
Transplanting
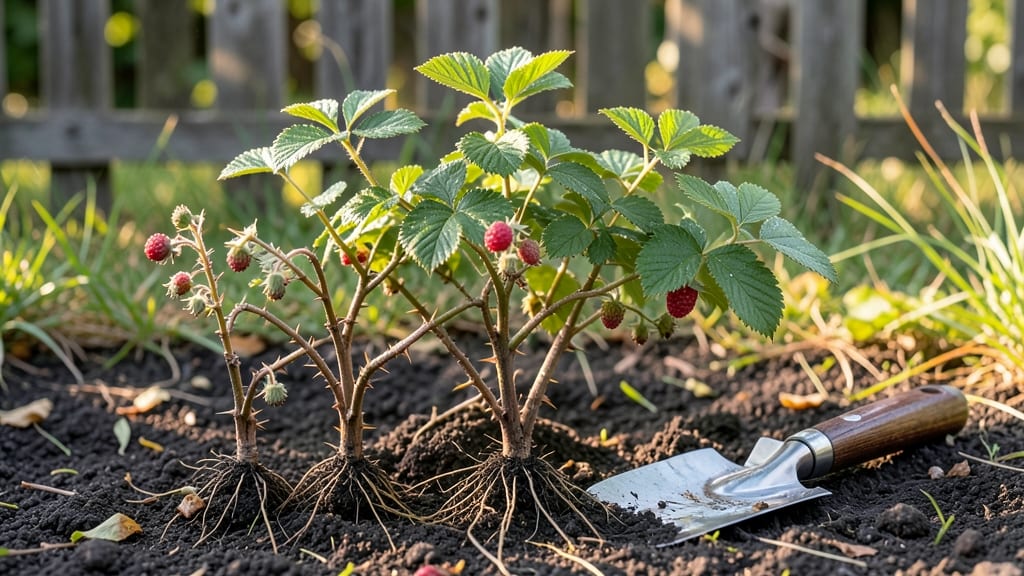
Planting Willamette raspberries is how you turn a shady corner into a summer berry bonanza—these hardy canes thrive where others fail. 🌱 I’ve watched my neighbors struggle with floppy, disease-prone varieties, but Willamettes stand tall with minimal fuss, especially in the Pacific Northwest’s damp climate.
The secret lies in mimicking their natural habitat: rich, well-draining soil and a spot where they won’t fight for sunlight.
Start with bare-root plants in early spring or fall, when the soil is workable but not soggy. Amend heavy clay with compost to improve drainage, and space canes 2 to 2.5 feet apart in rows 6 feet apart—this gives them room to spread without crowding.
Plant the roots just below soil level, firming the earth gently to eliminate air pockets. Mulch heavily with straw or wood chips to protect roots from winter’s chill and summer’s heat.
Within weeks, you’ll see new shoots pushing through the soil, and by next summer, those canes will be laden with sweet, firm berries. The key to their success? Consistent moisture—keep the soil evenly damp but never waterlogged—and prune old canes back in late winter to encourage fresh growth.
Willamettes reward patience with years of harvests, even in less-than-ideal conditions.
Perfect for beginners, these raspberries handle Pacific Northwest’s wet winters better than most, and they produce fruit on second-year canes—no waiting around. Once established, they’re nearly maintenance-free, making them the ultimate low-effort, high-reward garden addition. Let’s get those roots in the ground!
📚 In This Guide
- What you need
- Instructions
- Tips and common mistakes
- Wrapping up and next steps
What you need
- ● Willamette raspberry canes: 3–5 healthy, dormant canes (bare-root or potted) per plant. Look for Rubus idaeus 'Willamette'—a thornless, cold-hardy variety perfect for the Pacific Northwest.
- ● Well-draining soil: Mix of 50% native soil + 50% compost (or potting mix for containers). Aim for a pH of 5.5–6.5—raspberries love slightly acidic soil!
- ● Fertilizer: Balanced 10-10-10 or organic compost (1 cup per plant at planting time). Avoid high-nitrogen fertilizers early on.
- ● Mulch: Straw or wood chips (2–3 inches thick) to retain moisture and suppress weeds.
- ● Support system: T-posts or stakes (4–6 ft tall, 2–3 per plant).
- ● Jute twine or raspberry trellis (to train canes as they grow).
- ● Watering can or hose: With a soaker hose attachment for deep, gentle watering.
- ● Pruning shears: Sharp, clean pair (sterilize with rubbing alcohol between uses).
- ● Gloves: Heavy-duty gardening gloves (raspberry canes have small thorns even if thornless!).
- ● Soil test kit: To check pH and nutrient levels before planting.
- ● Epsom salt: (1 tbsp per plant) for magnesium boost if soil tests low.
- ● Row covers: Lightweight fabric to protect young plants from pests or late frosts.
- ● Drip irrigation system: For automated, consistent watering.
- ● Compost tea: To give seedlings a microbial boost at planting.
Step-by-Step instructions for planting Willamette raspberries
Here’s how to establish your Willamette raspberry patch—hardy, productive, and built to thrive through Pacific Northwest winters.
🌱 Step 1: Choose the Right Site and Prepare the Soil
Willamette raspberries demand full sun—at least 6-8 hours daily—so pick a south-facing spot with afternoon shade in hotter summers. These canes hate soggy roots, so avoid low-lying areas where water pools. Test your soil’s drainage by digging a 12-inch hole: if water doesn’t drain within 4-6 hours, amend the site with 3 inches of compost and 1 inch of coarse sand mixed into the top 12 inches of soil.
These raspberries tolerate slightly acidic to neutral soil (pH 5.5-6.5). If your soil tests lower, work in 1 cup of lime per 100 square feet and mix it in 3-4 weeks before planting. The Willamette variety is disease-resistant, but poor soil prep leads to weak canes that flop or succumb to fungal issues later. Take your time here—it’s the foundation for years of harvests.
🪴 Step 2: Plant Bare-Root Canes at the Correct Depth and Spacing
Plant your 4 bare-root canes in early spring (March-April), when soil is workable but not frozen. Space them 2-3 feet apart in rows 6 feet apart—this gives canes room to spread and improves airflow, cutting down on mildew. Dig a trench 12 inches wide and 12 inches deep, then soak the roots of each cane in lukewarm water for 1 hour before planting to revive them.
Position the crown (the swollen area where roots meet the cane) 1 inch below soil level—burying it deeper risks rot, while planting too high stresses the plant. Spread the roots gently into the trench, then backfill with soil, tamping lightly to eliminate air pockets. Water deeply (1 gallon per cane) to settle the soil and encourage root contact. You’ll see new shoots emerge within 3-4 weeks if conditions are right.
☀️ Step 3: Support Canes and Mulch for Winter Hardiness
Install J-shaped wire supports (or sturdy stakes) immediately after planting to train canes as they grow. Willamette raspberries produce primocanes (first-year growth) that fruit the following year, so avoid pruning anything in the first season—let them establish. Weave canes loosely through the supports to prevent breakage from wind or snow.
Apply 3 inches of organic mulch (like wood chips or straw) around each plant, keeping it 6 inches away from the crown to prevent rot. Mulch insulates roots in winter and retains moisture in summer. In Zone 7-8, Willamettes handle winter well, but add 4-6 inches of mulch in colder microclimates to protect roots from freeze-thaw cycles. Check mulch depth annually—it breaks down over time.
✂️ Step 4: Prune and Fertilize for Maximum Yield
In late winter (February), prune out dead, diseased, or crossing canes, cutting them back to the ground. Leave 4-6 of the strongest primocanes per plant—these will fruit next summer. Willamettes produce floricanes (second-year canes) that bear fruit, so never remove healthy wood unless it’s crowded. Use clean, sharp shears and make cuts at a 45-degree angle just above a bud to encourage outward growth.
Fertilize in early spring with 1/2 cup of 10-10-10 granular fertilizer per plant, worked into the soil 6 inches out from the crown. These raspberries are moderate feeders—over-fertilizing leads to excessive leafy growth at the expense of fruit. Water 1 inch per week during fruiting season, directing moisture at the base to avoid wetting leaves (which spreads disease). You’ll see red berries by mid-summer—harvest when fully colored and plump.
Tips & tricks for perfect Willamette raspberry planting
Real talk: Planting Willamette raspberries isn't rocket science, but these details make all the difference between a struggling patch and a thriving berry bounty. I've learned this the hard way after watching canes flop or rot—don't skip these.
Soil Drainage Test: The 4-6 hour drainage test in Step 1 is non-negotiable. I've seen soggy soil turn raspberry roots to mush—if water lingers past 6 hours, mix in that extra inch of coarse sand and compost until you get proper drainage. Think of it like testing a sponge: water should pass through, not pool. For extra insurance, consider raised beds if your site is naturally wet.
Root Revival Hack: That 1-hour lukewarm water soak before planting in Step 2 is a game-changer. I've revived canes that looked completely dried out—just don't soak them overnight, or you'll risk root rot. Pro tip: Add a pinch of seaweed fertilizer to the water for a gentle nutrient boost while the roots rehydrate.
Mulch Depth Strategy: The 3-inch mulch recommendation in Step 3 is perfect for Zone 7-8, but here's the secret: in colder microclimates, pile that mulch higher—4-6 inches—around the base of the plant, but mound it like a volcano, leaving the center bare. This creates an insulating air pocket while preventing rot at the crown. Check mulch depth annually as it breaks down.
Pruning Angle Matters: When you make those 45-degree cuts in Step 4, you're not just being precise—you're directing growth. The angle creates a larger surface area for water absorption and prevents moisture from pooling on the cut. I've seen canes develop fungal issues from improper pruning cuts, so take your time here. Sterilize your shears with rubbing alcohol between cuts to prevent disease spread.
Pro Tips for Willamette Raspberry Planting
- Real talk: Planting Willamette raspberries isn't rocket science, but these details make all the difference between a struggling patch and a thriving berry bounty.
- Soil Drainage Test: The 4-6 hour drainage test in Step 1 is non-negotiable.
- Root Revival Hack: That 1-hour lukewarm water soak before planting in Step 2 is a game-changer.
Frequently asked questions
Got questions about growing Willamette raspberries? You’re not alone! Here are answers to the most common concerns to help you plant with confidence.
When is the best time to plant Willamette raspberries in my region?
For Zone 5-8, plant bare-root canes in early spring (3-4 weeks before last frost) or fall (6-8 weeks before hard frost). Container-grown plants can go in anytime the soil isn’t frozen. Willamettes thrive in cooler climates—avoid summer planting in hot zones!
How far apart should I space Willamette raspberry plants?
Space caneberries 2–3 feet apart in rows 6–8 feet apart for airflow and maintenance. If using trellises, leave 18–24 inches between plants. Tighter spacing can lead to disease or poor fruit quality—give them room to shine!
Do Willamette raspberries need winter protection?
These hardy canes (Zone 5-8) handle light frost but may need mulch (straw/leaves, 4–6 inches) in colder areas. In Zone 5, bend canes to ground and cover with mulch or burlap for extra insulation. Prune dead canes in early spring before new growth starts.
What pests or diseases should I watch for with Willamette raspberries?
Common issues include:
- Spider mites: Spray with water or neem oil if webs appear.
- Cane borers: Remove infested canes immediately and treat stumps with borax.
- Fungal diseases (e.g., Botrytis): Prune for airflow, avoid overhead watering, and use copper fungicide if needed.
Can I grow Willamette raspberries in containers?
Yes! Use a 5-gallon+ pot with well-draining soil and a trellis. Plant 1 cane per container and ensure it gets 6+ hours of sun. Containers dry faster—water deeply 2–3x/week in summer. Dwarf varieties thrive best in pots!
Wrapping up and next steps
Planting Willamette raspberries is a rewarding journey that yields sweet, flavorful berries with minimal winter fuss! By choosing the right site, preparing your soil, and following proper spacing and mulching techniques, you’ll set your canes up for success.
With a little patience and care, you’ll soon enjoy a bountiful harvest straight from your backyard.
Ready to get started? Grab your gardening gloves and pick your planting spot today! 🌱 Whether you’re a seasoned gardener or a beginner, these steps will guide you to a thriving raspberry patch in no time.