Pruning
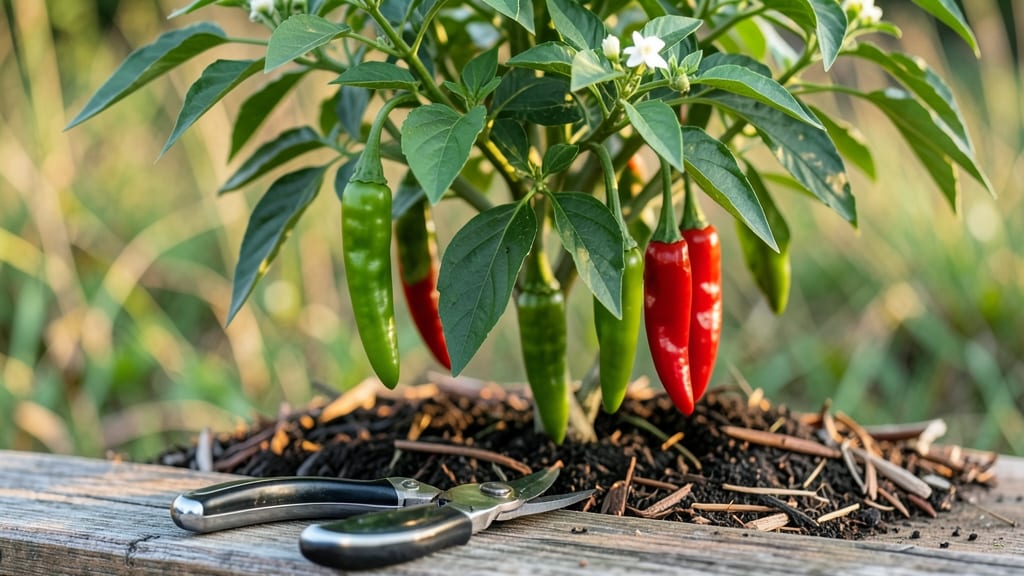
Pruning chilli plants transforms bushy, stressed plants into productive powerhouses—three strategic cuts can double your harvest while keeping plants healthy all season. 🌿 I learned the hard way that skipping pruning leads to fewer peppers and more pests, but once I mastered these cuts, my plants stayed compact, fruited continuously, and even bloomed in winter.
The key is timing: prune early for shape, mid-season for yield, and late for cleanup.
You’ll need sharp pruning shears (sterilized with rubbing alcohol), a clean cutting board, and a plan to remove only one-third of the plant at a time. Focus on cutting just above leaf nodes—this encourages new growth where peppers form.
Most gardeners mess up by over-pruning or cutting too close to the stem, which stresses the plant. I’ll show you exactly where to cut to avoid stunted growth or disease entry points.
After pruning, your plants will bounce back with thicker stems, more flowers, and heavier fruit sets. The airflow improves, reducing humidity-related diseases like powdery mildew, and the plant directs energy toward peppers instead of excess foliage.
Within 2-3 weeks, you’ll see fresh new shoots—proof the cuts worked. The real magic? Pruned plants keep producing well into fall, sometimes even through winter in warm climates.
This method works for all chilli varieties, from small peppers to giant bell types, and adapts to containers or in-ground gardens. Whether you’re growing in Zone 5 or 10, the principles stay the same—just adjust timing for your frost dates.
Let’s get those shears ready and turn your chillies into a year-round pepper machine.
📚 In This Guide
- What you need
- Instructions
- Tips and common mistakes
- Wrapping up and next steps
What you need
- ● Sharp pruning shears – Bypass pruners (for clean cuts; avoid anvil pruners, which crush stems). Choose 5-inch stainless steel for durability.
- ● Garden gloves – Nitrile-coated (for grip and protection against thorns/spicy sap). Size medium or large for comfort.
- ● Disinfectant (70% isopropyl alcohol or bleach solution) – 1 part bleach to 9 parts water (sterilize tools between cuts to prevent disease).
- ○ Small spray bottle – For water or diluted hydrogen peroxide (3%) to seal cuts (optional but helpful for large prunes).
- ● Sharp knife or razor blade – Backup for tiny cuts (e.g., removing suckers).
- ● Compost bin or bag – For disposing of pruned material (avoid composting diseased parts).
- ● Pruning saw – For thick stems (if your plant grows woody over time).
- ● Plant growth regulator (e.g., seaweed extract) – Diluted spray to encourage faster healing post-pruning.
- ● Labeling tags – If pruning different chilli varieties (e.g., Carolina Reaper vs. Jalapeño).
- ● Sunscreen & hat – For outdoor pruning sessions (chilli plants can be in full sun!).
Step-by-Step guide to pruning chili plants for maximum yield
Here’s how to shape your chilis for bigger harvests—no guesswork, just proven techniques.
✂️ Step 1: Remove Suckers for Stronger Growth
Suckers are the small shoots that grow in the V-shaped junction between the main stem and branches. These energy vampires drain your plant instead of fueling fruit production. Use clean, sharp pruning shears to snip them off at the base—don’t leave stubs, or they’ll regrow. I do this every 2-3 weeks during the growing season, always working in the morning when the plant is hydrated.
Watch for new suckers forming near the base of the plant. If left unchecked, they’ll compete with your main branches for nutrients, leading to smaller peppers. A well-pruned plant will have a single, sturdy stem with strong lateral branches—this is your signal you’re on the right track.
🌿 Step 2: Trim Leggy Branches to Encourage Bushiness
Leggy growth happens when your chili plant stretches too tall and thin, reaching for light. This usually means it’s not getting enough sun or nutrients. Pinch back the top 1-2 inches of the longest branches to encourage new side shoots. You’ll see small buds form within a week—that’s your plant redirecting energy toward bushier growth.
Focus on the upper third of the plant first. Avoid cutting more than 20% of the plant’s foliage at once, or you’ll shock it. If your plant is already flowering, wait until after harvest before pruning—you don’t want to stress it mid-fruit production.
🌱 Step 3: Prune Damaged or Diseased Leaves Immediately
Yellow, spotted, or wilted leaves are open invitations to pests and disease. Use sterilized pruning shears to remove any leaves showing signs of trouble, cutting back to healthy tissue. Always dispose of diseased leaves in the trash—not the compost—since pathogens can survive and reinfect your plants.
Pay extra attention to the lower leaves, which are more prone to moisture buildup and fungal issues. After pruning, spray the plant with a copper fungicide (if needed) to prevent further spread. A healthy plant will have vibrant green leaves with minimal gaps—this is your cue that pruning is working.
⏰ Step 4: Lighten the Canopy for Better Airflow
Overcrowded foliage traps humidity and blocks sunlight, creating the perfect conditions for mold and mildew. Thin out dense areas by removing the oldest or innermost leaves, starting from the bottom. Aim for 3-4 inches of space between branches to allow air to circulate freely.
This step is especially critical in humid climates. You’ll notice fewer yellowing leaves and stronger stems as airflow improves. If your plant is in a container, prune more aggressively—compact growth is common in pots, and airflow is even more critical.
Tips & tricks for pruning chili plants
These simple strategies will help you maximize your chili harvest all year long—without sacrificing plant health.
Timing Secret: Always prune in the morning when plants are fully hydrated. This reduces stress on the plant and helps it recover faster. I also avoid pruning during extreme heat or cold—stick to mild, overcast days when possible. The 2-3 week schedule mentioned in Step 1 works best when you're consistent, so mark it on your calendar right alongside your watering schedule.
Tool Tip: Sterilize your pruning shears between cuts with rubbing alcohol to prevent spreading disease. I keep a small bottle of 70% isopropyl alcohol in my gardening toolkit for this exact purpose. Sharp tools make cleaner cuts that heal faster, so take a moment to sharpen your shears if they feel dull. For suckers and small branches, clean scissors work in a pinch, but invest in proper pruning shears for larger cuts.
Visual Cues: When pinching back leggy branches in Step 2, look for the first set of leaves after the pinch point—this is where new growth will emerge. The buds should appear within 7-10 days if your plant is healthy. If you don't see new growth after two weeks, your plant might need more sunlight or nutrients. Remember, we're aiming for that bushy, productive shape with strong lateral branches rather than a single tall stem.
Seasonal Strategy: Adjust your pruning approach based on the season. In early spring, focus on removing winter damage and encouraging new growth. During peak growing season (late spring to summer), prioritize the 2-3 week sucker removal and canopy thinning. In fall, scale back pruning to allow plants to recover before winter. This seasonal rhythm keeps your chilis productive throughout the year without overstressing them.
Pro Tips for Pruning Chilli Plants
- These simple strategies will help you maximize your chili harvest all year long—without sacrificing plant health.
- Timing Secret: Always prune in the morning when plants are fully hydrated. This reduces stress on the plant and helps...
- Tool Tip: Sterilize your pruning shears between cuts with rubbing alcohol to prevent spreading disease. I keep a smal...
Frequently asked questions
Got questions about pruning your chilli plants? You’re not alone! Here are some of the most common queries—and their straightforward answers—to help you keep your peppers thriving year-round.
When is the best time to prune chilli plants?
Prune your chilli plants after they’ve established 4–6 true leaves (about 4–6 weeks after germination) and again when they’re 12–18 inches tall. For year-round harvests, prune lightly every 4–6 weeks to encourage new growth and fruit production. Avoid heavy pruning during flowering or fruiting seasons—focus on shaping and removing suckers instead.
What’s the difference between suckers and leaves—how do I prune correctly?
Suckers are the small shoots that grow in the _V_-shaped junction between the main stem and a branch. These are the only parts you should remove! Leaves (especially lower ones) can stay unless they’re yellow or diseased. Use clean, sharp scissors to snip suckers close to the stem—never tear them. Pro tip: Leave 2–3 leaves above where you prune to help the plant recover faster.
Will pruning reduce my chilli yield?
Not if done right! Pruning increases yield by directing energy toward fruit production instead of leafy growth. However, over-pruning (removing more than 20–30% of the plant at once) can stress your chilli and reduce harvests. Balance is key: Focus on removing suckers and dead leaves while preserving the plant’s structure. Patience pays off—pruned plants often produce more and larger peppers over time!
Can I prune chilli plants in winter or cold climates?
Yes, but with caution. If your chillies are indoor plants in winter, prune lightly (suckers only) to maintain shape and health. For outdoor plants in cold zones, wait until spring when temperatures stay above 50°F (10°C) for at least a week. Avoid pruning in frost-prone areas—focus on protecting the plant instead. Use grow lights or move pots indoors if needed to keep them productive.
What should I do if my chilli plant looks sad after pruning?
Don’t panic! A little shock is normal, but here’s how to revive it:
- Water deeply but avoid overwatering—root stress worsens recovery.
- Give it bright, indirect light (6+ hours/day) to speed up regrowth.
- Fertilize lightly with a balanced, water-soluble fertilizer (half-strength) 1–2 weeks post-prune.
- Avoid pruning again for 4–6 weeks to let the plant heal.
Wrapping up and next steps
Pruning your chilli plants isn’t just about keeping them tidy—it’s the secret to bigger yields, healthier growth, and year-round harvests. 🌱 By mastering the three key cuts (apical, lateral, and cleanup), you’ll encourage bushier plants, stronger stems, and a never-ending supply of fiery peppers.
Whether you’re a beginner or a seasoned gardener, these techniques work for any variety and climate.
Now that you’re armed with the know-how, grab those shears and get pruning! Start with one plant, observe how it responds, and soon you’ll be a chilli-pruning pro. Happy growing—and may your harvests be legendary! 🔥