
Transplanting
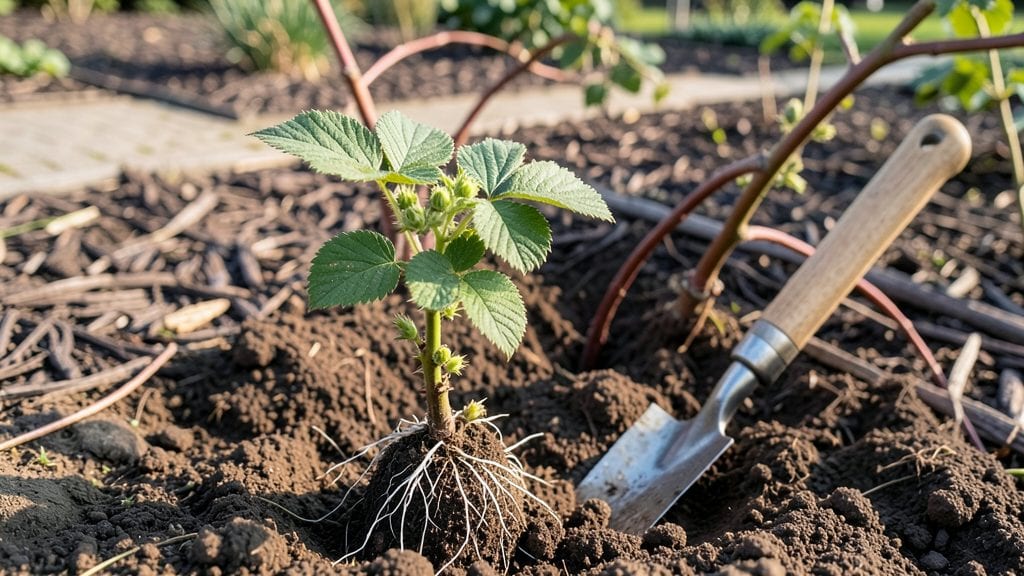
Planting raspberry canes in early spring or fall sets you up for a harvest that’ll make your neighbors jealous. 🌱 I’ve planted dozens of canes over the years, and the difference between a scraggly patch and a berry-laden thicket comes down to two things: timing and technique.
The right soil, spacing, and orientation make all the difference.
Start with well-draining soil mixed with compost—raspberries hate soggy roots. Space canes 2 to 3 feet apart in rows 6 feet apart for airflow, and plant them 1 foot deep with the crown just above soil level.
Summer-bearing varieties need upright support, while fall-bearing types thrive when trained along wires. Mulch heavily to keep roots cool and moist.
Water deeply right after planting, then again every 3 to 4 days until established. The first year, focus on root growth—you’ll see berries later, but healthy canes now mean bigger harvests in years to come.
Prune old canes in early spring to encourage fresh growth, and watch those berries swell with sweetness.
This method works for both bare-root and potted canes, and the same principles apply whether you’re planting a single bush or a full row. The key is patience—your raspberries won’t fruit much the first year, but by year two, you’ll wonder why you didn’t start sooner. Ready to dig in?
📚 In This Guide
- What you need
- Instructions
- Tips and common mistakes
- Wrapping up and next steps
What you need
- ● Raspberry canes: 2–4 healthy, dormant canes (bare-root or potted) per plant. Look for primocanes (first-year growth) or floricanes (second-year canes) depending on your variety.
- ● Shovel or trowel: A sturdy digging tool (12–18 inches deep for proper root placement).
- ● Compost or well-aged manure: 5–10 lbs per planting hole to enrich soil.
- ● Balanced fertilizer (10-10-10 or 5-10-10): 1–2 cups per plant to kickstart growth.
- ● Mulch (straw, wood chips, or pine needles): 2–3 inches thick to retain moisture and suppress weeds.
- ● Drip irrigation or hose with a gentle spray nozzle: For consistent watering (1–2 inches per week).
- ● Planting site: A sunny spot (6+ hours of sunlight daily) with well-draining soil (pH 5.5–6.5).
- ● Epsom salt: 1 tbsp per hole to boost magnesium (great for red raspberries).
- ● Trellis or stakes (4–6 ft tall): To support canes as they grow (especially for floricane varieties).
- ● Pruning shears: Sharp, clean shears for trimming dead foliage or adjusting canes post-planting.
- ● Soil test kit: To check pH and nutrient levels before planting.
- ● Row cover or frost cloth: For early planting in cold climates.
Step-by-Step instructions for planting raspberry canes
Here's the foolproof method I use to establish healthy raspberry plants that fruit abundantly.
🌱 Step 1: Choose and Prepare the Planting Site
Raspberries thrive in full sun with at least 6-8 hours of direct light daily. Pick a spot with well-draining soil—raspberries rot quickly in soggy conditions. I always test drainage by digging a 12-inch hole and filling it with water; if it doesn't drain within a few hours, amend the soil with 2-3 inches of compost or sand.
Raspberries need space to spread, so space canes 3-4 feet apart in rows 6 feet apart. If growing in containers, use pots at least 18 inches deep with drainage holes. The key is airflow—crowded plants invite disease. I mark planting spots with stakes before digging to ensure proper spacing.
🪴 Step 2: Plant Canes at the Right Depth and Angle
Dig holes 12-18 inches deep—deep enough to bury half the cane. Raspberries root from their lower buds, so plant canes at a 45-degree angle, leaving the top 1/3 of the cane exposed. This encourages strong root development while keeping the crown above soil level to prevent rot.
Gently loosen the roots before planting to encourage them to spread into the surrounding soil. Backfill the hole with soil, tamping lightly to remove air pockets. Water deeply to settle the soil and eliminate gaps around the roots. You'll know it's right when the soil looks firm but not compacted.
✂️ Step 3: Prune New Canes for Strong Growth
At planting time, cut back the top 1/3 of the cane to encourage bushier growth. Remove any damaged or diseased sections with clean pruners. I also trim side shoots to 5-6 inches long—this redirects energy to root establishment rather than excessive top growth.
Leave the remaining cane sturdy and upright. Avoid heavy pruning in the first year—you want the plant to focus on root and cane development. Water 1-2 inches per week during the first growing season, keeping the soil consistently moist but never waterlogged.
☀️ Step 4: Mulch and Protect for First Winter
Spread 2-3 inches of organic mulch around the base of each cane, keeping it 6 inches away from the stem to prevent rot. I use straw or wood chips because they insulate roots in winter and retain moisture in summer. This mulch layer also suppresses weeds, which compete for nutrients.
In colder climates, add 4-6 inches of straw mulch in late fall to protect canes from freezing. Remove the mulch in early spring before new growth begins. Watch for first green shoots in spring—that's your signal to start regular watering and fertilizing for next year's crop.
Tips & tricks for planting raspberry canes
Here's what I've learned after establishing dozens of raspberry patches—small details make all the difference for bigger harvests.
Soil Prep Secret: In Step 1, don't just test drainage—amend the soil with 2-3 inches of compost mixed into the bottom 12 inches of your planting hole. This creates a nutrient-rich zone right where roots will establish. I also add a handful of bone meal to provide phosphorus for strong root growth. The key is working compost into the native soil, not just piling it on top.
Planting Angle Matters: When planting at that 45-degree angle in Step 2, think of it like planting a flagpole—you want the cane to lean away from the center of the planting circle. This creates space for multiple canes to spread without crowding. After planting, I gently press the surrounding soil to eliminate air pockets while keeping the crown exposed to prevent rot.
Pruning Precision: In Step 3, that 1/3 top trim might seem drastic, but it's crucial for establishing a strong root system. I use clean, sharp pruners and make cuts just above a leaf node or bud. For side shoots, trim to 5-6 inches—any longer and they'll compete with the main cane for energy. This is where I've seen the biggest difference in first-year growth.
Mulch Strategy: The 2-3 inches of organic mulch in Step 4 isn't just about moisture—it's about creating a microclimate. I always keep it 6 inches away from the stem to prevent rot while still protecting roots. In colder climates, that extra 4-6 inches of straw in winter can mean the difference between frozen and thriving canes. Remove it early in spring before new shoots appear.
Pro Tips for Planting Raspberry Canes
- Here's what I've learned after establishing dozens of raspberry patches—small details make all the difference for bigger harvests.
- Soil Prep Secret: In Step 1, don't just test drainage—amend the soil with 2-3 inches of compost mixed into the bottom 12 inches of your planting hole.
- Planting Angle Matters: When planting at that 45-degree angle in Step 2, think of it like planting a flagpole—you want the cane to lean away from the center of the planting circle.
Frequently asked questions
Got questions about planting raspberry canes?
You’re not alone! Here are answers to the most common queries to help you grow like a pro.
When is the best time to plant raspberry canes?
Plant raspberry canes in early spring (before new growth starts) or fall (4-6 weeks before the first frost). Avoid planting in summer heat or winter’s freeze—canes need time to establish roots! For container-grown canes, plant anytime the soil isn’t frozen.
Can I plant raspberry canes in summer?
Yes, but with caution! If you must plant in summer, do it on a cool, cloudy day and keep the soil consistently moist. Summer heat stresses young canes. For best results, wait for spring or fall. If planting now, mulch heavily to retain moisture and protect roots.
How do I know if my raspberry canes are healthy enough to transplant?
Healthy canes are plump, green, and flexible (not woody or brittle). Look for no signs of disease (like black spots or mold) and active buds. Avoid canes with yellowing leaves or weak stems—they won’t recover well. Dormant canes (bare-root) are fine if stored properly.
What if I don’t have raspberry canes? Are there alternatives?
No canes? Try mail-order nurseries (like Stark Bros. Nursery or Johnny’s Selected Seeds) or local garden centers. For a quick fix, divide existing plants (if you have neighbors with raspberries) or grow from seed (though it takes 2+ years for fruit).
My raspberry canes are wilting after planting. What went wrong?
Wilting often means overwatering or root damage during transplanting. Check soil moisture (it should be damp, not soggy) and ensure roots weren’t trimmed too short. If leaves are crispy, it’s transplant shock—keep them shaded for a week and water deeply. Avoid fertilizing for 4-6 weeks post-planting.
Can I plant raspberry canes in containers?
Use a 5-gallon container minimum (bigger is better) with drainage holes. Choose dwarf varieties like ‘Heritage’ or ‘Boyne’ for pots. Fill with well-draining soil and place in full sun. Containers dry out faster—water regularly and fertilize monthly during growing season.
Wrapping up and next steps
Planting raspberry canes is your first step toward a bountiful harvest of sweet, juicy berries—just remember, timing and technique are everything! 🌱 With the right pruning secrets, you’ll encourage healthier growth, bigger yields, and fewer pests.
Now that you’re armed with the knowledge, there’s no better time to roll up your sleeves and get planting.
Ready to take action? Start by selecting healthy canes and follow the steps outlined above. Before you know it, your garden will be bursting with raspberries—just imagine the jam, pies, and fresh snacks ahead! Happy planting! 🍓✨