
Aphids
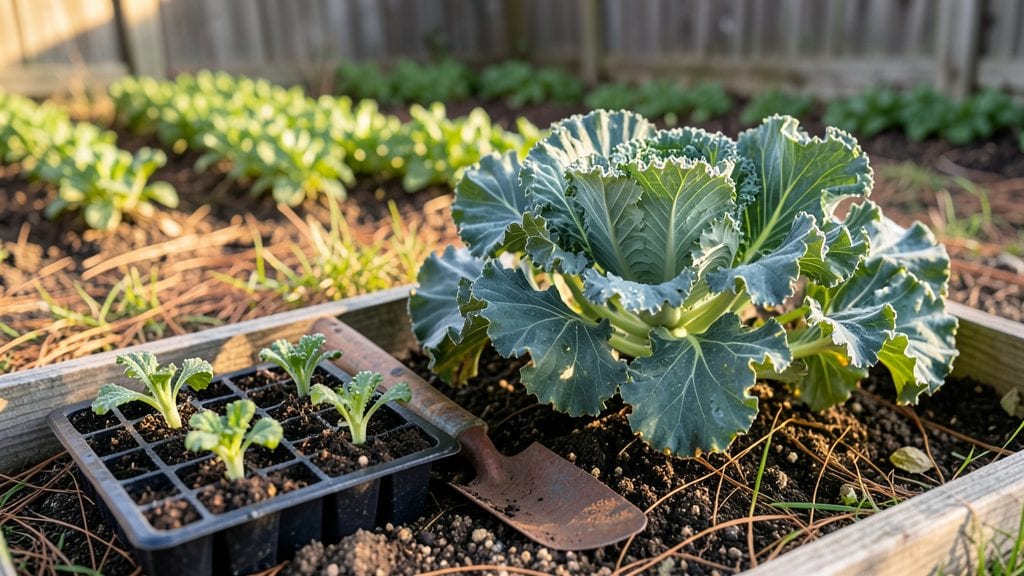
Planting kale in summer isn’t about fighting the heat—it’s about choosing the right varieties and timing to outsmart it. 🌿 I’ve grown kale in July and August for years, and the secret lies in heat-tolerant types like ‘Vates’ or ‘Red Russian’ that stay crisp instead of bolting.
These varieties keep producing long after regular kale would turn bitter and bolt.
The trick is planting in late afternoon shade or using 30% shade cloth to protect young leaves while still giving them enough light to grow. Start seeds indoors 4-6 weeks before your last frost, then transplant seedlings when temperatures dip below 85°F at night.
Succession planting every 2 weeks ensures a steady supply of fresh leaves all summer long.
What you’ll end up with is tender, pest-resistant kale that thrives when others fail. The leaves stay sweet and crisp, perfect for salads or sautéing, and you’ll avoid the common pitfalls of summer bolting. Plus, companion plants like nasturtiums or dill help deter aphids while attracting pollinators.
This method works in zones 3-9, though you’ll need to adjust timing for southern climates—plant in early summer instead of late. The key is staying ahead of the heat with smart choices and a little extra shade. Let’s get those seeds in the ground!
📚 In This Guide
- What you need
- Instructions
- Tips and common mistakes
- Wrapping up and next steps
What you need
- ● Kale seedlings or seeds: Pest-resistant varieties like Winterbor, Vates, or Red Russian (6–12 plants, depending on harvest goals).
- ● Organic, non-GMO seeds if starting from scratch (1–2 packets).
- ● Well-draining soil: 60% topsoil, 30% compost, and 10% perlite or sand (for loose, fertile beds).
- ● pH level: 6.0–7.0 (test kit recommended).
- ● Container or garden bed: For containers: 5–7 gallon pots with drainage holes (1 per plant).
- ● For in-ground: 12–18 inches of spacing between plants in rows 2 feet apart.
- ● Watering can or hose with nozzle: 1–2 gallons per plant (deep watering 2x/week).
- ● Organic mulch: Straw or shredded leaves (2–3 inches thick) to retain moisture and deter pests.
- ● Garden gloves (nitrile-coated for durability).
- ● Hand trowel or transplanting spade (for seedling placement).
- ● Neem oil spray (1% solution) or insecticidal soap (for aphid prevention).
- ● Row covers or lightweight fabric (to shield young plants from cabbage moths).
- ○ Soil moisture meter (optional but handy for summer droughts!).
- ● Sunlight: Full sun (6+ hours/day) or partial shade (afternoon shade in hot climates).
- ● Temperature: Ideal planting window: 60–75°F (avoid extreme heat; use shade cloth if temps exceed 85°F).
- ● Pest scouting: Check plants weekly for aphids, cabbage worms, or flea beetles (early detection = easier fixes!).
Step-by-Step instructions for planting kale in summer
Here's how to grow hardy, pest-resistant kale varieties that thrive in summer's heat.
🌱 Step 1: Select and Prepare the Right Varieties
Choose heat-tolerant kale varieties like 'Vates' or 'Red Russian'—they handle summer's intensity better than standard types. I always opt for transplants rather than seeds in summer because seedlings struggle to establish in the heat. Purchase 4 healthy plants with firm stems and vibrant leaves, avoiding any with yellowing or wilted foliage.
Before planting, let the transplants sit in a bucket of room-temperature water for 15-20 minutes to rehydrate their roots. This step is critical—it helps them recover from transplant shock and start growing stronger immediately. While they soak, prepare the planting site by loosening the soil to a depth of 12 inches with a garden fork to improve drainage and root penetration.
🪴 Step 2: Choose the Perfect Location and Plant
Kale needs partial shade in summer to prevent bolting (flowering prematurely), so select a spot that gets morning sun and afternoon shade. I plant mine near taller plants like sunflowers or corn, which provide natural shade as they grow. Space the 4 plants 18 inches apart in a square pattern for even air circulation and sunlight exposure.
Dig a hole for each plant that's twice as wide as the root ball but only as deep. Gently remove the plant from its container and place it in the hole, ensuring the soil line on the stem sits ½ inch below the ground level. This slight burial prevents stem rot while encouraging strong root growth. Backfill with soil, pressing lightly around the base to eliminate air pockets.
💧 Step 3: Water Deeply and Mulch for Retention
Water each plant immediately after planting with 1 gallon of water, directing the stream at the base to avoid wetting the leaves. Kale is drought-tolerant once established, but young plants need consistent moisture. I water deeply every 2-3 days until the soil feels 2 inches dry when checked with a finger—this encourages deep root growth and prevents shallow, weak roots.
Spread 2 inches of organic mulch around each plant, keeping it 3 inches away from the stem to prevent rot. Mulch conserves moisture, regulates soil temperature, and suppresses weeds. I use straw because it breaks down slowly and adds organic matter to the soil as it decomposes. Avoid synthetic mulches—they can overheat the soil and stress the plants.
☀️ Step 4: Monitor Light and Protect from Pests
Watch for signs of heat stress, like curled or yellowing leaves. If this happens, provide temporary shade with a lightweight row cover during the hottest afternoon hours. Kale thrives in 55-75°F temperatures, so extreme heat can cause bolting. You'll know your plants are happy when they grow steadily with deep green leaves and minimal yellowing.
Inspect leaves regularly for pests like cabbage worms or aphids. I use a strong spray of water mixed with a few drops of dish soap to dislodge pests—it's organic, effective, and won't harm the plants. For added protection, plant marigolds nearby; their scent repels many common kale pests. Harvest outer leaves as they mature to encourage continuous growth and reduce pest pressure.
⏰ Step 5: Harvest and Maintain for Continuous Yields
Start harvesting outer leaves when they reach 6-8 inches in length, using clean scissors to cut just above a leaf node. This method encourages the plant to produce more leaves without harming its growth. I harvest every 2-3 weeks throughout the season, ensuring the center leaves stay intact to keep the plant productive. You'll see new growth within 7-10 days after each harvest, signaling that the plant is thriving.
Fertilize lightly every 4-6 weeks with a balanced organic fertilizer to replenish nutrients. Kale is a heavy feeder, so it benefits from regular feeding, but avoid over-fertilizing—this can lead to excessive leaf growth at the expense of flavor. By following these steps, you'll enjoy a steady supply of fresh, homegrown kale all summer long.
Tips & tricks for perfect summer kale planting
Summer kale thrives when you pay attention to these often-overlooked details that make all the difference between struggling plants and a bountiful harvest.
Root Recovery Matters: That 15-20 minute root soak in Step 1 isn't just about hydration—it's your plant's first chance to recover from transplant stress. I've seen plants wilt dramatically after planting when skipped. Use room-temperature water (never cold) and include a handful of seaweed fertilizer in the soak for extra vigor. The goal is to get those roots actively growing within hours, not days.
Shade Strategy: The morning sun/afternoon shade recommendation in Step 2 is non-negotiable for summer planting. I've learned this the hard way—direct afternoon sun turns kale bitter and causes bolting. For extra protection, install a 50% shade cloth on the south side of your plants during peak heat (12-3 PM). This mimics the natural shade from taller plants while giving you more control over light exposure.
Mulch Depth and Placement: Those 2 inches of organic mulch in Step 3 should form a donut shape around your plants—3 inches away from the stem prevents rot while keeping roots cool. I use straw mulch because it breaks down slowly, but you can also layer cardboard first (to block weeds) then top with straw. The key is keeping that mulch consistently 2 inches thick—thinner layers won't regulate temperature properly.
Pest Prevention: The marigolds mentioned in Step 4 are your secret weapon against pests, but don't stop there. I also plant dill and fennel nearby—their strong scents repel cabbage moths. For an extra barrier, wrap the lower stems with copper tape (available at garden centers) to deter slugs and snails from climbing.
Pro Tips for Kale Summer Planting
- Summer kale thrives when you pay attention to these often-overlooked details that make all the difference between struggling plants and a bountiful harvest.
- Root Recovery Matters: That 15-20 minute root soak in Step 1 isn't just about hydration—it's your plant's first chance to recover from transplant stress.
- Shade Strategy: The morning sun/afternoon shade recommendation in Step 2 is non-negotiable for summer planting.
Frequently asked questions
Got questions about growing kale in summer? You’re not alone! Here are answers to the most common concerns—from timing to troubleshooting—so you can plant with confidence.
When is the best time to plant kale in summer?
For summer planting, aim for late July to early August in most U.S. climates (zones 5–9). This gives seedlings time to mature before cooler fall weather. In hotter regions (zones 10+), start even earlier—June works well—to avoid extreme heat stress. Pro tip: Use shade cloth for young plants if temps hit 90°F+!
How do I protect kale from pests like aphids in summer?
Choose aphid-resistant varieties like ‘Winterbor’ or ‘Lacinato’ (Dinosaur kale), and use these tactics:
- Neem oil spray (apply at dusk to avoid harming bees).
- Ladybugs or lacewings—release beneficial insects near plants.
- Row covers for young seedlings to block aphids entirely.
Can I grow kale in containers during summer?
Use a 5-gallon pot minimum with well-draining soil and place in partial shade (morning sun max). Varieties like ‘Dwarf Blue Curled’ thrive in containers. Just ensure pots have drainage holes and fertilize every 3–4 weeks with a balanced organic fertilizer.
Why does my kale bolt or turn bitter in summer?
Kale bolts (sends up flowers) when stressed by heat or drought. To prevent bitterness:
- Water deeply 2–3x/week (1–1.5 inches total).
- Harvest outer leaves frequently to encourage regrowth.
- Mulch with straw to retain moisture and cool roots.
What’s the fastest way to harvest kale for summer salads?
For tender, young leaves, cut-and-come-again is key:
- Harvest outer leaves first (leave the center growing).
- Use clean scissors or pruners to snip 2–3 inches from the stem.
- Repeat every 1–2 weeks—this keeps plants productive!
Wrapping up and next steps
Planting kale in summer is totally doable—especially with pest-resistant varieties like Winterbor or Vates! 🌱 By following the right steps—choosing shade, managing water, and keeping pests at bay—you’ll enjoy a thriving harvest even in warmer months. Your garden (and taste buds!) will thank you.
Ready to get growing? Start by prepping your soil this week, then plant those resilient seeds for a summer-green success story. Happy gardening! 🌿