
Container Gardens
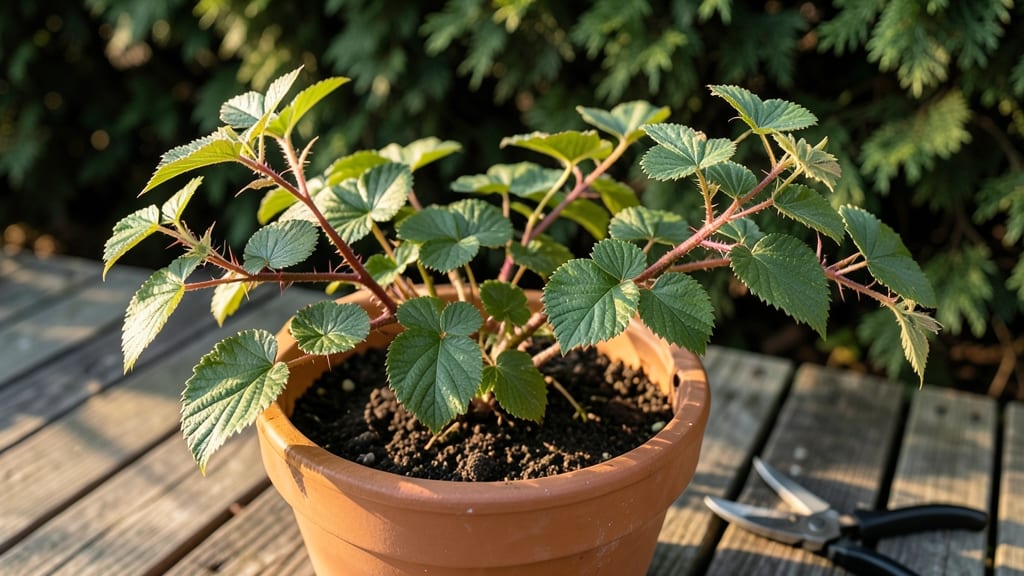
My potted raspberry plants produce fruit from spring to frost—no backyard needed. 🌱 The trick lies in container size, pruning timing, and understanding how raspberries grow differently in pots than in the ground.
I learned this after my first attempt with undersized containers left me with sparse canes and tiny berries.
You’ll need a 5-gallon pot minimum for each plant (bigger is better), well-draining soil mixed with compost, and a spot with at least 6 hours of sunlight daily. Watering is the real game-changer: keep the soil consistently moist but never soggy, especially during fruit development.
The right pruning schedule—cutting back old canes in early spring and thinning new growth—doubles your harvest.
By mid-summer, you’ll be picking sweet, plump berries straight from your patio. The plants stay compact, fruit continuously, and even overwinter well with a little protection. No more waiting for summer to enjoy fresh raspberries—your balcony becomes the harvest zone.
This method works for summer-bearing varieties like ‘Heritage’ or ‘Boyne’ and even fall-bearing types like ‘Caroline.’ The key is adapting pruning tricks to container growth habits. Let’s get those berries growing!
📚 In This Guide
- What you need
- Instructions
- Tips and common mistakes
- Wrapping up and next steps
What you need
- ● Potted raspberry plants: 1–3 bare-root or container-grown plants (choose Rubus idaeus varieties like 'Heritage' or 'Boyne' for containers).
- ● Containers: 2–3 large pots (18–24" diameter, 12–18" deep) with drainage holes. Tip: Use fabric grow bags for better aeration!
- ● Potting mix: 3–4 cubic feet of well-draining mix (50% peat moss/coir, 30% perlite, 20% compost).
- ● Fertilizer: Balanced organic fertilizer (10-10-10 or 5-5-5) + slow-release granules (e.g., Osmocote).
- ● Support system: 1–2 6–8 ft tall trellises or stakes (metal or wooden) per plant.
- ● Mulch: 1–2 inches of straw or wood chips to retain moisture.
- ● Watering can or hose: With a gentle spray nozzle for deep watering.
- ● Pruning tools: 1 pair bypass pruners (sharp, clean).
- ● 1 pair long-handled loppers (for thicker canes).
- ● 1 disinfectant (rubbing alcohol or bleach solution).
- ● Drip irrigation kit for consistent moisture.
- ● Epsom salt (1 tbsp/month) for magnesium boosts.
- ● Row covers (for frost protection in early spring/fall).
- ● Garden gloves to protect your hands from thorns!
- ● Plant tags to track varieties and pruning schedules.
Step-by-Step guide to pruning potted raspberry plants
These three pruning tricks transform raspberries into prolific producers—even in containers.
✂️ Step 1: Prune Out Dead or Weak Canes in Early Spring
Start your pruning the moment new growth appears in early spring, around March or April depending on your zone. Look for canes that are brown, mushy, or hollow—these won’t produce fruit and should be cut back to the ground immediately. I always use clean, sharp pruners to make clean cuts just above a bud or lateral branch, which prevents disease from entering the plant.
Real talk: If you see any canes that are thinner than a pencil or have no visible buds, remove them entirely. These won’t contribute to your harvest and just compete with stronger canes for nutrients. After pruning, give your plant a light layer of 1-2 inches of mulch (using the organic mulch) to retain moisture and protect roots from temperature swings.
✂️ Step 2: Thin Canes to 6-8 Strongest in Late Spring
By late spring, when your raspberries have grown 4-6 inches tall, it’s time to thin out the weaker canes. Leave only the 6-8 strongest, most vigorous canes—these are the ones with thick stems, abundant buds, and upright growth. Use your pruners to cut the rest at the base, making sure to sterilize the blades with rubbing alcohol between cuts to prevent spreading disease.
Here’s the thing—raspberries produce fruit on second-year canes, so you’re not just pruning for shape. You’re training the plant to focus its energy on the canes that will bear fruit next year. After thinning, step back and admire your plant—you’ll notice it looks airier and more structured, which improves airflow and reduces fungal risks.
✂️ Step 3: Summer Pruning to Encourage Fruit Production
During summer, as fruit begins to form, focus on removing any suckers that emerge from the base of the plant. These are the thin, fast-growing shoots that siphon energy away from fruit production. Pinch them off as soon as you see them—don’t wait until they’re 6 inches tall, or they’ll steal nutrients from your harvest.
Also, watch for overly crowded canes—if two canes are growing too close together, they’ll compete for sunlight and produce smaller berries. Use your pruners to space them out so each has room to grow. After summer pruning, water deeply (using the drip irrigation system) to help the plant recover and support fruit development.
⏰ Step 4: Post-Harvest Cleanup in Fall
Once your harvest is done, cut back all fruited canes to the ground in late fall or early winter. These canes have given their energy to fruit production and won’t recover. You’ll know which ones to remove because they’ll be thin, woody, and bare. Leave the new, green canes—these are next year’s fruit producers.
This is also the time to sterilize your pruners again and give your plant a light trim to remove any dead or diseased leaves. I like to add a slow-release fertilizer (using the balanced fertilizer) around the base of the plant to give it a nutrient boost for next season. Cover the pot with 1-2 inches of mulch to protect roots from freezing temperatures.
Tips & tricks for perfect potted raspberry pruning
These three pruning secrets will help you maximize fruit production and keep your container-grown raspberries thriving year after year.
Pruning Tool Essentials: Invest in a good pair of bypass pruners for clean cuts—avoid anvil pruners that crush stems. Sterilize your tools with 70% rubbing alcohol between cuts to prevent spreading disease, especially when working with brown, mushy canes in Step 1. I keep a small bottle of alcohol in my gardening toolbox for quick sterilization between plants.
Visual Identification for Step 1: When pruning in early spring, look for canes that are thinner than a pencil or completely devoid of buds—they're energy vampires that won't contribute to your harvest. The key is to cut just above a lateral branch or bud to encourage new growth from the right spot. Think of it like giving your plant a haircut that promotes healthy regrowth rather than just chopping randomly.
Seasonal Timing Strategy: The 4-6 inch height marker in Step 2 is your guide for late spring thinning, but don't rely solely on measurements. Check for thick stems with abundant buds—these are your future fruit producers. In warmer zones, you might need to adjust your timing slightly, but always aim to thin before the canes get too crowded. I've learned this the hard way after letting raspberries get too dense, which leads to smaller berries and more fungal issues.
Summer Maintenance Hack: For summer pruning, make it a habit to check for suckers and crowded canes weekly. These fast-growing shoots can appear suddenly, so don't wait until they're 6 inches tall to deal with them. Pinch them off at the base with your fingers or pruners—it takes just seconds but prevents major nutrient competition. After pruning, give your plant a deep watering to help it recover and support fruit development.
Pro Tips for Potted Raspberry Plants
- These three pruning secrets will help you maximize fruit production and keep your container-grown raspberries thriving year after year.
- Pruning Tool Essentials: Invest in a good pair of bypass pruners for clean cuts—avoid anvil pruners that crush stems.
- Visual Identification for Step 1: When pruning in early spring, look for canes that are thinner than a pencil or completely devoid of buds—they're energy vampires that won't contribute to your harvest.
Frequently asked questions
Got questions about growing potted raspberry plants? You’re not alone! Here are answers to the most common queries—from pruning puzzles to harvest hacks—so you can keep your container garden thriving.
How long does it take for potted raspberries to bear fruit?
Potted raspberries typically take 1–2 years to produce fruit, depending on the variety and care. Primocane-bearing types (like ‘Heritage’ or ‘Autumn Britten’) may fruit in the first year, while floricane varieties (like ‘Boyne’ or ‘Nova’) usually wait until the second spring. Patience pays off—healthy plants reward you with berries for years!
When is the best time to prune potted raspberries?
Prune twice a year for optimal growth:
- Late winter/early spring: Remove dead or weak canes before new growth starts (aim for February–March in most climates).
- Summer (after harvest): Trim back fruited canes to encourage next year’s growth. Use clean shears to avoid disease.
Can I grow raspberries in pots indoors year-round?
While raspberries can grow indoors, they need bright light (6+ hours of direct sun daily) and cool nights (50–60°F) to fruit well. A sunny windowsill or grow lights work, but outdoor containers (with winter protection) yield better harvests. For indoor success:
- Use a large pot (at least 12–18 inches deep) with drainage.
- Choose dwarf varieties like ‘Tulameen’ or ‘Heritage.’
- Monitor humidity—raspberries hate dry air!
Why are my potted raspberry leaves turning yellow?
Yellow leaves usually signal overwatering, nutrient deficiency, or pests. Check these fixes:
- Watering: Let the top 1–2 inches of soil dry out between waterings. Pots dry faster than ground soil!
- Nutrients: Feed with a balanced fertilizer (10-10-10) in spring and after harvest.
- Pests: Inspect for spider mites or aphids on undersides of leaves. Spray with neem oil if needed.
What’s the best container size for raspberry plants?
Raspberries have deep roots, so skip tiny pots! Aim for:
- Minimum: 12–15 inches deep × 18 inches wide (for 1 plant).
- Ideal: 18–24 inches deep × 24 inches wide (allows for 2–3 canes).
- Material: Fabric grow bags or plastic pots with drainage holes work best. Avoid shallow decorative pots—they stunt growth!
Wrapping up and next steps
Growing potted raspberry plants is a rewarding way to enjoy fresh, sweet berries year-round—even in small spaces! 🌱 With the right pruning tricks, you’ll maximize yield, keep your plants healthy, and extend their lifespan. Whether you’re a beginner or a seasoned gardener, these techniques make container gardening a breeze.
Now that you’re armed with expert tips, roll up your sleeves and get pruning! Start small, observe your plant’s progress, and soon you’ll be harvesting juicy raspberries straight from your balcony or patio. Happy gardening! 🍓✨