
Shrubs
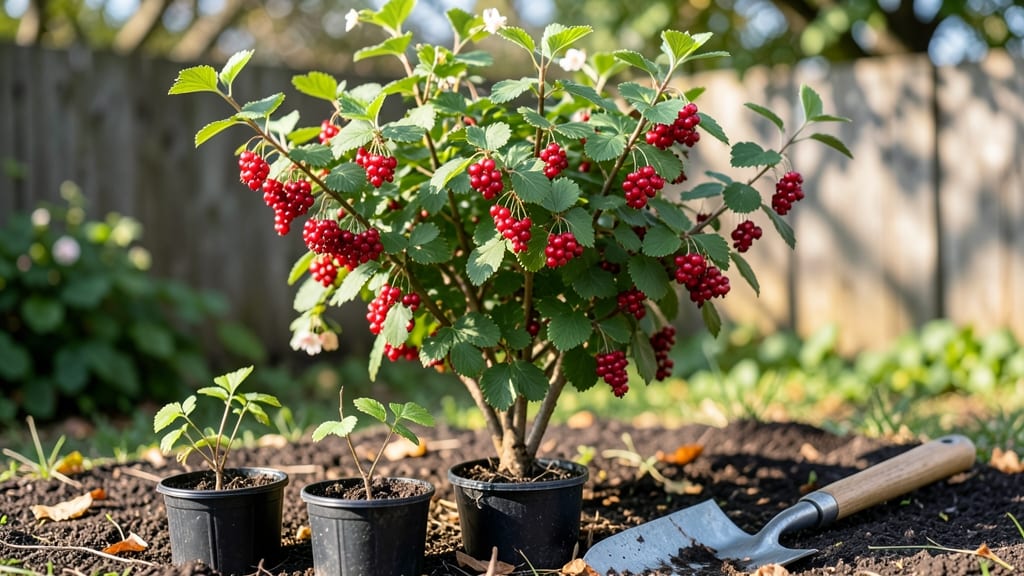
Planting currant bushes in the right spot means juicy, low-maintenance berries by next summer—no fancy pruning skills required. I planted mine last fall in a sunny, sheltered corner, and this year they’re already sending up vigorous new shoots.
The key? Timing, soil, and a little patience to let them establish before they bear fruit.
You’ll need well-draining soil, a shovel, and a 5-gallon container for each bush—currants thrive in moist but not soggy ground. Space them 6 feet apart for good airflow, and avoid planting where tomatoes or potatoes grew before (they share diseases).
Most gardeners plant in early spring or fall, but cooler climates can handle it in winter too.
After planting, water deeply once a week for the first month to help roots settle. Mulch around the base to keep moisture in and weeds out—this is where minimal effort pays off.
By year two, you’ll have berries with almost no upkeep beyond occasional pruning to open the center of the bush.
Regional note: Northern gardeners get the best flavor from red and black currants, while warmer zones do well with white currants or gooseberries. Avoid overwatering in summer—that’s how you get powdery mildew. Stick with these basics, and you’ll have berries for years with almost no fuss.
📚 In This Guide
- What you need
- Instructions
- Tips and common mistakes
- Wrapping up and next steps
What you need
- ● Currant bushes: 3–5 healthy, disease-resistant plants (red, black, or white varieties). Choose 1-year-old bare-root or potted plants for best results.
- ● Shovel or trowel: A 6-inch digging trowel for precision or a broad shovel for larger holes.
- ● Garden fork: For loosening soil and improving drainage.
- ● Compost or well-rotted manure: 5–10 lbs per bush to enrich the soil.
- ● Mulch (straw, wood chips, or pine needles): 2–3 inches to retain moisture and suppress weeds.
- ● Pruning shears: Sharp, bypass-type shears for clean cuts.
- ● Organic mulch or landscape fabric: To protect soil and deter pests.
- ● Watering can or hose with a gentle nozzle: For deep, even watering.
- ● Soil test kit: To check pH (currants prefer 6.0–7.0).
- ● Fertilizer (balanced 10-10-10 or organic options): Apply sparingly in early spring.
- ● Bird netting: To protect ripe berries from hungry birds!
- ● Support stakes or trellis: If growing tall varieties like red currants.
- ● Garden gloves: To keep hands clean while handling thorny bushes.
Step-by-Step instructions for planting currant bushes
Here’s how to plant currant bushes for strong growth and bountiful berries with minimal fuss.
Choose the Right Location and Prepare the Soil
Currants thrive in full sun to partial shade, with at least 6 hours of sunlight daily. I always pick a spot with good airflow to prevent fungal diseases like powdery mildew. Avoid low-lying areas where cold air pools—currants need well-draining soil and hate soggy roots.
Test your soil’s drainage by digging a 12-inch hole and filling it with water. If it doesn’t drain within 30 minutes, amend the soil with 2-3 inches of compost or sand to improve airflow. Currants prefer slightly acidic soil (pH 5.5-6.5), so add sulfur or peat moss if your soil tests higher. Work the amendments into the top 12 inches of soil before planting.
Dig the Planting Holes and Space Bushes Properly
Dig holes twice as wide as the root ball but only as deep—currant roots should sit no deeper than they were in the nursery pot. Space red currants 4-5 feet apart and black currants 5-6 feet apart to allow airflow and easy harvesting. I always plant in early spring or fall, when the soil is workable but not frozen.
Loosen the roots gently if they’re circling the root ball—this encourages them to spread outward. Place the bush in the hole so the top of the root ball sits level with the surrounding soil. Fill the hole with soil, tamping lightly to remove air pockets. Water deeply to settle the soil around the roots.
Mulch and Water for Establishment
Spread 2-3 inches of mulch (like wood chips or straw) around the base of the bush, keeping it 3 inches away from the stem to prevent rot. Mulch retains moisture, suppresses weeds, and regulates soil temperature. Water deeply once a week for the first month, ensuring the soil stays moist but not waterlogged. Currants are drought-tolerant once established, but young plants need consistent moisture.
Watch for wilting leaves—this is your signal to water. Overwatering is worse than underwatering, so let the top 2 inches of soil dry out between waterings. Avoid wetting the foliage when watering to reduce disease risk. A drip irrigation system works best for even moisture without splashing.
Prune for Shape and Airflow in Early Spring
Currants need minimal pruning but benefit from light shaping in early spring before new growth starts. Remove dead, crossing, or weak branches first—these compete for energy and invite pests. Cut back last year’s growth by one-third to encourage bushier growth and better berry production. I always prune on a dry, sunny day to reduce disease spread.
Use clean, sharp pruners to make cuts at a 45-degree angle, just above an outward-facing bud. Avoid heavy pruning—currants fruit on old wood, so aggressive cuts reduce next year’s harvest. Step back after pruning; the bush should have an open, vase-like shape with sunlight reaching the center. This airflow prevents fungal issues and makes harvesting easier.
Monitor for Pests and Fertilize Lightly
Check bushes weekly for aphids or spider mites, especially on new growth. A strong spray of water usually dislodges them, but severe infestations may need neem oil. Currants don’t need heavy feeding—too much nitrogen leads to leafy growth at the expense of berries. Apply a balanced 10-10-10 fertilizer in early spring at half the recommended rate, then side-dress with compost in fall.
You’ll know fertilization is right when new leaves are dark green and healthy, not yellow or pale. Over-fertilizing causes excessive vine growth and fewer berries. Mulch annually to replenish nutrients naturally. With proper care, your currants will produce sweet, plentiful berries within 2-3 years.
Tips & tricks for planting currant bushes
These simple strategies will help you avoid common pitfalls and set your currant bushes up for success from day one.
Soil Drainage Test: The 30-minute drainage test in Step 1 is crucial—don't rush it. If water pools after 30 minutes, you'll need to amend that soil before planting. I've seen currants fail within weeks when planted in heavy clay that doesn't drain properly. For extra insurance, mix in perlite or coarse sand to create better drainage channels around the roots.
Root Ball Preparation: When loosening circling roots in Step 2, be gentle but thorough. I've made the mistake of leaving some roots intact, which can strangle the bush as it grows. Make a few small vertical cuts with a clean knife if the roots are tightly bound. This encourages outward growth rather than a tangled mess underground.
Watering Wisdom: The first month's watering schedule in Step 3 is critical for establishment. I recommend using a rain gauge to track your weekly deep watering—currants need about 1-1.5 inches of water per week during this period. If you're unsure, stick your finger 2 inches into the soil; if it's dry, water again. Overwatering is the biggest mistake new growers make.
Pruning Precision: When cutting back last year's growth by one-third in Step 4, focus on removing the oldest, thickest stems first. These are the ones that produce fewer berries and compete with new growth. Make your cuts just above an outward-facing bud at a 45-degree angle—this creates a larger surface for healing and encourages new shoots to grow outward rather than inward.
Pro Tips for Planting Currant Bushes
- These simple strategies will help you avoid common pitfalls and set your currant bushes up for success from day one.
- Soil Drainage Test: The 30-minute drainage test in Step 1 is crucial—don't rush it.
- Root Ball Preparation: When loosening circling roots in Step 2, be gentle but thorough.
Frequently asked questions
Got questions about planting currant bushes? You’re not alone! Here are answers to the most common queries to help you grow thriving bushes with ease.
When is the best time to plant currant bushes?
The ideal time is early spring (just as new growth starts) or early fall (6-8 weeks before frost). This gives roots time to establish before extreme temperatures. Avoid planting in summer heat or freezing winter conditions—roots need stability to thrive!
How far apart should I space currant bushes?
Space them 4-6 feet apart for red and white currants, or 5-7 feet for black currants (they grow larger). Proper spacing ensures airflow, reducing fungal diseases like powdery mildew and making harvesting easier. Think of it as giving each bush room to stretch its branches without crowding!
Can I plant currant bushes in containers?
Yes! Currants adapt well to 5-gallon containers or larger (at least 18" deep). Use well-draining soil mixed with compost, and place pots in full sun. Just remember: container-grown bushes may need more frequent watering and annual repotting as roots grow. Perfect for small yards or urban gardens!
What pests or diseases should I watch for?
Common issues include:
- Aphids: Tiny green/black bugs that cluster on leaves (use neem oil or insecticidal soap).
- Birds: They love ripe berries! Cover bushes with netting when fruits ripen.
- Powdery mildew: White fungal spots on leaves (improve airflow, prune for sunlight, and spray with baking soda mix if needed).
Do currant bushes need a male and female plant to produce berries?
Most red and white currants are self-fertile, so one bush = berries! However, black currants often need a pollinator (another bush within 30 feet). Check your variety’s tags—some labeled "self-pollinating" still benefit from neighbors for heavier yields. Cross-pollination = more flavorful fruit!
Wrapping up and next steps
Planting currant bushes is a rewarding way to enjoy juicy, nutrient-packed berries with minimal fuss—especially when you prioritize the right location, soil prep, and spacing.
By following these steps, you’ll set the stage for healthy growth, abundant harvests, and easy maintenance, proving that great things (and tasty treats!) come from thoughtful planning. 🌱
Ready to dive in? Grab your gloves, mark that sunny spot, and get planting—your future breakfast (or jam-making sessions) will thank you! Next up: Learn how to keep your bushes thriving year-round with our care guide.