
Planting
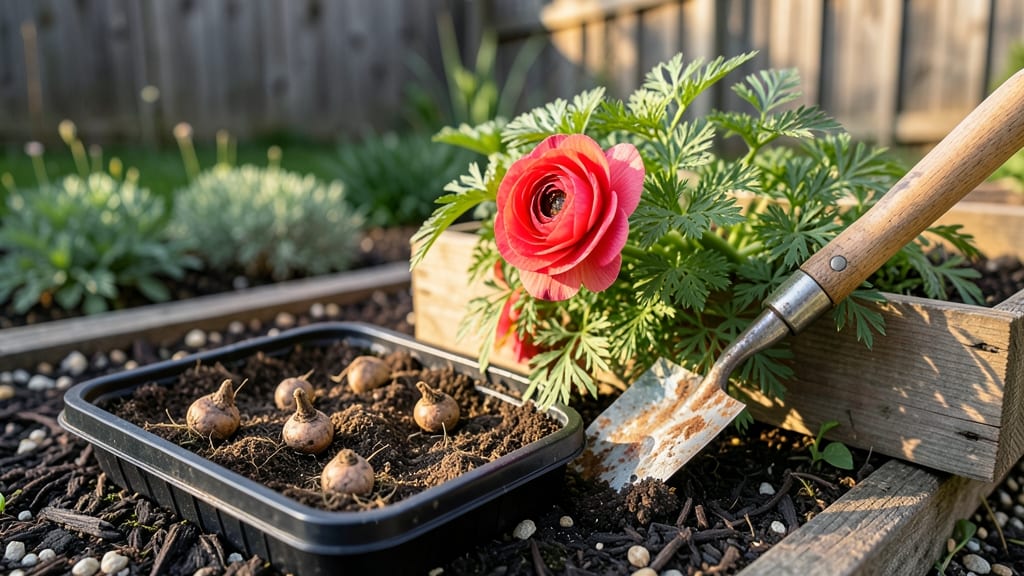
Fall-planted ranunculus bulbs deliver the most shockingly lush striped blooms I’ve ever grown—right when spring’s dreary gray gives way to color. 🌱 The secret? Planting in cool weather lets those paper-thin bulbs establish roots before winter’s chill, so they burst into blooms weeks earlier than spring-planted ones.
My first batch last October produced stems tall enough to cut by late April, and the striped petals—think deep burgundy with white or yellow—never fail to turn heads.
You’ll need 3-4 weeks before your first frost to get them in the ground, well-drained soil (they rot faster than you’d think), and a sunny spot where they won’t get crowded by spring.
I swear by mixing in a handful of compost and a slow-release bulb fertilizer—it’s the difference between wimpy stems and bold, sturdy blooms. Spacing them 4-6 inches apart keeps the foliage from tangling, and mulching after planting protects them from freeze-thaw cycles.
By spring, you’ll have cutting garden quality stems that last weeks in vases, with blooms so vivid they look photoshopped. The key is patience—those bulbs look tiny, but they pack a punch. Just don’t overwater after planting (they’ll rot) and avoid fertilizing in spring (too much greens, fewer flowers).
The payoff? A neighbor-jealousy display of striped perfection when everyone else’s garden is still waking up.
Works in zones 3-9, though southern gardeners should plant in late fall to avoid summer heat. Even in small spaces, these bulbs thrive in containers—just use well-draining mix. The only real mistake? Planting too deep or in soggy soil. Once you’ve tried fall-planted ranunculus, spring planting feels like cheating.
📚 In This Guide
- What you need
- Instructions
- Tips and common mistakes
- Wrapping up and next steps
What you need
- ● Ranunculus corms: 50–100 corms per square foot (choose fall-planted varieties like 'Striped' or 'Buttercup').
- ● Well-draining soil: Mix 50% potting soil with 50% perlite or coarse sand (1–2 cubic yards for in-ground planting).
- ● Organic compost: 2–3 inches blended into the top 6–8 inches of soil for nutrients.
- ● Slow-release fertilizer: 10-10-10 or bulb-specific fertilizer (1–2 lbs per 10 sq ft).
- ● Mulch: 2–3 inches of straw or shredded leaves to insulate roots.
- ● Watering can or hose: With a gentle spray nozzle (avoid soaking the corms).
- ● Garden trowel or bulb planter (for precise corm placement).
- ● Rake or hoe (to loosen soil before planting).
- ● Measuring tape or ruler (corms need 2–3 inches of depth and 2–3 inches of spacing).
- ○ Gloves (optional but recommended for handling corms).
- ● Timing: Plant corms 6–8 weeks before the first frost (typically September–October in most climates).
- ● Location: Full sun (6+ hours/day) or partial shade (morning sun, afternoon shade).
- ● Soil prep: Test soil pH (ideal: 6.0–7.0); amend if needed with lime or sulfur.
- ● Weather check: Avoid planting if frost is forecasted within 48 hours.
- ● Cold frame or cloches (for early spring protection in harsh climates).
- ● Epsom salt (1 tbsp per gallon of water) for a magnesium boost during growth.
- ● Plant labels (to track varieties if mixing colors).
- ● Drip irrigation system (for consistent moisture in dry fall weather).
Step-by-Step instructions for planting ranunculus in fall
Here's the method I swear by for coaxing those dramatic striped blooms through winter.
🌱 Step 1: Prepare the Planting Site for Winter Success
Choose a location with full sun exposure—ranunculus bulbs need at least 6 hours of direct sunlight daily to produce their signature bold blooms. Work the soil to a depth of 12 inches, breaking up any compacted layers with a garden fork. Amend the soil with 2-3 inches of compost to improve drainage and fertility, since these bulbs despise soggy conditions.
Rake the surface smooth and remove any rocks or debris. The goal is loose, well-draining soil that won't trap moisture around the bulbs during winter's freeze-thaw cycles. If your soil drains poorly, mix in 1 part perlite or coarse sand to every 3 parts soil. You'll know you've done it right when the soil crumbles easily between your fingers.
🌱 Step 2: Plant Bulbs at the Correct Depth and Spacing
Plant ranunculus bulbs 4-6 weeks before your first hard frost—this timing ensures they establish roots before winter dormancy. Space the bulbs 3-4 inches apart in rows that are 6-8 inches apart to allow for air circulation and prevent fungal diseases. Dig planting holes 2-3 inches deep, which is roughly 3 times the diameter of the bulb.
Place one bulb in each hole with the pointed end facing upward. If you're unsure which end is up, don't worry—they'll find their way. Cover the bulb with soil and gently firm it around the base. Water immediately after planting to settle the soil and eliminate air pockets. The soil should feel evenly moist but not waterlogged.
💧 Step 3: Mulch and Protect for Winter Dormancy
Apply a 3-4 inch layer of straw mulch over the planted area to insulate the bulbs and regulate soil temperature. Avoid using leaves or grass clippings, as they can compact and trap moisture. The mulch should feel dry to the touch but not brittle. This layer protects the bulbs from extreme temperature fluctuations and prevents heaving during freeze-thaw cycles.
Mark the planting area with labels or stakes so you don't accidentally disturb the bulbs in spring. Ranunculus bulbs are dormant through winter, so resist the urge to water or fertilize until you see signs of new growth in early spring. You'll know the mulch is working when it stays in place and doesn't blow away in winter winds.
☀️ Step 4: Prepare for Spring Growth and Bloom Time
In late winter or early spring, when you see the first signs of green shoots pushing through the mulch, remove the straw and water the area lightly. This is your cue that the bulbs have broken dormancy and are ready to grow. Apply a balanced, slow-release fertilizer at this stage to provide the nutrients needed for robust foliage and flower development.
Continue watering regularly to keep the soil evenly moist but not soggy. You'll notice the foliage emerge first, followed by the striking striped blooms that make ranunculus so special. Deadhead spent blooms to encourage continuous flowering throughout the season. The key to success is patience—these bulbs need time to establish before they reward you with their dramatic display.
Tips & tricks for perfect fall-planted ranunculus
A few strategic moves will ensure your ranunculus bulbs thrive through winter and deliver those showstopping striped blooms next spring.
Soil Test First: Before amending your soil in Step 1, conduct a simple drainage test. Dig a hole 12 inches deep and fill it with water—if it drains in less than an hour, your soil is fine. If water pools after 2 hours, you definitely need that perlite/sand mix. Ranunculus bulbs will rot if they sit in soggy conditions, so don't skip this critical prep step. The goal is soil that feels like a damp sponge, not a swamp.
Timing Secret: The 4-6 week window before your first hard frost is non-negotiable for root establishment. Check your local frost dates and mark your calendar—planting too early means bulbs may sprout before winter, while planting too late risks insufficient root growth. I always aim for mid-October in my zone 5 garden, but your exact timing depends on your microclimate. Use a soil thermometer to verify temperatures are consistently below 50°F at night before planting.
Mulch Layer Precision: That 3-4 inch straw mulch in Step 3 isn't just decoration—it's insulation. Use a straightedge to create an even layer, then weigh it down with small rocks along the edges to prevent wind from scattering it. The mulch should feel like a dry, fluffy blanket—not packed down or clumpy. This precise layering regulates soil temperature fluctuations that can damage dormant bulbs during freeze-thaw cycles. Pro tip: Save your straw mulch from local farms where it's often given away for free.
Spring Awakening Cues: In Step 4, those first green shoots through the mulch are your golden ticket. That's when you know the bulbs have successfully broken dormancy. I've learned the hard way that removing mulch too early (before shoots appear) can expose tender new growth to late frosts. Wait until you see at least 2-3 shoots per bulb before disturbing the mulch—patience here prevents spring setbacks.
Pro Tips for Fall Planted Ranunculus
- A few strategic moves will ensure your ranunculus bulbs thrive through winter and deliver those showstopping striped blooms next spring.
- Soil Test First: Before amending your soil in Step 1, conduct a simple drainage test.
- Timing Secret: The 4-6 week window before your first hard frost is non-negotiable for root establishment.
Frequently asked questions
Got questions about growing fall-planted ranunculus? You’re not alone! Here are answers to the most common queries—from timing to troubleshooting—to help your striped blooms thrive.
When is the best time to plant ranunculus in fall?
Plant 6–8 weeks before your first hard frost (typically late September to early November in most climates). This gives roots time to establish before winter dormancy. In warmer zones (Zone 8+), aim for October–November—just avoid planting too early, or they may sprout and die in cold snaps.
Can ranunculus survive winter frost?
Ranunculus are hardy to Zone 4 when dormant. Their tuberous roots naturally enter a frost-resistant state. Just mulch lightly (2–3 inches of straw or leaves) to protect them from extreme cold or thaw-freeze cycles. No special winter care is needed beyond this!
What happens if I plant ranunculus too late in fall?
If planted too close to frost, roots may not anchor before winter. Risks include rot, weak stems, or no blooms next spring. To salvage late plants: mulch heavily and avoid watering until spring. If soil is frozen, wait until early spring (Zone 5–7) or next fall.
Are there alternatives to ranunculus for fall planting?
Yes! Try these cold-hardy, fall-planted perennials for similar drama:
- Tulips (Zone 3–8): Classic, reliable blooms.
- Daffodils (Zone 3–9): Deer-resistant and pest-proof.
- Crocus (Zone 3–8): Early spring color, naturalizes well.
- Anemones (Zone 4–8): Striking dark centers, late-season blooms.
Why aren’t my ranunculus blooming in spring?
Common culprits:
- Improper planting depth: Tubers should be 2–3 inches deep.
- Overwatering: Soggy soil = rot. Water only when soil is dry 1–2 inches down.
- Poor sunlight: They need 6+ hours of sun daily.
- Old tubers: Replace every 2–3 years for vibrant blooms.
Wrapping up and next steps
Growing fall-planted ranunculus is a rewarding way to bring vibrant, striped blooms to your garden—even in colder months! 🌸 With the right timing, soil prep, and care, these frost-tolerant beauties will thrive and reward you with months of color.
Whether you're a seasoned gardener or just starting out, their ease of cultivation makes them a must-try for any flower bed.
Ready to take the next step? Mark your calendar for late fall planting, gather your supplies, and get ready to enjoy a stunning spring display. Your garden’s boldest statement starts now!