Vegetables
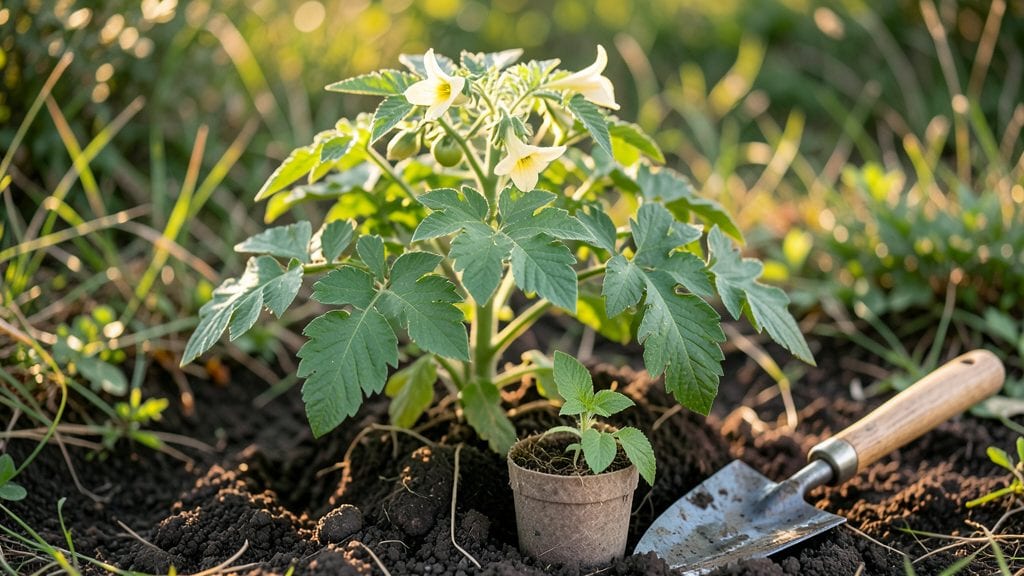
Planting tomatoes outdoors transforms a simple seedling into a vine heavy with sun-ripened fruit—if you time it right. I learned the hard way that rushing these heat-lovers into cool soil means stunted plants and delayed harvests.
The secret lies in waiting for nighttime temperatures to stay above 50°F, when your seedlings have outgrown their pots and the last frost has vanished like a bad dream.
You’ll need a spot that bakes in full sun for at least 6-8 hours daily, soil amended with compost (tomatoes hate soggy roots), and sturdy cages or stakes to support their ambitions.
Most gardeners space plants 18-24 inches apart, but crowding them too close invites disease and steals sunlight. Harden off your seedlings over 7-10 days—gradually exposing them to outdoor conditions—before they meet the soil for good.
Within 60 days, you’ll be plucking tomatoes so ripe they blush red at the touch, their scent thick with summer. The key is consistency: water at the base (not the leaves) to prevent blight, mulch to keep roots cool, and prune suckers regularly.
Skip these steps, and you’ll end up with leggy plants and bitter fruit—or worse, a garden full of green tomatoes that never ripen.
This works in containers too, just scale down the spacing and use 5-gallon pots for dwarf varieties. Whether you’re a first-timer or a veteran, the payoff is worth the patience—imagine biting into that first vine-ripened tomato, still warm from the sun. Let’s get those plants in the ground right.
📚 In This Guide
- What you need
- Instructions
- Tips and common mistakes
- Wrapping up and next steps
What you need
- ● Tomato seedlings or seeds: 6–10 healthy seedlings (or seeds, if starting from scratch)
- ● Varieties: Choose disease-resistant types like Celebrity, Beefsteak, or Cherry for beginners.
- ● Well-draining potting mix or garden soil: 5–10 gallons (enough to fill containers or amend garden beds)
- ○ Optional boost: Mix in compost (1 part compost to 3 parts soil).
- ● Containers or garden space: Containers: 5-gallon pots or larger (1 plant per container)
- ● Garden beds: Full sun (6+ hours/day) and space 18–24 inches apart.
- ● Fertilizer: Balanced 10-10-10 or tomato-specific fertilizer (follow package rates).
- ● Stakes or cages: 5–10 ft wooden stakes or tomato cages (1 per plant).
- ● Watering can or hose with gentle nozzle.
- ● Gloves (to protect your hands from thorns or soil).
- ● Pruning shears (for trimming suckers or dead leaves).
- ● Mulch (straw or shredded leaves to retain moisture).
- ● pH test kit (to check soil acidity; ideal range: 6.0–6.8).
- ● Shade cloth (for seedlings if temps exceed 90°F).
- ● Drip irrigation system (for consistent watering).
Planting tomatoes outdoors: Step-by-Step for a thriving garden
Here's how to get your tomato plants established strong enough to bear fruit in just 60 days.
Prepare the Planting Site for Optimal Growth
Choose a location that receives at least 6-8 hours of direct sunlight daily—tomatoes are sun-hungry plants that won't produce well in shade. The soil should be well-draining, rich in organic matter, and have a pH between 6.0 and 6.8. Work in 2-3 inches of compost into the top 12 inches of soil to improve fertility and structure.
If your soil is heavy clay, mix in 1-2 inches of coarse sand or perlite to prevent compaction. Avoid fresh manure—it can burn tender roots and attract pests. You'll know the soil is ready when it crumbles easily between your fingers and holds moisture without becoming soggy.
Harden Off Seedlings Before Transplanting
If you started seeds indoors, begin hardening off 1-2 weeks before the last frost date. Place seedlings outside in a sheltered spot for 1-2 hours the first day, gradually increasing exposure over 7-10 days until they can tolerate a full day outdoors. This process toughens young plants so they don’t wilt or shock when permanently moved.
Watch for signs of stress like drooping leaves or yellowing—these indicate too much sun or wind too soon. If seedlings look stressed, move them back indoors for a day or two before trying again. You’ll know they’re ready when they stand upright and continue growing even after a full day outside.
Plant Tomatoes at the Right Depth and Spacing
Dig holes slightly deeper than the root ball—up to 1/3 of the stem can be buried to encourage stronger root growth. Space plants 18-24 inches apart in rows 3-4 feet apart to allow airflow and prevent disease. If planting in containers, use pots at least 12-18 inches deep with drainage holes.
Gently remove the plant from its container, loosen the roots if they’re circling, and place it in the hole so the top of the root ball sits 1 inch below soil level. Fill the hole with soil, pressing lightly to remove air pockets. Water deeply to settle the soil and eliminate gaps around the roots.
Provide Support and Mulch for Healthy Growth
Install stakes, cages, or trellises immediately after planting to support the plant as it grows. Tomatoes can get top-heavy with fruit, and wind or rain can snap weak stems. Secure the main stem to the support with soft ties, leaving room for the plant to grow without constriction.
Apply 2-3 inches of organic mulch around the base of each plant, keeping it 2 inches away from the stem to prevent rot. Mulch retains moisture, suppresses weeds, and regulates soil temperature. Water deeply once a week, aiming for 1-1.5 inches of water per week, and adjust based on rainfall. You’ll know the plants are thriving when they produce new leaves and show signs of flowering within 2-3 weeks.
Monitor and Maintain for Maximum Yield
Fertilize every 3-4 weeks with a balanced 10-10-10 or 5-10-10 fertilizer to support fruiting. Avoid high-nitrogen fertilizers once flowers appear—they encourage leafy growth at the expense of fruit. Prune suckers (the shoots that grow between the main stem and branches) regularly to improve airflow and direct energy to fruit production.
Watch for common pests like aphids or hornworms, and remove them by hand or treat with neem oil if needed. You’ll know your tomatoes are on track when they develop small green fruits within 60 days of planting. Harvest regularly to encourage more production, and enjoy your homegrown bounty before the first frost.
Tips & tricks for planting tomatoes outdoors
Getting your tomato plants off to the right start makes all the difference between a modest harvest and a sun-kissed bounty. These garden-tested strategies will help you avoid common pitfalls and maximize your 60-day growing window.
Soil Preparation Insight: The secret to that perfect soil texture lies in the ratio of amendments. For heavy clay soil, I've found that mixing in 1-2 inches of coarse sand creates ideal drainage while still retaining moisture. Test your soil's readiness by squeezing a handful—it should crumble easily but not fall apart completely. If your soil feels too powdery, add a bit more compost to help it hold moisture without becoming compacted. This balance is crucial for preventing both root rot and drought stress during those critical first weeks.
Harden Off Gradually: The 7-10 day hardening off period in Step 2 is non-negotiable for transplant shock prevention. I've learned this the hard way after watching seedlings wilt dramatically when moved too quickly. Start with just 1-2 hours of morning sun on the first day, then gradually increase exposure by 1-2 hours each subsequent day. Watch for subtle signs of stress like slight leaf curling or yellowing at the edges—these are early warning signs to slow down. The goal is to let the plants acclimate to outdoor conditions without overwhelming them.
Planting Depth Strategy: Burying up to 1/3 of the stem when planting isn't just about root development—it's about creating a stronger plant architecture. The buried portion will develop new roots, giving your tomato a more robust support system. When planting, make sure the top of the root ball sits 1 inch below soil level—this ensures proper root coverage while preventing soil from piling up against the stem, which can cause rot. The deeper you plant, the more stable your tomato will be against wind and the weight of developing fruit.
Mulching Technique: That 2-3 inches of organic mulch serves multiple purposes beyond weed suppression. I've found that applying mulch immediately after planting helps maintain consistent soil temperatures, which is especially important in regions with temperature swings. Keep the mulch 2 inches away from the stem to prevent moisture buildup that could lead to disease. For even better results, consider using straw or wood chips—these break down slowly and improve soil structure over time, giving you a head start on next year's garden.
Pro Tips for Planting Tomatoes Outdoors
- Getting your tomato plants off to the right start makes all the difference between a modest harvest and a sun-kissed bounty.
- Soil Preparation Insight: The secret to that perfect soil texture lies in the ratio of amendments.
- Harden Off Gradually: The 7-10 day hardening off period in Step 2 is non-negotiable for transplant shock prevention.
Frequently asked questions
Got questions about growing tomatoes outdoors? You’re not alone! Here are answers to the most common queries to help you grow a thriving, sun-soaked tomato harvest.
When is the best time to plant tomatoes outdoors?
Plant tomatoes after the last frost date in your area (usually late spring). Soil should be at least 60°F (15°C)—test it with a thermometer or wait until nighttime temps stay above 50°F (10°C). In warmer climates, plant in early spring; in cooler zones, start 6-8 weeks before summer.
How do I protect my tomatoes from cold weather?
Use row covers, black plastic mulch, or cloches (mini greenhouses) to shield young plants. If frost threatens, cover plants with lightweight blankets or move pots indoors temporarily. Avoid planting too early—cold stress stunts growth and invites disease.
What are the most common tomato pests, and how do I prevent them?
Watch for hornworms (stripy caterpillars), aphids (sticky clusters), and blossom end rot (dark spots from calcium deficiency). Prevent pests with:
- Neem oil sprays
- Row covers
- Handpicking pests
- Ensuring 6+ hours of sunlight and well-draining soil
Can I plant tomatoes in containers, or do they need a garden bed?
Tomatoes thrive in 5-gallon+ containers with drainage holes. Use a balanced fertilizer (like 10-10-10) and stake or cage plants for support. Dwarf varieties (e.g., ‘Tiny Tim’ or ‘Patio Princess’) are ideal for pots. Just ensure containers get full sun and water regularly.
How long does it take for outdoor tomatoes to bear fruit?
With warm weather and proper care, tomatoes typically produce fruit in 60–85 days after transplanting. Determinate varieties (bush types) fruit all at once, while indeterminate types (vining) yield continuously until frost. Pro tip: Pinch suckers (side shoots) to redirect energy to fruit production!
What should I do if my tomato plants wilt suddenly?
Sudden wilting often signals overwatering, underwatering, or disease (like fusarium wilt). Check soil moisture—tomatoes prefer 1–2 inches of dry soil between waterings. If leaves turn yellow or brown, reduce water and improve drainage. For fungal issues, remove affected plants and treat with copper fungicide.
Wrapping up and next steps
Planting tomatoes outdoors is a rewarding journey that brings fresh, homegrown flavor straight to your plate! 🌱 With the right timing, soil prep, and care, you’ll be enjoying sun-ripened tomatoes in just 60 days.
Whether you’re a seasoned gardener or a beginner, these steps make it simple—and the taste? Unbeatable.
Now that you’re ready to dig in, pick your favorite tomato variety and start planting! Need extra confidence? Join a local gardening group or check out tomato-growing communities for tips and inspiration. Happy growing—your future meals will thank you! 🍅✨