Pruning
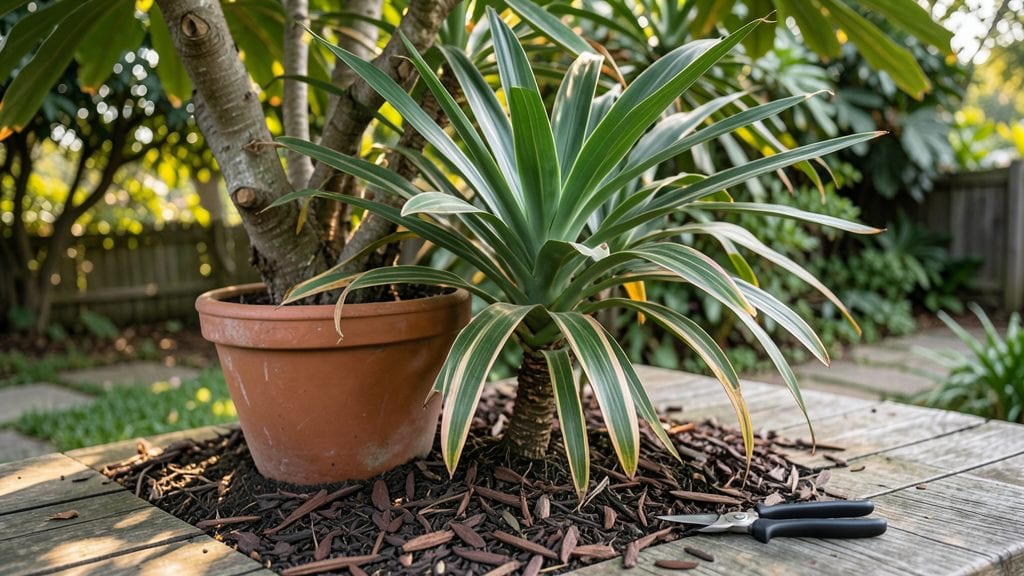
Trimming cordyline plants can turn a tired, leggy specimen into a showstopper with just three precise cuts. I’ve revived my own overgrown striped stems using this method—no fancy tools, just a sharp pair of shears and a little patience.
The key is timing: late winter or early spring, when new growth is about to burst from the base, is your best bet for a dramatic transformation.
You’ll need basic supplies: clean pruning shears, rubbing alcohol for sterilizing, and a bucket for clippings. The process is simpler than it looks—start by removing any dead or yellowed leaves at the bottom, then cut back the tallest fronds by about one-third to encourage bushier growth.
Think of it like giving your plant a fresh haircut, but with more dramatic results.
After trimming, your cordyline will reward you with vibrant new shoots within weeks, and the striped stems will stand out even more against the fresh green. The plant will look fuller, healthier, and more balanced, with less risk of disease from crowded fronds.
Plus, you’ll avoid the heartbreak of watching it slowly decline from neglect.
This method works for both indoor and outdoor cordylines, and it’s especially effective if your plant has outgrown its space or looks a little sad. The best part?
You’ll notice the difference immediately, and the plant will keep thriving for years with just a little seasonal maintenance. Ready to give it a try?
📚 In This Guide
- What you need
- Instructions
- Tips and common mistakes
- Wrapping up and next steps
What you need
- ● Pruning shears or bypass pruners – Choose sharp, clean ones (size: 6–8 inches) to avoid crushing stems.
- ● Garden gloves – Heavy-duty, cut-resistant (e.g., nitrile-coated) to protect hands from thorns and sap.
- ● Disinfectant (70% isopropyl alcohol or bleach solution) – 1 part bleach to 9 parts water to sterilize tools between cuts.
- ● Rubbing alcohol or hydrogen peroxide (3%) – For cleaning wounds on stems post-pruning.
- ● Trash bag or compost bin – To dispose of pruned foliage (check local compost rules—some areas avoid diseased plant debris).
- ● Watering can or hose – For post-pruning hydration (aim for deep watering to reduce stress).
- ● Hand pruners (for smaller stems) – If your plant has thin, delicate growth.
- ● Loppers (for thicker stems) – For woody, mature Cordyline branches (bypass type preferred).
- ● Plant food or fertilizer – A balanced, slow-release option (e.g., 10-10-10) to boost recovery.
- ● Mulch (organic, like pine bark) – To retain moisture and protect roots after trimming.
- ● Notebook & pen – To jot down pruning notes (e.g., "Trimmed 3/20/24 – 20% reduction").
Instructions for trimming cordyline plants
Here's how to refresh your cordylines with clean, precise cuts that keep them healthy and vibrant.
Gather Your Tools and Assess the Plant
Start by selecting a sharp pair of pruning shears or a clean, sterilized knife. Cordyline stems are tough, so dull blades tear fibers instead of making clean cuts. I always wipe my tools with rubbing alcohol before use—this prevents spreading disease between plants.
Examine the plant from all sides. Look for brown, crispy leaves at the top, which indicate overgrowth, or leggy stems that stretch too far between leaves. These are your visual cues for where to trim. Healthy growth appears in the lower third of the plant, where new leaves emerge from the stem.
Remove Dead or Damaged Foliage
Begin at the top of the plant and work your way down. Cut off any brown, yellow, or blackened leaves with a single, clean motion. Avoid leaving stubs—trim right where the leaf meets the stem. For large, dried fronds, I often make a small initial cut to reduce resistance, then follow through with the full cut.
If you see any stems with blackened or mushy spots, these are signs of rot. Trim these sections out completely, cutting back to healthy green tissue. You’ll notice the plant’s natural shape re-emerge as you remove the dead material. This step is all about revealing the plant’s hidden potential underneath.
Prune for Shape and Encourage New Growth
Now focus on shaping the plant. Use your shears to trim the top growth evenly, cutting just above a leaf node where new branches can sprout. For a fuller look, I like to make a slight angle cut to prevent water from pooling on the stem. This also helps the plant heal faster.
If your cordyline has become too tall and leggy, you can cut the entire top third off. Don’t worry—this plant is tough and will bounce back. After trimming, you’ll see fresh, vibrant growth emerging from lower nodes within a few weeks. This is the plant’s way of saying, “Thank you for giving me a fresh start.”
Clean Up and Monitor Recovery
After trimming, remove all the cuttings and dispose of them in the trash or compost bin. Never leave pruned material on the ground around the plant—it can attract pests or harbor disease. I like to give the area a quick sweep to clear any fallen leaves or debris.
Water the plant lightly after trimming to help it recover. You’ll notice new shoots appearing at the nodes within 2-4 weeks, depending on your climate. Keep the soil consistently moist but not soggy during this time. Avoid heavy fertilization right after pruning—let the plant focus on regrowing before adding nutrients.
Maintain Healthy Growth Moving Forward
Once your cordyline has recovered, it’s time to establish a maintenance routine. Trim back any new leggy growth in early spring to encourage bushier development. I also recommend rotating the plant occasionally so all sides get even sunlight—this keeps the shape balanced and prevents one side from becoming too sparse.
Watch for signs of stress, like yellowing leaves or wilting, which can signal overwatering or underwatering. Cordylines are drought-tolerant once established, so I usually water only when the top 2 inches of soil feel dry. With proper care, your trimmed cordyline will reward you with lush, striped foliage for years to come.
Tips & tricks for perfectly pruned cordyline plants
These simple tricks will help you achieve clean cuts and encourage your cordyline to bounce back with vibrant new growth.
Tool Preparation Matters: Sterilizing your pruning shears or knife with rubbing alcohol before you start isn't just about cleanliness—it's about protecting your plant. Cordyline stems have tiny wounds when cut, and any bacteria or fungus on your tools can enter these openings. I've seen plants develop rot simply because I skipped this step. Use a small brush to clean between the blades if you're working with multiple plants.
Visual Cues for Healthy Cuts: When trimming in Step 3, look for the leaf nodes—the small bumps where new leaves emerge. These are your target spots for cutting. Making a slight angle cut just above a node (about 1/4 inch) prevents water from pooling on the stem, which reduces the risk of rot. Think of it as creating a tiny roof over the cut to keep moisture away. This small detail makes a big difference in how quickly your plant recovers.
Timing New Growth: The instructions mention new shoots appearing within 2-4 weeks, but here's what I've noticed: warmer climates often see regrowth in as little as 2 weeks, while cooler seasons may take closer to 4 weeks. If you don't see new growth after 4 weeks, check your watering—cordylines need consistently moist soil during recovery but hate soggy conditions. A light misting every few days can help maintain humidity without overwatering.
Post-Trim Care Secret: After your initial trimming, I recommend giving your cordyline a light feeding with a diluted houseplant fertilizer (half-strength) about 6 weeks later. This timing allows the plant to focus on regrowing rather than processing heavy nutrients right after the stress of pruning. I've found this approach leads to more vigorous new growth compared to fertilizing immediately after trimming.
Pro Tips for Trimming Cordyline Plants
- These simple tricks will help you achieve clean cuts and encourage your cordyline to bounce back with vibrant new growth.
- Tool Preparation Matters: Sterilizing your pruning shears or knife with rubbing alcohol before you start isn't just about cleanliness—it's about protecting your plant.
- Visual Cues for Healthy Cuts: When trimming in Step 3, look for the leaf nodes—the small bumps where new leaves emerge.
Frequently asked questions
Got questions about keeping your Cordyline plants lush and stylish? You’re not alone! Here are answers to the most common queries—because even pros need a little guidance now and then.
When is the best time to trim Cordyline plants?
The ideal time to trim is early spring (just before new growth starts) or late summer (after flowering). Avoid heavy pruning in winter—your plant needs energy to survive. Light trimming to shape? Anytime is fine! Just avoid pruning right before harsh weather.
How much can I cut back without harming my Cordyline?
You can safely remove up to 1/3 of the plant’s height in one go, but avoid cutting into old, woody stems—this won’t regrow. For dramatic changes, trim in stages over a few weeks. Pro tip: If your plant looks leggy, focus on the top 1/3 to encourage bushier growth!
What should I do with the cuttings after trimming?
Turn your trimmings into new plants! Dip cuttings in rooting hormone, plant them in moist potting mix, and keep them in bright, indirect light. They’ll root in 4–8 weeks. No hormone? Water-propagate them first! Just place stems in water until roots form—easy peasy.
Why is my Cordyline turning brown after trimming?
Brown edges or tips? It’s usually stress from over-pruning or underwatering. Reduce pruning to 10–20% at a time and water deeply. If the browning spreads, check for pests (like spider mites) or fungus. A balanced fertilizer can help revive it too!
Can I trim a Cordyline that’s never been pruned before?
Even unpruned Cordylines respond well to shaping. Start with light trims to remove dead or yellow leaves, then gradually shape the canopy. Avoid cutting into the base of the stem—this can stunt growth. Patience is key; your plant will thank you with fresh, vibrant foliage!
Still stumped? Drop your question below—we’ve got you covered!
Wrapping up and next steps
Trimming your Cordyline plants doesn’t have to be intimidating—with the right tools and techniques, you can easily revive their striped stems and keep them thriving! 🌿 Whether you’re pruning for shape, health, or propagation, remember to sterilize your tools, cut at the right angles, and give your plant time to recover.
A little effort now means lush, vibrant foliage for seasons to come.
Ready to transform your Cordyline? Grab your pruners and get started—your plant will thank you! For extra flair, share your before-and-after results or experiment with propagating those cuttings. Happy pruning! ✂️💚