
Picking
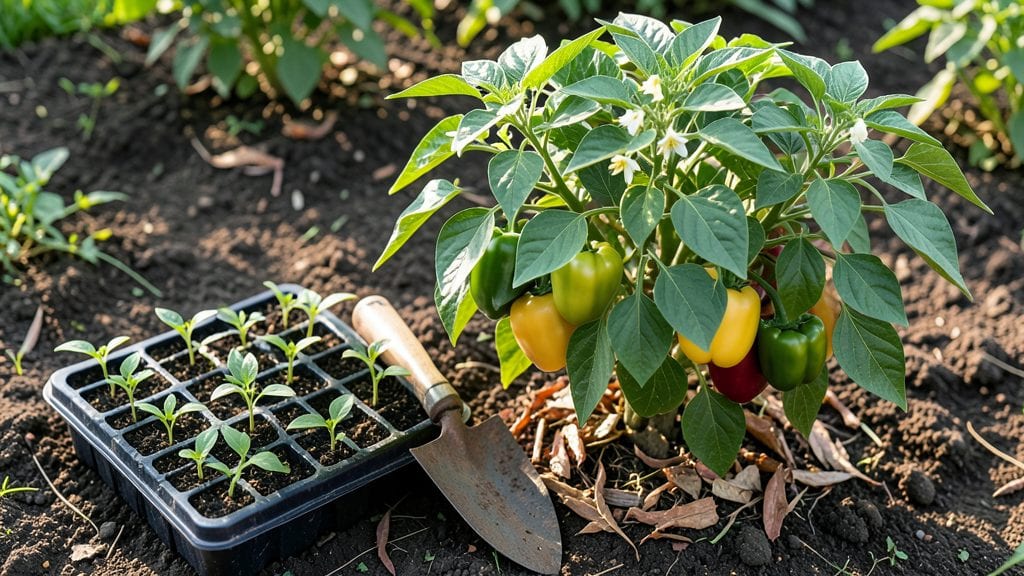
Planting with peppers starts with warm soil and a little patience—my first batch of jalapeños nearly gave up when I rushed them into cold ground. The key is timing: wait until nighttime temperatures stay above 55°F, and you’ll see those seedlings surge with growth instead of wilting.
I learned that the hard way after my first season of stunted plants and sad little peppers that never ripened.
You’ll need well-draining soil mixed with compost (think 3 parts soil to 1 part compost), a sunny spot with at least 6-8 hours of direct sunlight daily, and enough space—peppers hate crowding, so give them 18-24 inches apart in rows.
Plant seeds indoors 8-10 weeks before last frost for a head start, or sow directly outdoors after all danger of frost has passed. The secret weapon? A black plastic mulch to warm the soil faster and keep weeds at bay.
What you’ll end up with is a plant that thrives under your care: glossy green leaves, sturdy stems, and peppers that turn from green to red (or purple, or yellow) right on the vine.
The first harvest comes in 60-90 days for hot varieties, and if you keep the soil moist but not soggy, you’ll keep getting fruit all the way through fall. The smell of fresh peppers in the garden is unmistakable—like a burst of summer heat you can’t resist.
This method works for bell peppers, jalapeños, habaneros, and everything in between, whether you’re growing in raised beds, containers, or straight in the ground. The only real mistake? Planting too early or ignoring the soil temperature. Let’s get those peppers growing strong!
📚 In This Guide
- What you need
- Instructions
- Tips and common mistakes
- Wrapping up and next steps
What you need
- ● Peppers: Choose from varieties like jalapeños, bell peppers, cayenne, or habanero. Buy 3–5 plants or seeds per variety, depending on your needs.
- ● Containers or Garden Beds: For containers: 5–10 gallon pots (1 per plant) with drainage holes.
- ● For garden beds: Well-draining soil in a sunny spot (6+ hours of sunlight daily).
- ● Potting Mix: 1–2 bags of high-quality, well-draining potting soil (avoid garden soil—it can compact).
- ● Compost or Fertilizer: Balanced organic fertilizer (10-10-10) or compost (1 cup per plant at planting).
- ● Mulch: Straw, wood chips, or black plastic mulch (to retain moisture and suppress weeds).
- ● Watering Can or Hose: With a gentle spray nozzle for even watering.
- ● Gloves & Pruners: For handling plants and trimming (sterilize pruners with rubbing alcohol).
- ● Plant Support: Small stakes or cages (for taller varieties like bell peppers).
- ● Shade Cloth: Lightweight fabric (30–50% shade) to protect seedlings from intense afternoon sun.
- ● Grow Lights: LED or fluorescent lights (if starting indoors before the last frost).
- ● Soil pH Test Kit: To ensure your soil is slightly acidic (6.0–6.8, ideal for peppers).
- ● Pest Control: Neem oil or insecticidal soap (for aphids or spider mites).
Step-by-step instructions for planting peppers successfully
Here's the foolproof method I've used for years to grow peppers that thrive in heat and produce fruit until frost.
Prepare the Soil for Heat-Loving Plants
Peppers demand well-draining soil that stays warm—cold roots mean stunted growth. Work the first 3 inches of your garden bed with a fork, breaking up any compacted areas. Mix in 2 gallons of compost to enrich the soil and improve its ability to hold moisture while allowing excess to drain.
Test the soil's warmth by placing your hand near the surface—it should feel comfortably warm, not cool. If your soil stays chilly, spread a 4-inch layer of black plastic mulch over the bed 2 weeks before planting. This traps heat and speeds up root establishment. Avoid fresh manure; it can burn tender pepper roots.
Plant Transplants at the Right Time and Depth
Wait until soil temperatures reach at least 65°F before transplanting—peppers refuse to grow in cooler conditions. Dig holes slightly deeper than the root ball, about 1 inch deeper than the plant's current soil line. This encourages roots to spread downward rather than staying shallow.
Gently remove the plant from its container, loosen the roots if they're circling, and place it in the hole. Fill around the base with soil, pressing lightly to eliminate air pockets. Space plants 18 inches apart in rows 24 inches apart to allow airflow and prevent disease. Water immediately after planting to settle the soil and eliminate gaps.
Provide Consistent Water and Mulch
Peppers need 1 to 1.5 inches of water per week, but they hate wet leaves. Water deeply at the base in the morning, aiming for the soil rather than the foliage. Use a soaker hose or drip irrigation to keep moisture even and reduce evaporation. Avoid overhead watering—it spreads fungal diseases like early blight.
Apply a 3-inch layer of organic mulch (like straw or shredded leaves) around each plant, keeping it 2 inches away from the stem. This conserves moisture, regulates soil temperature, and suppresses weeds. Refresh the mulch every 4-6 weeks as it breaks down. You'll notice healthier plants with fewer yellow leaves when mulch is in place.
Support Growth with Fertilizer and Stakes
Feed plants with a balanced fertilizer (10-10-10) when they're 4-6 inches tall, using 1 tablespoon per plant. Switch to a low-nitrogen, high-phosphorus formula (5-10-10) when flowers appear to encourage fruiting. Water thoroughly after each application to prevent root burn.
Install 5-foot stakes or cages at planting time to support heavy pepper varieties. Tie the main stem loosely to the stake with soft plant ties as it grows. Prune suckers (side shoots) that form in the leaf axils to direct energy to fruit production. You'll see stronger stems and more peppers when plants are properly supported.
Monitor for Pests and Adjust Care
Check plants weekly for aphids, spider mites, or hornworms—common pepper pests. Spray infested areas with neem oil or introduce ladybugs for natural control. Remove damaged leaves immediately to prevent spread. Peppers also attract birds, so cover young fruit with floating row covers if needed.
Adjust care as peppers mature: reduce watering slightly when fruit begins to swell to improve flavor, and harvest regularly to encourage more production. You'll know peppers are ready when they're firm, glossy, and fully colored. Store freshly picked peppers in a cool, dark place for up to 2 weeks to extend their shelf life.
Tips & tricks for planting with peppers
These heat-loving plants need the right conditions to thrive—here's how to give them the best start possible.
Soil Preparation: When loosening the first 3 inches of soil, don't just break it up—aim for a crumbly texture that resembles cake batter. This creates ideal air pockets for roots while allowing water to drain properly. I've found that adding a handful of perlite to the compost mix helps maintain that perfect drainage without compromising moisture retention. The goal is to mimic the loose, well-draining soil peppers naturally grow in tropical climates.
Timing and Temperature: That 65°F soil temperature threshold is non-negotiable for peppers. Use a soil thermometer to check—especially in early spring or late fall. If your soil runs cooler, consider planting in raised beds with black plastic mulch underneath. I've seen peppers planted in regular garden soil with 60°F temperatures struggle to establish roots, while those in raised beds with proper heat reached full maturity a full two weeks earlier.
Watering Wisdom: The 1 to 1.5 inches of water per week guideline can be tricky in hot climates. I recommend checking soil moisture by sticking your finger 1-2 inches deep—if it feels dry, water deeply. For container-grown peppers, you may need to water every 2-3 days instead. The key is consistent moisture without waterlogging, which is why that 3-inch mulch layer makes such a difference in conserving water while preventing evaporation.
Fertilizer Strategy: When switching to the 5-10-10 fertilizer at flowering, don't rush the transition. I've noticed peppers that get this change too early often produce more leaves than fruit. Wait until you see actual flower buds forming, then apply the fertilizer. This timing encourages stronger root development before the plant focuses on fruit production, which is when you'll see the biggest harvests.
Pro Tips for Planting With Peppers
- These heat-loving plants need the right conditions to thrive—here's how to give them the best start possible.
- Soil Preparation: When loosening the first 3 inches of soil, don't just break it up—aim for a crumbly texture that resembles cake batter.
- Timing and Temperature: That 65°F soil temperature threshold is non-negotiable for peppers.
Frequently asked questions
Got questions about planting with peppers? You’re not alone! Here are some of the most common queries—plus quick, actionable answers to help you grow a thriving garden.
When is the best time to plant peppers?
Peppers thrive in warm soil—wait until after the last frost when nighttime temps stay above 50°F (10°C). Start seeds indoors 8–12 weeks before transplanting (usually March–April in most climates). For direct sowing, aim for 2–3 weeks after the last frost when soil is at least 60°F (15°C).
Can I plant peppers with other vegetables?
Yes! Peppers love companions like basil, onions, spinach, and tomatoes (though avoid planting with fennel or brassicas, which stunt growth). Use the "Three Sisters" method—plant peppers near corn and beans for natural support and pest control. Just give them at least 12–18 inches of space to avoid competition.
What if my peppers struggle in cold weather?
Peppers are heat-lovers—if temps drop below 50°F (10°C), they’ll stop growing. Solutions:
- Use row covers or black plastic mulch to warm soil.
- Move potted peppers to a sunny windowsill or greenhouse overnight.
- Try cold-hardy varieties like ‘Carolina Wonder’ or ‘NuMex RNaky’ (tolerate brief chills).
What can I plant instead of peppers if I don’t have space?
If peppers aren’t your thing, swap them for heat-tolerant alternatives like:
- Eggplant (similar care, loves warmth)
- Tomatoes (great companions, but watch for diseases)
- Okra (drought-resistant and prolific)
- Hot sauce herbs (cilantro, Thai basil, or lemongrass for flavor without the bulk)
Why are my pepper plants wilting or turning yellow?
Common culprits:
- Underwatering (peppers need 1–1.5 inches of water weekly)
- Overwatering (root rot from soggy soil—let top inch dry out)
- Nutrient deficiency (yellow leaves? Feed with balanced fertilizer like 10-10-10)
- Pests (aphids or spider mites—spray with neem oil)
Wrapping up and next steps
Planting with peppers is a rewarding journey that brings bold flavors and vibrant colors to your garden—and your plate! 🌶️ From choosing the right varieties to mastering soil care and pest control, every step sets you up for a spicy, successful harvest.
Whether you’re a first-time gardener or a seasoned green thumb, these heat-loving tips will help you grow peppers that thrive.
Now that you’re armed with the know-how, it’s time to roll up your sleeves and get planting! Start small with a few pots or a dedicated bed, and watch your confidence—and your pepper plants—grow. Happy gardening! 🌱