Shrubs
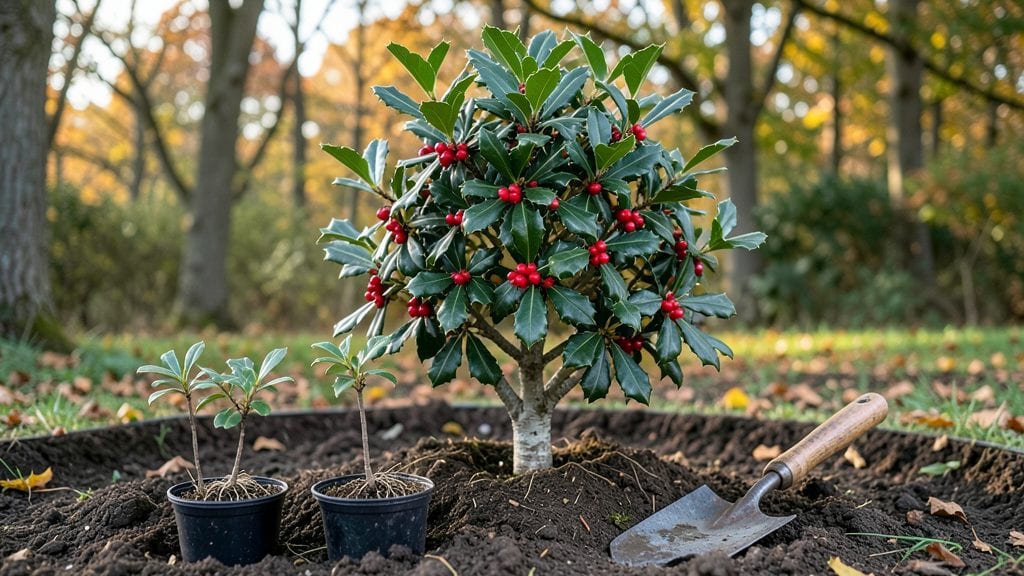
Planting holly bushes transforms your yard into a year-round green fortress—spiky, lush, and impossible to ignore. 🌿 I planted mine last October, and by spring they’d already filled in enough to block the neighbor’s nosy view.
The secret isn’t just timing; it’s picking the right spot where they’ll thrive for decades without fuss.
You’ll need a sunny or partially shaded area with well-draining soil—holly hates soggy roots. Dig holes twice as wide as the root ball and space bushes 6 to 10 feet apart depending on the variety.
Amend heavy clay with compost, and avoid planting too deep; the top of the root ball should sit just above ground level. Mulch afterward to keep moisture in and weeds out.
Water deeply right after planting, then again every 2-3 days until established. By the first winter, your holly will stand tall and glossy, ready to handle snow and wind.
The key to long-term health? A light annual feeding in early spring and pruning only to shape—never to remove more than a third of the foliage at once.
This works for both male and female bushes (you’ll need both for berries, but they’re optional). Start now, and in three years, you’ll have that coveted evergreen privacy screen that never goes out of style—or season.
📚 In This Guide
- What you need
- Instructions
- Tips and common mistakes
- Wrapping up and next steps
What you need
- ● Holly plants: 3–5 gallon containers (1–3 plants per 10 feet of space, depending on desired density). Choose Ilex opaca (American holly) or other cold-hardy varieties.
- ● Shovel or trowel: For digging holes (12–18" wide and deep). A transplant spade works best for multiple plants.
- ● Well-draining soil: Mix 1 part native soil with 1 part compost (or peat moss for sandy soil). Test pH (ideal: 5.0–6.5).
- ● Mulch: 2–3 inches of pine bark or shredded leaves (keep 6" away from stems to prevent rot).
- ● Watering can or hose: With a soaker nozzle for deep hydration.
- ● Pruning shears: Sharp, bypass-style (for clean cuts).
- ● Garden gloves: Heavy-duty to protect against thorns.
- ● Fertilizer: Slow-release acid-loving plant fertilizer (e.g., 10-10-10) or holly-specific granules (apply in early spring).
- ● Plant support: Stakes or cages (if planting in windy areas or for young, top-heavy holly varieties).
- ● Soil amendments: Sulfur (to lower pH if needed) or gypsum (for clay soil).
- ● Weed barrier fabric: Landscape fabric to suppress weeds (lay under mulch, not directly on roots).
- ● Post-hole digger: For marking planting spots in a straight line (great for privacy screens!).
Step-by-Step instructions for planting holly bushes
Here’s how to plant four holly bushes for a lush, year-round privacy screen that thrives in any climate.
🌱 Step 1: Choose the Perfect Planting Spot
Holly bushes love full sun to partial shade, so pick a location with at least 4-6 hours of sunlight daily. If your yard is shady, opt for a variety like 'Blue Princess' holly, which tolerates 3-4 hours of sun. Avoid low-lying areas where water pools—holly roots rot easily in soggy soil.
Spread your four bushes in a straight line, spacing them 6-10 feet apart for a dense screen. Use a garden hose to mark the spots before digging—this prevents overcrowding as they mature. I like to sketch a rough layout first to ensure even spacing and a natural, flowing shape.
🪴 Step 2: Dig Holes and Prepare the Soil
Dig holes twice as wide as the root ball but no deeper—holly roots prefer to sit slightly above ground level. Use the 4 cubic yards of topsoil to amend the native soil if it’s heavy clay or sandy. Mix in a 5-gallon bucket of compost per hole to boost nutrients and improve drainage.
Loosen the soil at the bottom of each hole with a garden fork to encourage root spread. Avoid compacting the soil as you backfill—holly roots need room to expand. Tap the bush gently into place once the hole is ready, ensuring the root flare (where roots meet the stem) sits just above soil level.
💧 Step 3: Plant and Water Thoroughly
Fill each hole halfway with soil, then water deeply to settle the roots. Add the remaining soil, pressing lightly around the base to eliminate air pockets. Mulch with 3 cubic feet of pine bark mulch (keeping it 2-3 inches away from the stem) to retain moisture and suppress weeds.
Water each bush with 1-2 gallons of water immediately after planting. Holly needs consistent moisture for the first 2-3 months, so check soil weekly—it should feel damp but not waterlogged. Overwatering is the fastest way to kill young holly, so resist the urge to drench it daily.
☀️ Step 4: Prune and Maintain for Full Growth
Skip pruning the first year—let the bushes establish strong roots. In spring or early summer, trim any dead or crossing branches with clean, sharp shears. Shape lightly to encourage bushiness, but avoid heavy cuts. Holly responds best to gradual shaping over time.
Fertilize once a year in early spring with 1 pound of slow-release 10-10-10 fertilizer spread evenly around the root zone. Water deeply after applying to help nutrients absorb. Holly is low-maintenance, but a little extra care ensures vibrant foliage and those prized red berries by winter.
⏰ Step 5: Monitor and Adjust for Long-Term Success
Watch for signs of stress like yellowing leaves or stunted growth—these often mean the soil is too dry or compacted. Holly thrives in well-draining soil with a pH of 5.0-6.5. If your soil is too alkaline, amend with sulfur or peat moss to lower the pH over time.
By year 3, your holly screen should fill in beautifully. Prune lightly each spring to maintain shape and remove any suckers at the base. With proper care, these bushes will provide privacy, color, and structure for decades—no other plant gives you that much year-round impact.
Tips & tricks for planting holly bushes
A few small details can make all the difference between a thriving holly screen and one that struggles. Here's what I've learned after planting my own.
The Sunlight Secret: In Step 1, pay close attention to the 4-6 hours of sun requirement. If your yard has afternoon shade, that's perfect—holly handles heat better than harsh morning sun. I planted mine facing west and noticed the leaves stayed greener longer in summer. For shady spots, 'Blue Princess' is your best bet, but even it needs those 3-4 hours to produce berries.
Root Ball Handling: When you're digging holes in Step 2, don't remove the bushes from their containers until you're ready to plant. The root ball stays intact this way, preventing root damage. Gently squeeze the sides of the container to encourage roots to spread into the new hole. I've seen people rip out the root ball completely—this is a common mistake that sets back growth for months.
Watering Wisdom: The 2-3 months of consistent moisture in Step 3 is non-negotiable, but how you water matters. Instead of drenching daily, I use a soaker hose for 10-15 minutes every other day. This keeps the soil evenly moist without waterlogging. Check the soil 1 inch down—it should feel like a damp sponge, not a swamp.
Mulch Placement: That 3 cubic feet of pine bark mulch in Step 3 needs precise placement. Keep it 2-3 inches away from the stem to prevent rot. I like to create a donut shape around each bush, wider at the base and tapering toward the center. This protects the roots while keeping the stem dry. Over-mulching is just as bad as under-mulching for holly.
Pro Tips for Planting Holly Bushes
- A few small details can make all the difference between a thriving holly screen and one that struggles.
- The Sunlight Secret: In Step 1, pay close attention to the 4-6 hours of sun requirement.
- Root Ball Handling: When you're digging holes in Step 2, don't remove the bushes from their containers until you're ready to plant.
Frequently asked questions
Got questions about growing your own holly privacy screen? Here are some of the most common queries—and answers—to help you get started with confidence!
When is the best time to plant holly bushes?
The ideal time to plant holly bushes is in early spring or early fall. These seasons provide mild temperatures and consistent moisture, giving young roots a strong start. Avoid planting during extreme heat or frost, as these conditions can stress the plant.
How far apart should I space holly bushes for a privacy screen?
For a dense, lush privacy screen, plant holly bushes 3 to 5 feet apart. If you’re using them as a hedge along a fence or wall, spacing them 2 to 3 feet apart will encourage faster growth and a tighter barrier. Give them room to grow—holly bushes can reach 10 to 15 feet tall and wide over time!
Do holly bushes need full sun, or can they grow in shade?
Holly bushes thrive in partial shade to full sun, but their tolerance depends on the variety. Most hollies prefer at least 4 to 6 hours of sunlight daily for optimal berry production and growth. If planting in shady spots, choose varieties like Ilex × 'Nellie R. Stevens', which adapt well to lower light conditions.
Why aren’t my holly bushes producing berries?
Holly berries require both male and female plants to pollinate. If you only have female bushes, you won’t see berries! Plant at least one male holly bush for every 5 to 9 female bushes to ensure pollination. Also, ensure your bushes get enough sunlight and aren’t over-fertilized with high-nitrogen feeds, which can reduce berry production.
How do I protect holly bushes from pests like spider mites or scale insects?
Holly bushes are generally pest-resistant, but spider mites and scale can still be an issue, especially in dry conditions. Keep plants well-watered and spray them with a strong jet of water to dislodge pests. For severe infestations, use neem oil or insecticidal soap. Prune affected branches promptly to prevent spread.
Can I plant holly bushes in containers instead of the ground?
Yes! Holly bushes can thrive in large containers (at least 15-20 gallons) if given proper care. Use well-draining soil and ensure the pot has drainage holes. Container-grown hollies may need more frequent watering and fertilizing, especially during hot summers. Just be mindful that they may grow slower and require pruning to control size.
Wrapping up and next steps
Planting holly bushes is a rewarding way to add year-round beauty, privacy, and wildlife appeal to your landscape! 🌿 With the right soil, spacing, and care, these evergreens will thrive for decades—offering vibrant berries, glossy leaves, and a lush screen in all three seasons.
Whether you’re a beginner or a seasoned gardener, now’s the perfect time to roll up your sleeves and transform your outdoor space.
Ready to get started? Pick your holly varieties, grab your tools, and plant with confidence! For extra success, check local planting guides or consult a nursery pro to match your climate and sunlight needs. Happy gardening—your future privacy screen is waiting! 🌱