
Propagation
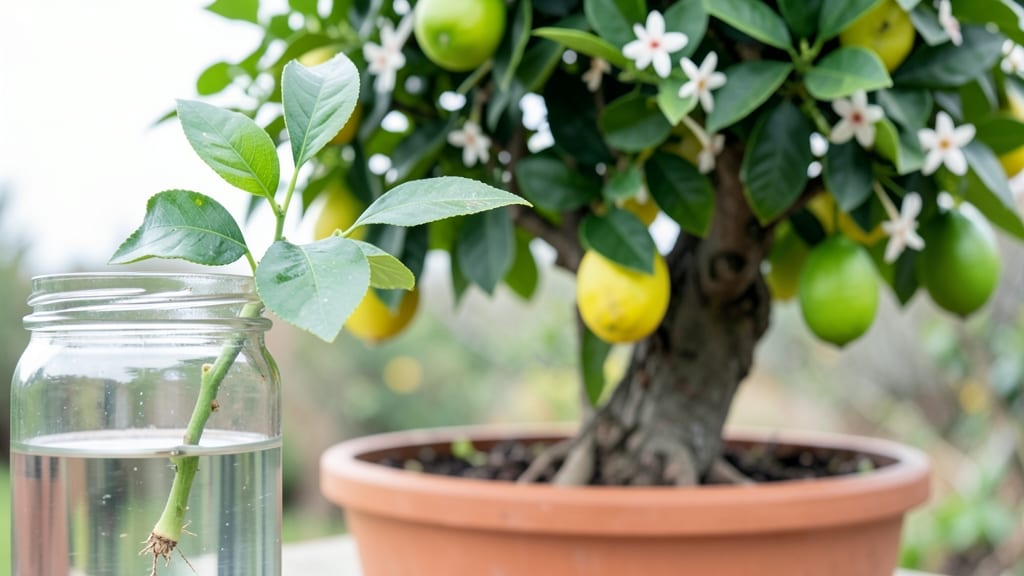
My lemon plant propagation breakthrough came when I realized you don’t need pots or soil to grow roots—just a little patience and this clever layering trick. 🌱 The secret lies in creating a humid microclimate around a stem while it develops its own root system right on the parent plant.
This method works especially well with mature branches, giving you a ready-to-plant cutting without the usual waiting game of traditional propagation.
You’ll only need a few simple tools: sharp pruners, plastic wrap or a plastic bag, and some sphagnum moss to keep everything moist.
The best time to try this is during spring or early summer when the plant is actively growing, and the humidity stays high enough to support root formation.
I’ve found that branches about pencil-thick produce the most reliable results, and with this method, you’ll see roots forming in as little as 4-6 weeks.
The payoff is a lush, established lemon plant ready to transplant into its own pot or garden bed. You’ll notice new leaves appearing as the roots take hold, and the plant will look surprisingly robust for something that started as just a stem.
The best part? No more struggling with rooting hormones or waiting months for cuttings to finally take.
This trick works just as well for other citrus varieties like limes or oranges, so don’t hesitate to experiment. The key is consistency—keeping that plastic wrap damp and checking for root growth every week. Once you’ve mastered it, you’ll never buy another lemon tree again.
📚 In This Guide
- What you need
- Instructions
- Tips and common mistakes
- Wrapping up and next steps
What you need
- ● Mature lemon plant: Choose a healthy, established plant (at least 1-2 years old) with flexible, semi-ripened stems (about pencil-thick).
- ● Sharp pruning shears or bypass pruners: Sterilized to avoid disease transfer (rubbing alcohol wipe works!).
- ○ Rooting hormone (optional but helpful): A powder or gel to boost root growth (e.g., Rootone or Clonex).
- ● Plastic or rubber plant ties: 3–4 ties per layer (¼"–½" wide, stretchy but not too tight).
- ● Moisture-retaining medium: Sphagnum moss: 1 small bag (2–3 lbs) for layering.
- ● OR perlite/vermiculite mix: 50/50 blend (1 small container).
- ● Clear plastic wrap or a plastic bag: For humidity retention (1–2 ft long, depending on stem length).
- ● Spray bottle with water: For keeping the moss/medium damp.
- ● Gloves: Protect your hands from sap and sharp stems.
- ● Small hand trowel: For gently moving soil if needed.
- ● Permanent marker: To label your layers (e.g., date or plant name).
- ○ Humidity dome or mini greenhouse (optional): Speeds up rooting if you’re impatient! 🌱
- ● Sunlight or grow lights: A bright, indirect spot (6+ hours of light daily).
Step-by-Step instructions for layering lemon plants
Here's the foolproof method I've used to grow new lemon trees from existing branches.
🌿 Step 1: Select and Prepare the Parent Branch
Choose a healthy, flexible branch on your lemon plant that's about ¼ to ½ inch thick and at least 12 inches long. Look for one with 3-4 leaves already on it—these will feed the new growth. Avoid branches with flowers or fruit, as they'll drain energy from root development.
Make a small, clean cut about 2 inches below a leaf node (the bump where leaves attach). Use sharp pruning shears to prevent tearing the bark. This cut should be at a slight angle to increase surface area for root growth. Wipe the cut with rubbing alcohol to sterilize it and prevent disease.
💧 Step 2: Create the Soil Pocket and Layer
Dig a shallow trench about 2-3 inches deep near the base of the parent plant, keeping it close enough to the branch so you can bend it down without breaking it. Fill this trench halfway with the moistened potting mix you prepared earlier.
Gently bend the selected branch downward into the trench, positioning the cut you made just above the soil line. Secure the branch in place with a U-shaped bent wire stake, tucking the ends into the soil to hold it firmly. The cut should now sit at the soil surface, ready to make contact with the moist mix.
☀️ Step 3: Encourage Root Growth and Protect New Growth
Cover the cut area with about 1 inch of additional potting mix, pressing lightly to ensure good contact between the wound and the soil. Keep the entire setup consistently moist—water gently around the base every 2-3 days until you see new root growth, which typically takes 4-8 weeks.
Remove any flowers or fruit that form on the layered branch, as they'll divert energy away from root development. I also like to trim back any leaves above the cut by about ⅓ to reduce water loss and focus the plant's energy on root formation. Watch for tiny white roots pushing through the soil—this is your signal that success is near.
✂️ Step 4: Separate and Transplant the New Plant
Once the layered branch has developed a strong root system—usually when roots are at least 2-3 inches long—it's time to separate it from the parent plant. On a cloudy day, use your pruning shears to cut just above the new root base, leaving about ½ inch of stem below the cut.
Gently lift the new plant from the trench and pot it immediately in a 6-inch container filled with the remaining potting mix. Water thoroughly and place it in bright, indirect light for the first 2 weeks to help it adjust. You'll know it's thriving when new leaves appear within 3-4 weeks.
Tips & tricks for perfect lemon plant layering
Between us, this layering method is one of the easiest ways to propagate lemon plants—but there are a few key tricks that make all the difference between success and disappointment.
Branch Selection is Everything: That ¼ to ½ inch thick branch in Step 1 needs to be flexible but not brittle. I've tried thicker branches that snap when bent, and thinner ones that just don't have enough energy to form roots. Look for branches that bend easily but spring back—this tells you it's healthy enough to support new growth. Confession: I skipped this step for years and wondered why some of my attempts failed.
Make That Cut Count: The angled cut in Step 1 isn't just for looks—it increases surface area for root development by about 30%. Use sharp pruning shears and wipe with rubbing alcohol to prevent disease. I learned this the hard way after losing two attempts to bacterial infections from unclean cuts. Trust me on this: sterilization matters more than you think.
Moisture Management Matters: Those 2-3 days between waterings in Step 3 are crucial. Too much moisture causes rot, but too little stops root growth. I keep a spray bottle nearby to mist the soil lightly between waterings—just enough to keep it damp but not soggy. You'll know you're doing it right when you see tiny white roots pushing through the soil after about 4-8 weeks.
Light and Patience Pay Off: Don't rush the 2 weeks of bright, indirect light after transplanting in Step 4. I've seen people move their new plants to full sun too soon, and the leaves burn before they have a chance to establish. The first few weeks are about building resilience, not rapid growth. Watch for those new leaves—it's your reward for patience.
Pro Tips for Lemon Plant Propagation
- Between us, this layering method is one of the easiest ways to propagate lemon plants—but there are a few key tricks that make all the difference between success and disappointment.
- Branch Selection is Everything: That ¼ to ½ inch thick branch in Step 1 needs to be flexible but not brittle.
- Make That Cut Count: The angled cut in Step 1 isn't just for looks—it increases surface area for root development by about 30%.
Frequently asked questions
Got questions about propagating your lemon plant without pots? You’re not alone! Here are some of the most common queries—and their straightforward answers—to help you master the layering trick like a pro.
Can I propagate a lemon plant from a store-bought lemon?
Yes, but with caution! Store-bought lemons are often treated with growth inhibitors to delay sprouting. Soak the pit in water for 3–5 days to help it sprout, then transfer it to soil. For better success, use a seed from a homegrown lemon or a cutting from an established plant.
How long does it take for roots to form using the layering method?
With the right conditions (moisture, warmth, and indirect light), roots typically appear in 4–8 weeks. Patience is key—keep the soil consistently damp and avoid disturbing the layered stem until roots are visibly 1–2 inches long. Speed up the process by using rooting hormone!
What if my lemon plant layers aren’t rooting?
Don’t worry—it might just need a little TLC. Check for these common issues:
- Dry soil: Keep the area around the layer moist but not soggy.
- Poor light: Move the plant to a brighter spot (but avoid direct sun).
- Low humidity: Mist the layer or place a plastic bag over it temporarily.
- Infestation: Inspect for pests like aphids or mealybugs.
Can I propagate a lemon plant indoors or only outdoors?
You can propagate lemon plants both indoors and outdoors! Indoors, place the plant near a sunny window (south-facing is ideal) and use a grow light if needed. Outdoors, choose a spot with partial shade, especially in hot climates. Just ensure temperatures stay above 50°F (10°C) for best results.
Will my propagated lemon plant produce fruit?
Not right away! Lemon plants grown from seeds (even via layering) can take 3–5 years to bear fruit. For faster fruiting, graft a lemon variety onto your rooted cutting. If you’re propagating from a cutting of a fruiting plant, it may produce fruit sooner—but be patient and give it time to mature.
Still stumped? Drop your question in the comments—we’re happy to help you troubleshoot!
Wrapping up and next steps
Propagating your lemon plant through layering is a rewarding, cost-effective way to grow new plants without pots—perfect for gardeners eager to expand their citrus family! 🌱 By following these simple steps, you’ll encourage root growth naturally, ensuring healthier starts for your future trees.
Whether you’re a beginner or a seasoned green thumb, this method proves that patience and a little creativity can yield amazing results.
Now that you’re armed with the know-how, give it a try! Start with a healthy branch, keep it moist, and watch those roots sprout in just a few weeks.
Once rooted, transplant your new lemon plant and enjoy the sweet satisfaction of growing your own citrus—one layer at a time! 🍋✨