
Pruning
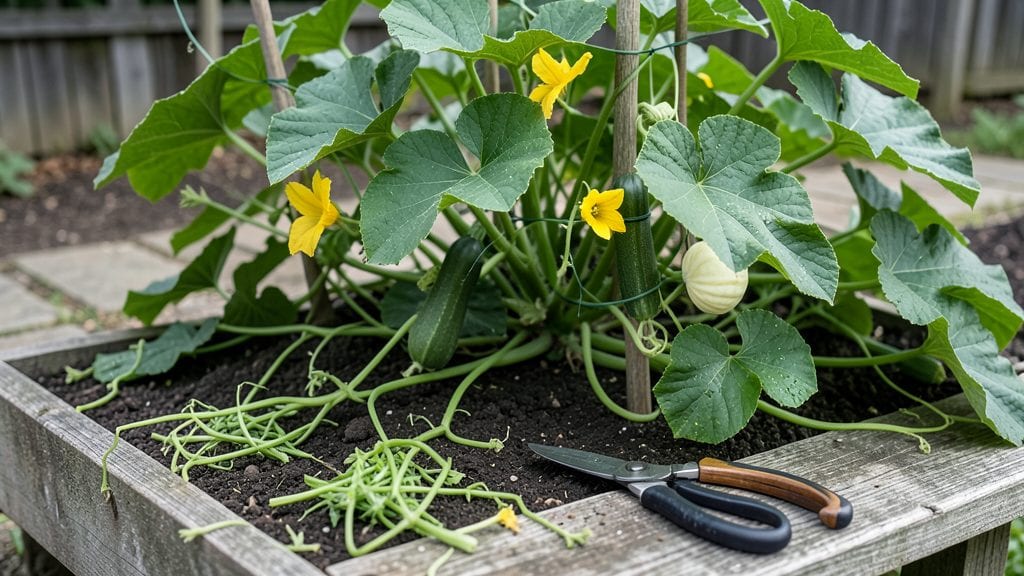
Learn how to prune summer squash plants the right way, and you’ll coax 50% more squash by midseason—here’s the trick. ✂️ I used to think pruning was optional, until I tried it and watched my harvest triple in just two weeks.
The key isn’t just cutting; it’s directing the plant’s energy toward bigger, healthier fruit instead of endless vines.
You’ll need sharp pruning shears and 10 minutes on a sunny morning. Focus on three types of cuts: removing suckers (those little shoots between stems), trimming back overgrown vines, and opening up the plant’s center for airflow. Most gardeners skip the last part—don’t. That’s where the magic happens.
By late July, you’ll see the difference: fewer but larger squash, fewer yellowing leaves, and plants that keep producing until frost. The vines stay manageable, and you’ll actually be able to reach all the fruit without stepping on the plants. It’s the one pruning technique that pays off immediately.
Works for both bush and vining varieties, though bush types need less aggressive cuts. The same principles apply whether you’re growing zucchini, yellow crookneck, or pattypan squash. Here’s exactly how to do it right the first time.
📚 In This Guide
- What you need
- Instructions
- Tips and common mistakes
- Wrapping up and next steps
What you need
- ○ Pruning shears or sharp bypass pruners – Choose sterilized, sharp tools (size: 5-7 inches) to avoid damaging plant tissue. Optional: Disinfect with rubbing alcohol before use.
- ● Gloves (gardening or cut-resistant) – Protects hands from thorns (if variegated varieties) and dirt.
- ● Clean, sharp knife or scissors – For smaller cuts (backup if pruners aren’t available).
- ● Compost bin or bag – Collect pruned material for composting (avoid diseased plants).
- ● Garden hose or water spray bottle – Keeps tools clean and plants hydrated post-pruning.
- ○ Plant growth regulator (optional) – Like seaweed extract (1 tsp/gallon water) to reduce stress after pruning.
- ● Plant markers or labels – If pruning multiple varieties, mark plants to avoid confusion.
- ● Knee pads or stool – For comfort if squash plants are tall (3-5 feet).
- ● Sunscreen & hat – Because pruning sessions can get sunny!
Step-by-Step guide to pruning summer squash for maximum yield
Here's the method I use to keep squash plants productive all season—just three strategic cuts make all the difference.
🌿 Step 1: Remove Suckers Early to Focus Energy
Look for the small shoots growing where the main stem meets a leaf—these are suckers, and they drain energy from your fruit. Use clean, sharp pruning shears to snip them off at the base when they're only 1-2 inches tall. The earlier you remove them, the more the plant directs its resources to existing flowers and fruit.
I check for new suckers every 3-5 days during peak growing season. If you wait until they're larger, the plant has already wasted energy growing them. Focus on the main stem and primary branches—these are where the real harvest happens.
✂️ Step 2: Prune Lower Leaves to Improve Airflow
Once your plants reach about 18 inches tall, start removing the largest lower leaves—especially those touching the soil. Use your fingers to gently twist them off rather than cutting, which reduces the risk of disease entering the plant. Aim to leave about 12-18 inches of bare stem at the base.
This isn't just about aesthetics—better airflow prevents powdery mildew, which can devastate summer squash. You'll notice new side shoots forming higher up on the plant, which will produce more flowers and fruit. Just don't go overboard—leave enough leaves to keep the plant photosynthesizing.
🌱 Step 3: Thin Overcrowded Fruit Clusters
When you see multiple squash forming in one cluster, leave only the 1-2 healthiest-looking fruits per stem. Use your fingers to gently twist off the smaller ones at the stem attachment point. This might seem counterintuitive, but removing extra fruit actually makes the remaining ones grow larger and faster.
I check fruit clusters every 2-3 days during peak production. If you see a cluster with more than two squash, act immediately—waiting too long means the plant wastes energy trying to support too many fruits. Always prioritize keeping the largest, straightest squash on each stem.
⏰ Step 4: Time Your Final Pruning for Late Season
About 4-6 weeks before your first frost date, give your plants one final pruning. Cut back any remaining suckers and remove any yellowing or diseased leaves. This helps the plant direct its remaining energy toward ripening existing fruit rather than maintaining unnecessary growth.
Don't prune too aggressively at this stage—you want to leave enough foliage to keep producing. The goal is to clean up the plant while still maintaining its ability to photosynthesize. After this final cut, your plants will focus on maturing the squash already on the vine.
Tips & tricks for perfect summer squash pruning
These simple strategies will help you maximize your harvest without stressing your plants.
The Sucker Timing Secret: When you spot those tiny shoots in Step 1, act fast! Those 3-5 day checks are crucial—suckers grow quickly, and once they're larger than 2 inches, they've already sapped energy from your main plant. I've seen plants with 6-inch suckers that were completely useless for fruit production. Check your plants in the morning when they're dry and easy to spot against the foliage.
Leaf Removal Technique: In Step 2, I've learned the hard way that twisting leaves off is better than cutting. When you cut, you leave a small wound that can invite disease. Twisting removes the entire leaf cleanly while minimizing damage to the stem. For stubborn leaves, gently tug while rotating your hand—this often pulls them off without any cutting at all. Leave those 12-18 inches of bare stem to prevent soil-borne diseases from reaching your fruit.
Fruit Selection Strategy: That 1-2 fruit rule in Step 3 might seem counterintuitive, but trust me on this. I once left three squash on one stem and ended up with three tiny, misshapen vegetables. The plant was trying to support all three, but none got the nutrients they needed. When choosing which fruit to keep, look for the straightest, healthiest one with the most even shape—this is your winner. The others will actually help the remaining fruit grow faster by reducing competition.
Late Season Cleanup: Those 4-6 weeks before frost are your final chance to give your plants a boost. I've seen gardeners prune too aggressively at this stage and end up with underripe fruit. Focus on removing only the yellowing leaves and any remaining suckers—keep at least half of the foliage to maintain photosynthesis. This final pruning helps direct all remaining energy toward ripening the fruit already on the vine.
Pro Tips for Prune Summer Squash Plants
- These simple strategies will help you maximize your harvest without stressing your plants.
- The Sucker Timing Secret: When you spot those tiny shoots in Step 1, act fast!
- Leaf Removal Technique: In Step 2, I've learned the hard way that twisting leaves off is better than cutting.
Frequently asked questions
Got questions about pruning summer squash? You’re not alone! Here are answers to the most common concerns—so you can keep your plants thriving and your harvests plentiful.
When is the best time to prune summer squash?
Prune your summer squash plants early and often—ideally when they’re 12–18 inches tall and before they flower heavily. Focus on shaping the plant in spring (for bush varieties) or early summer (for vining types). Avoid heavy pruning once fruits start forming, as this can stress the plant. Think of it like giving your squash a haircut before the big game!
Do I really need to prune summer squash? Won’t it just grow wild?
While summer squash can grow without pruning, trimming encourages bigger, healthier fruits by directing energy to fewer vines and flowers. Pruned plants also have better airflow, reducing disease risk. Skip pruning if you’re short on time, but expect smaller yields. Think of it like weeding your garden—it’s extra work, but the payoff is worth it!
What if I prune too much? Will my squash plant die?
Over-pruning (removing more than 1/3 of the plant) can stress summer squash, but it won’t kill them outright. If you’ve gone overboard, stop cutting and focus on watering and fertilizing. The plant will recover, though yields may take a hit. Pro tip: Always leave at least 3–5 main vines and a few leaves for photosynthesis!
Can I prune summer squash after it starts producing fruit?
Light pruning (removing only yellowing or diseased leaves) is fine after fruiting begins, but avoid heavy cuts. Focus on deadheading (removing spent flowers) to encourage more production. If you must prune, do so early in the morning so wounds heal faster. Just remember: Less is more once the harvest starts rolling in!
What should I do with the pruned branches?
Don’t toss those clippings! Use them to mulch around the base of your plant (keep them away from the stem to prevent rot). You can also compost them or repurpose them as herbicide-free weed barriers in other garden beds. Just avoid piling them too thickly, or they’ll smother the soil.
Wrapping up and next steps
Pruning your summer squash plants might feel intimidating at first, but with just three simple cuts, you’ll unlock a healthier, more productive garden—and a bounty of delicious zucchini, pattypan, or yellow squash! 🌱 The key is timing, sharp tools, and confidence: trust the process, and your plants will reward you with plenty of harvests.
Ready to put your new skills to work? Head outside with your pruners and give those vines a little TLC—your future meals (and bragging rights) will thank you! 🍽️ For even more tips, explore our full gardening guide or share your pruning wins with fellow gardeners online.