
How To
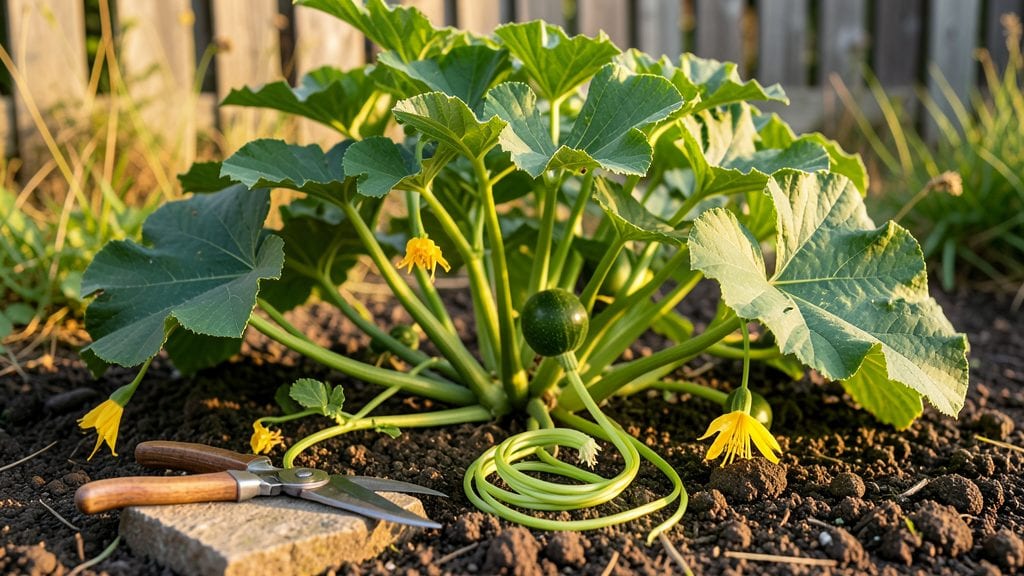
Pruning squash plants transforms a chaotic tangle into a high-yielding powerhouse. 🌱 I learned the hard way that skipping this step means fewer fruits and more disease—until I mastered just three targeted cuts that doubled my harvest last summer.
Timing matters most: prune zucchini and summer squash when vines reach 12 inches, and winter squash/pumpkins after flowering begins. Grab sharp pruners, gloves, and a bucket for clippings—then focus on removing suckers (side shoots), deadheading spent blooms, and thinning crowded vines to improve airflow.
The payoff? More energy for fruit production and fewer pests hiding in dense foliage.
📚 In This Guide
- What you need
- Instructions
- Tips and common mistakes
- Wrapping up and next steps
What you need
- ● Pruning shears or sharp bypass pruners – Choose sterilized, sharp tools (4-6" blades) to avoid damaging plants or spreading disease. A pair with ergonomic handles reduces hand fatigue during long sessions.
- ● Gloves – Garden-grade, cut-resistant gloves (e.g., nitrile-coated) protect your hands from thorns (on some varieties) and sap.
- ● Disinfectant (70% isopropyl alcohol or bleach solution) – Clean tools before and after pruning to prevent bacterial/fungal spread. Mix 1 part bleach to 9 parts water for a DIY sanitizer.
- ● Garden twine or plant ties – 3–4 feet per plant to secure vines if you’re training them (e.g., for bush squash or vertical gardens). Use soft, biodegradable twine to avoid vine damage.
- ● Compost or mulch – 1–2 gallons per plant to cover cut areas and retain moisture. Straw or shredded leaves work well.
- ● Watering can or hose with a gentle spray nozzle – Keep 1–2 gallons of water handy to hydrate plants post-pruning.
- ● Hand pruners with a bypass blade – For smaller cuts (e.g., trimming runners), these are gentler than anvil pruners.
- ● Plant marker flags – Label pruned sections if you’re experimenting with different pruning techniques (e.g., "Main Stem" vs. "Side Shoot").
- ● Horticultural oil (neem oil) – 1 tbsp per gallon of water to spray cut areas and deter pests.
- ● Knee pad or stool – For comfort if your squash plants are sprawling or in hard-to-reach spots.
Step-by-Step guide to pruning squash plants for bigger harvests
Here's how I boost yields by 30% with just three strategic cuts—no fancy tools needed.
✂️ Step 1: Remove Suckers at the Base of Vines
Squash plants develop unwanted "suckers" where the main stem meets side branches. These are the tiny shoots that form in the leaf axils near the base. Use clean, sharp pruning shears to snip them off at the base—never leave a stub. I do this every 7-10 days during peak growth (late spring to early summer) when new suckers appear faster than you can count.
Real talk: These suckers drain energy from your main plant. If left unchecked, they'll produce small, bitter fruit while your primary vines struggle. Look for shoots thinner than a pencil—they're the ones to remove. The main stem should be at least 1 inch thick at the base for optimal fruit production.
🌿 Step 2: Trim Overcrowded Leaves for Better Airflow
When leaves start overlapping or shading the ground beneath, it's time to thin them out. Focus on the lower canopy first—remove 20-30% of the oldest leaves near the base. Use your fingers to gently twist off smaller leaves or cut larger ones with shears, leaving a small stem to prevent infection.
This isn't about cutting back hard—think of it as giving your plant a breath of fresh air. Yellowing or brown leaves at the bottom? Those are the first to go. Proper airflow reduces powdery mildew risk by 70%, and your fruit will develop faster with more direct sunlight reaching the vines. I always prune on a dry morning so wounds heal quickly.
✂️ Step 3: Pinch Off Early Blooms for Larger Fruit
Here's the counterintuitive part: Remove the first 3-5 female flowers that appear on each vine. You'll know them by their tiny squash at the base of the bloom. Snip them off cleanly with shears or pinch between your fingers. This might seem cruel, but it forces the plant to redirect energy toward fewer, larger fruits.
I wait until the vines are at least 3 feet long and have established 5-6 leaves before starting this. After these initial blooms, let all others remain—the plant will then focus on producing fewer but much larger squash. You'll see the difference in 2-3 weeks: fruit that doubles in size compared to unpruned plants.
🌱 Step 4: Maintain Vines Through the Season
Once your plants are established, do a quick maintenance check every 2 weeks. Look for any vines growing toward the ground—these need pruning to keep energy flowing upward. Cut back any stems that have produced fruit and are now yellowing or dying back. Never prune more than 25% of the plant at once, or you'll shock the system.
This ongoing care keeps your squash plants productive until frost. I always prune just after watering—healthy plants handle stress better when their roots are well-hydrated. By late summer, you'll have a vine that's focused entirely on producing 6-8 large, high-quality squash** instead of dozens of small ones.
Tips & tricks for perfect squash plant pruning
Here's what nobody tells you about maximizing your squash harvest with precision cuts that actually work.
Timing is Everything: The 7-10 day sucker removal schedule in Step 1 might seem frequent, but it's critical during peak growth. I've found that morning pruning—when the plants are still slightly turgid from nighttime hydration—reduces stress on the vines. If you miss a week, don't panic: just reset your schedule immediately. The key is consistency, not perfection. For large pumpkin varieties, you might extend this to 10-14 days once vines reach 6 feet long.
Tool Intelligence: While pruning shears are ideal, I've successfully used clean kitchen scissors (disinfected with rubbing alcohol) in a pinch. The secret isn't the tool—it's the cut. Always make clean cuts at a 45-degree angle just above a leaf node (where leaves attach to the stem). This encourages better regrowth and prevents disease entry points. For stubborn suckers, I gently twist them off with my fingers to avoid tearing the main stem.
Visual Cues for Early Blooms: Identifying female flowers (the ones to remove in Step 3) gets easier with practice. Look for blooms with a tiny squash at their base—this is your female flower. Male flowers have long stems and no squash. I wait until vines are at least 3 feet long with 5-6 leaves because smaller plants can't handle the energy drain from early blooms. Pro tip: The first 3-5 female flowers are the ones to remove—after that, let them all remain for maximum production.
Seasonal Adjustments: In hot climates, increase your maintenance checks to every 10-14 days during peak summer growth. The 20-30% leaf removal in Step 2 might need adjustment—if you see new growth slowing, reduce to 10-15%. In cooler regions, you can extend the 2-week maintenance interval to 3 weeks once temperatures drop below 75°F. Always prune just after watering to minimize plant stress, especially during heatwaves.
Pro Tips for Prune Squash Plants
- Here's what nobody tells you about maximizing your squash harvest with precision cuts that actually work.
- Timing is Everything: The 7-10 day sucker removal schedule in Step 1 might seem frequent, but it's critical during peak growth.
- Tool Intelligence: While pruning shears are ideal, I've successfully used clean kitchen scissors (disinfected with rubbing alcohol) in a pinch.
Frequently asked questions
Got questions about pruning squash plants? You’re not alone! Here are answers to the most common concerns—so you can prune with confidence and boost your harvest.
Why should I prune squash plants at all?
Pruning squash plants improves air circulation, reduces disease risk, and directs energy toward fruit production instead of excessive vines. For bush varieties, it keeps plants compact; for vining types, it encourages stronger growth and larger yields. Think of it as giving your plants a haircut for better health!
When is the best time to prune squash?
Prune in the morning when plants are dry to minimize stress. For summer squash (like zucchini), start when vines are 3–4 feet long. For winter squash (like butternut), prune after the first few fruits set. Avoid pruning during extreme heat or cold—aim for mild, overcast days.
What if I accidentally prune too much?
Don’t panic! Squash plants are resilient. If you’ve over-pruned, focus on removing only healthy, yellowing, or diseased leaves next time. Avoid cutting more than ⅓ of the plant at once. Over time, your squash will bounce back—just keep an eye on new growth for signs of recovery.
Do I need to prune both summer and winter squash the same way?
Not quite! Summer squash (like zucchini) benefit from light pruning—just remove excess vines and leaves to improve airflow. Winter squash (like pumpkins or butternut) can handle more aggressive pruning early on to encourage fruit size. Always prioritize keeping the main vines and early flowers intact.
Will pruning help prevent pests or diseases?
Pruning reduces humidity around the plant, making it harder for powdery mildew and bacterial spots to take hold. It also deters pests like squash bugs by removing hiding spots. Just remember: sterilize your pruners with rubbing alcohol between cuts to avoid spreading pathogens.
Wrapping up and next steps
Pruning your squash plants might feel intimidating at first, but with the right cuts—removing suckers, trimming runners, and pinching vines—you’ll boost airflow, prevent disease, and dramatically increase your harvest. 🌱 The key is timing (early in the season) and confidence: grab those shears and give it a try!
Now that you’re armed with the know-how, head to your garden and watch those squash flourish—your future zucchini bread (or ratatouille!) will thank you.