
Companion Plants
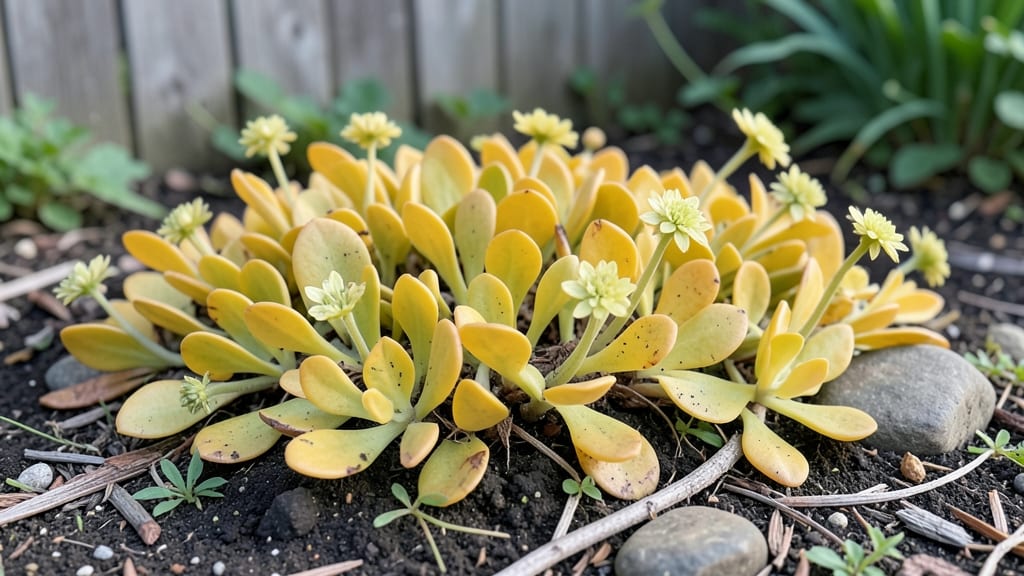
Your gravel garden can look like a designer’s dream with the right drought-resistant plants. ✨ I’ve transformed my own dry, rocky patch into a thriving, low-maintenance oasis by choosing plants that love heat, hate humidity, and thrive in sharp-edged gravel.
The key isn’t just picking the right species—it’s pairing them with the right gravel texture and color to create a cohesive, high-impact look.
The best gravel garden plants—like sedum, lavender, and ornamental grasses—need almost no water once established. They spread slowly, so you’ll spend less time weeding and more time admiring their silvery foliage, purple blooms, and airy textures.
A 3-inch layer of gravel keeps roots cool, suppresses weeds, and lets rainwater drain right through, which is exactly what these tough plants want.
By the end of summer, your gravel garden will burst with color and movement, all while using half the water of a traditional bed. The gravel reflects light, making plants look brighter, and the sharp lines create a modern, polished look that’s easier to maintain than mulch.
Plus, you’ll never dig through soggy soil again—just rake and rearrange as needed.
Works for sunny slopes, modern courtyards, or even container gardens with the right gravel-to-plant ratio. Let’s pick the perfect plants for your space and style.
📚 In This Guide
- What you need
- Instructions
- Tips and common mistakes
- Wrapping up and next steps
What you need
- ● Gravel: 3–4 inches of pea gravel, decomposed granite, or small river rocks (1–2 tons per 100 sq. ft., depending on depth). Choose a color that complements your garden’s aesthetic!
- ● Landscape Fabric: A permeable, weed-blocking fabric (e.g., 3–4 oz. polypropylene) to prevent weeds while allowing water drainage.
- ● Companion Plants: Drought-tolerant species like sedum, lavender, yarrow, or ornamental grasses (check local climate zones for best fits!).
- ○ Soil Amendments (Optional): A slow-release fertilizer or compost (1–2 inches mixed into soil) to boost plant health.
- ○ Mulch (Optional): Coarse bark or straw mulch (1–2 inches) around plants to retain moisture.
- ● Shovel & Rake: For digging and leveling the base.
- ● Wheelbarrow: To haul gravel and soil amendments.
- ● Garden Gloves: Protect your hands while working!
- ● Measuring Tape & String Line: For marking out your garden layout.
- ● Hose with Nozzle or Watering Can: For initial watering (especially if planting in dry conditions).
- ● A sunny or partially shaded spot (most gravel garden plants thrive in full sun).
- ● Well-draining soil (amend heavy clay with sand if needed).
- ● Access to water for the first few weeks (until plants establish roots).
- ● Patience! Gravel gardens mature over time—resist the urge to overwater or over-plant.
Step-by-Step guide to designing a thriving gravel garden
Here’s how to create a stunning, low-maintenance gravel garden that thrives with minimal water and care.
🌱 Step 1: Choose the Right Drought-Tolerant Plants
Select plants that naturally thrive in dry, well-draining conditions. Sedum, lavender, and Russian sage are excellent choices—they store water in their leaves and stems, making them perfect for gravel gardens. I always pick plants with silvery or gray foliage, like lamb’s ear or artemisia, because their color contrasts beautifully with the gravel while reflecting sunlight to reduce heat stress.
Look for plants labeled as "xeric" or "arid-adapted" at your local nursery. Avoid anything that requires frequent watering, like ferns or hostas. You’ll know you’ve chosen wisely when the plants have small, leathery leaves or fine textures that minimize water loss.
🪴 Step 2: Prepare the Soil and Gravel Base
Start by clearing the area of weeds and rocks, then loosen the soil to a depth of 6 inches to improve drainage. Mix in 1-2 inches of coarse sand or perlite into the top 4 inches of soil to create a fast-draining layer. This prevents water from pooling around roots, which is critical in gravel gardens.
Spread a 2-3 inch layer of gravel over the soil, leaving space between plants for their mature size. Use rounded pebbles or decomposed granite—they look natural and allow water to drain through easily. Press the gravel lightly into place to keep it from shifting with wind or foot traffic.
☀️ Step 3: Plant with Proper Spacing and Mulch Strategically
Dig holes just deep enough to accommodate the root balls of your plants, then place them in the gravel, spacing them 12-18 inches apart depending on their mature size. Water each plant deeply right after planting to settle the soil and encourage root growth. The gravel will help retain some moisture near the roots while keeping the soil underneath dry.
Add a 1-inch layer of organic mulch, like bark chips, around each plant but keep it 3-4 inches away from the stems to prevent rot. This mulch layer helps regulate soil temperature and reduces evaporation, giving your plants a better chance to establish themselves in the dry environment.
💧 Step 4: Water Deeply but Infrequently
Water your gravel garden once a week during the first month to help roots establish, then taper off to every 2-3 weeks once plants are mature. The key is to water deeply—1 inch of water per session—so the moisture reaches the roots without pooling on the surface. You’ll know you’ve watered enough when the soil 1-2 inches below the gravel feels damp but not soggy.
Avoid overhead watering, which can wash away gravel and encourage fungal growth. Instead, use a soaker hose or drip irrigation system placed at the base of plants. This method delivers water directly to the roots while keeping the foliage dry, which is especially important for drought-resistant plants that hate wet leaves.
✂️ Step 5: Maintain with Minimal Effort
Remove weeds as they appear, since they compete for the little moisture available. A quick hand-pulling session once a month keeps your gravel garden looking tidy without the need for herbicides. I also top off the gravel layer annually—just spread a fresh ½-inch layer over the existing one to maintain the clean, polished look.
Prune plants lightly in early spring to encourage bushier growth, but avoid heavy trimming. Deadheading spent blooms on annuals like petunias or verbena keeps them flowering longer without demanding extra care. Your gravel garden will reward you with vibrant color and texture year after year, with almost no upkeep required.
Tips & tricks for perfect gravel garden landscapes
Creating a stunning gravel garden isn't just about choosing the right plants—it's about understanding how to maximize their drought-resistant qualities while keeping maintenance to a minimum.
Plant Selection Matters: When selecting plants in Step 1, focus on those with succulent leaves like sedum or silvery foliage like artemisia—these traits help reflect sunlight and reduce heat stress. I always check the plant tags for "xeric" labels, as these indicate plants that naturally thrive in dry conditions. For best results, choose plants with shallow root systems that can easily access moisture just below the gravel surface.
Soil Preparation is Key: In Step 2, don't skip the 6-inch soil loosening—this creates essential air pockets for root growth. When mixing in 1-2 inches of coarse sand, use a rake to distribute it evenly through the top 4 inches of soil. This sandy layer is what prevents water from pooling around roots, which is critical for gravel gardens. For extra insurance, consider adding ¼ inch of horticultural grit to the mix—it improves drainage even more.
Watering Strategy: The once-weekly watering during the first month (Step 4) is non-negotiable for root establishment. After that, switching to every 2-3 weeks might seem extreme, but trust me—these plants are designed for it. Use a rain gauge to measure your 1-inch water sessionsearly morning to allow foliage to dry completely, preventing fungal issues that can occur with wet leaves.
Gravel Maintenance Hack: That ½-inch annual gravel topping in Step 5 does more than just refresh the look—it helps maintain the proper depth for root access. I use a leaf rake to spread the new gravel, working it into the existing layer rather than just piling it on top. This creates a more natural look while ensuring plants have consistent access to moisture just below the surface.
Pro Tips for Gravel Garden Plants
- Creating a stunning gravel garden isn't just about choosing the right plants—it's about understanding how to maximize their drought-resistant qualities while keeping maintenance to a minimum.
- Plant Selection Matters: When selecting plants in Step 1, focus on those with succulent leaves like sedum or silvery foliage like artemisia—these traits help reflect sunlight and reduce heat stress.
- Soil Preparation is Key: In Step 2, don't skip the 6-inch soil loosening—this creates essential air pockets for root growth.
Frequently asked questions
Got questions about creating a stunning, low-maintenance gravel garden? You're not alone!
Here are some of the most common queries—plus straightforward answers to help you design with confidence.
What are the best drought-resistant plants for a gravel garden?
Opt for sedum, lavender, yarrow, and Russian sage—they thrive in well-draining gravel with minimal water. Succulents like echeveria or sempervivum also add texture and color while requiring almost no care. Pair them with ornamental grasses for movement and height!
When is the best time to plant in a gravel garden?
Spring or early fall are ideal—soil is warm enough for root establishment but not scorching. Avoid summer heatwaves or winter freezes. For perennials, plant in spring; annuals can go in after the last frost. Pro tip: Water deeply after planting to help roots settle into the gravel.
How often should I water gravel garden plants?
Once established (after 1–2 years), most gravel garden plants need water only every 2–4 weeks, depending on climate. Newly planted specimens require weekly watering for the first month. Mulch with gravel or bark to retain moisture and suppress weeds—just avoid piling it against plant stems.
Can I mix gravel gardens with other types of landscaping?
Use gravel gardens as borders for flower beds, pathways, or as a backdrop for shrubs. They also work well in containers or as a modern alternative to traditional lawns. For a cohesive look, stick to a neutral gravel color (like decomposed granite) and complement it with plants in similar hues.
How do I prevent pests in a gravel garden?
Gravel gardens are naturally pest-resistant, but watch for aphids or spider mites on succulents. Encourage beneficial insects like ladybugs by adding pollinator-friendly plants (e.g., catmint or bee balm). If pests appear, spray with neem oil or introduce predator insects. Healthy soil = happy plants!
What if my gravel garden looks too sparse?
Layer in ground covers like creeping thyme or ice plant for density. Add structural elements like boulders, stepping stones, or low metal planters to break up space. For height, incorporate orchard grass or feather reed grass. Even a few potted plants can add pops of color!
Wrapping up and next steps
Transforming your outdoor space into a low-maintenance gravel garden doesn’t have to be complicated—it just takes the right plants and a little planning! 🌿 With drought-resistant options like sedum, lavender, and ornamental grasses, you can create a stunning, eco-friendly landscape that thrives with minimal effort.
The key is choosing companions that complement each other in both aesthetics and resilience.
Now that you’re armed with the best gravel garden plants and tips, it’s time to roll up your sleeves! Start small—pick one corner of your yard, gather your supplies, and let your creativity shine. Your dream low-maintenance garden is just a shovel’s throw away! 🌟