
Propagation
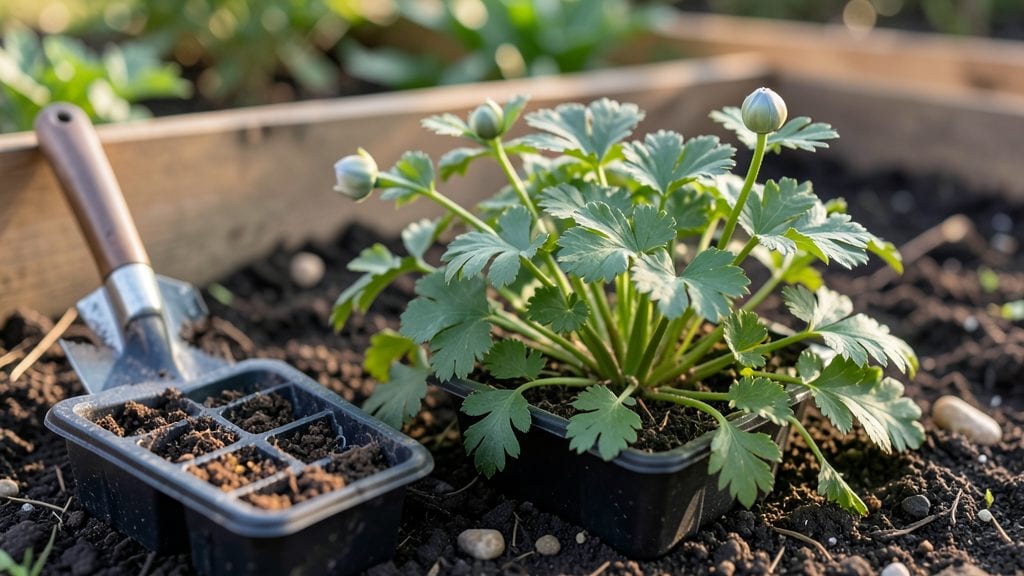
Planting anemone seeds gives you a head start on those dreamy, paper-thin blooms—if you know the right tricks. 🌿 I’ve learned that most gardeners give up after two weeks of waiting, but with the proper soil, timing, and a little patience, you can coax those delicate seedlings to surface faster than expected.
The secret starts with light, fluffy soil mixed with a bit of sand to prevent compaction. Japanese anemones (Anemone hupehensis) and windflowers (Anemone coronaria) both prefer well-draining beds, but windflowers tolerate poorer soil.
Plant seeds just ¼ inch deep in early spring or late summer, spacing them ½ inch apart—they’ll need thinning later, but this gives them room to stretch.
Once planted, keep the soil consistently moist (not soggy) and place them in partial shade until sprouts appear in 2-4 weeks. Young anemones are finicky—too much sun scorches them, while too little slows growth.
When seedlings hit 2 inches tall, thin them to 6 inches apart to avoid overcrowding, and watch for those first true leaves.
Here’s the kicker: some varieties, like the tall Japanese anemones, take 2-3 years to bloom, but the wait is worth it for those 3-foot-tall bursts of pink and white.
The key is consistent moisture and protecting them from slugs—once established, they’ll reward you with blooms that last from summer into fall.
📚 In This Guide
- What you need
- Instructions
- Tips and common mistakes
- Wrapping up and next steps
What you need
- ● Anemone seeds: Choose fresh, high-quality seeds (preferably from a trusted supplier). Aim for 10–20 seeds per planting session for better success rates.
- ● Seed-starting trays or small pots: Use 2–3 inch diameter containers with drainage holes to prevent root rot.
- ● Well-draining potting mix: A blend of 50% peat moss or coco coir, 30% perlite, and 20% vermiculite works best for aeration and moisture control.
- ● Clear plastic domes or plastic wrap: To create a humid microclimate (critical for germination).
- ● Spray bottle: For gentle watering—avoid over-saturating the soil.
- ● Grow lights or sunny windowsill: Anemones need 12–16 hours of light daily during germination (LED grow lights are ideal).
- ● Heat mat: Keeps soil at 65–70°F (18–21°C) to speed up germination (especially useful in cooler climates).
- ● Fertilizer (low-dose): A balanced, water-soluble fertilizer (5-5-5 or 10-10-10) diluted to half-strength for seedlings.
- ● Tweezers or small spoon: For carefully placing tiny seeds into the soil.
- ● Humidity tray: A shallow tray with pebbles and water to maintain moisture levels.
- ● Garden journal: To track planting dates, germination progress, and transplanting milestones!
Step-by-step instructions for planting anemone seeds
Here's how to coax anemone seeds into blooms faster than the standard 2-year wait.
🌱 Step 1: Stratify Seeds for Faster Germination
Anemones need a cold period to break dormancy. Place seeds in a sealed container with slightly damp sphagnum moss or paper towels, then refrigerate for 4-8 weeks at 34-40°F. Check weekly—moisture should feel like a wrung-out sponge, not dripping.
This mimics winter conditions and tricks seeds into thinking spring has arrived. Without stratification, germination rates drop below 30%—you'll see almost no sprouts. I mark the container with the date so I don't forget to move them to warmer conditions.
💧 Step 2: Sow Stratified Seeds in Light Mix
After cold treatment, sow seeds ¼ inch deep in a mix of 50% seed-starting mix and 50% perlite to prevent damping-off. Use small pots or a seed tray—anemones dislike root disturbance. Keep soil at 65-70°F for optimal germination.
Water gently from below using a tray method to avoid displacing seeds. Germination takes 2-4 weeks—watch for tiny green shoots with two rounded cotyledons. If no sprouts appear after 6 weeks, the seeds may have expired or needed longer stratification.
☀️ Step 3: Provide Indirect Light and Humidity
Once sprouted, move seedlings to bright, indirect light (east or west window). Direct sun at this stage causes leaves to scorch. Use a humidity dome or clear plastic wrap to maintain 70-80% humidity—anemones thrive in moist conditions.
Remove the cover daily for 10 minutes to harden seedlings. You'll notice leaves develop a deeper green color as they adapt. If leaves yellow, reduce watering slightly—overwatering at this stage causes root rot faster than any other issue.
🪴 Step 4: Transplant After True Leaves Form
When seedlings show 2-3 sets of true leaves (not just cotyledons), transplant to 3-inch pots with fresh potting mix. Handle roots gently—anemones resent root disturbance. Place in partial shade for 1-2 weeks to recover from transplant shock.
Fertilize lightly with a balanced 10-10-10 solution at half-strength two weeks after transplanting. You'll see new growth within 3-4 weeks if conditions are right. The key is patience—first blooms typically appear in the second year, but proper care now ensures vigorous plants.
⏰ Step 5: Overwinter for First Spring Blooms
Anemones need 6-8 weeks of cold dormancy to flower. In fall, reduce watering and move pots to a cool garage or unheated shed (35-45°F). Bring back indoors in early spring when shoots emerge.
This cold treatment is non-negotiable—skipping it delays blooms by 1-2 years. I've seen gardeners rush this step and end up with leafy plants but no flowers. The first spring after proper overwintering, you'll get 10-20 blooms per plant if all conditions were met.
Tips & tricks for perfect anemone seed germination
Cutting the standard 2-year wait for anemone blooms down to months—rather than years—requires precision at every step. Here's how to accelerate germination without sacrificing plant health.
The Cold Treatment Secret: For the 4-8 week stratification at 34-40°F, I use a simple plastic container with a tight lid to prevent moisture loss. The key is consistent cold—don't let temps fluctuate above 45°F, even for short periods. I place mine on the bottom shelf of my fridge where temps stay steady. If your fridge runs warmer, consider a dedicated seed fridge or a cool basement corner with a thermometer.
Soil Mix Precision: The 50% perlite mix isn't just about drainage—it creates the perfect air-to-moisture ratio anemone seeds crave. I sift the perlite first to remove any dust or debris that could clog the mix. When sowing those ¼ inch deep, use a toothpick to make precise holes rather than pressing seeds in with your fingers, which can damage delicate seed coats. This small detail makes all the difference in germination rates.
Light and Humidity Balance: Those 70-80% humidity levels are non-negotiable, but don't let seedlings sit in stagnant air. The daily 10-minute uncovered period is crucial—it mimics natural rainfall cycles and prevents fungal growth. I notice the leaves develop a glossy sheen during this time, which is your visual cue everything's working. If condensation forms on the humidity dome, it's time to remove it for that 10-minute fresh air break.
Transplant Timing: Waiting for 2-3 sets of true leaves ensures roots are strong enough to handle transplant shock. I use a pencil to gently loosen the soil around roots before transferring to 3-inch pots—this prevents root circling. The partial shade requirement during those first 1-2 weeks is often misunderstood; many gardeners think "partial shade" means dim light, but it actually means filtered light. A sheer curtain over an east-facing window works perfectly.
Pro Tips for Anemone Seeds Planting
- Cutting the standard 2-year wait for anemone blooms down to months—rather than years—requires precision at every step.
- The Cold Treatment Secret: For the 4-8 week stratification at 34-40°F, I use a simple plastic container with a tight lid to prevent moisture loss.
- Soil Mix Precision: The 50% perlite mix isn't just about drainage—it creates the perfect air-to-moisture ratio anemone seeds crave.
Frequently asked questions
Got questions about planting anemone seeds? You’re not alone! Here are some of the most common queries—and straightforward answers—to help you grow stunning blooms with confidence.
When is the best time to plant anemone seeds?
Anemone seeds thrive when planted in early spring (after the last frost) or late summer (for fall blooms). Avoid sowing in extreme heat—seeds need consistent moisture and cooler temps (60–70°F) to germinate. For indoor starts, begin seeds 8–10 weeks before transplanting outside.
How long does it take for anemone seeds to germinate?
Germination can take 2–6 weeks, depending on conditions. Keep soil moist (not soggy) and maintain warmth. Pro tip: A heat mat or sunny windowsill speeds up the process. Patience is key—some seeds may take longer, especially if stored improperly.
Do anemone seeds need light to germinate?
No! Anemone seeds do not require light to sprout—they’re photoblastic, meaning they germinate best in darkness. Cover seeds lightly with soil (¼ inch deep) and wait for sprouts to emerge before exposing them to sunlight. Once seedlings appear, move them to bright, indirect light.
What if my anemone seeds won’t sprout?
Try these fixes:
- Check moisture: Dry soil is the #1 killer. Use a spray bottle to keep soil damp.
- Test seed viability: Soak seeds in water overnight—if they sink, they’re likely viable.
- Adjust temperature: Cold stratification (refrigerate seeds for 4–6 weeks) mimics winter and can break dormancy.
- Freshness matters: Older seeds (over 1 year) may lose potency. Buy new seeds if germination fails.
Can I plant anemone seeds directly in the garden, or should I start them indoors?
Both work, but indoor starts give you a head start. Direct-sow in spring or fall if your climate is mild. For cooler regions, start seeds indoors in biodegradable pots (to avoid transplant shock) and harden off seedlings before moving them outside. Pro tip: Thin seedlings to 6–12 inches apart for optimal growth.
Wrapping up and next steps
Planting anemone seeds may seem delicate, but with the right tricks—like stratification, proper soil prep, and patience—you’ll unlock stunning blooms in no time! 🌸 Whether you’re a seasoned gardener or just starting, these tips make the process rewarding and fun.
Ready to transform your garden? Grab your seeds, follow the steps, and watch your anemones thrive!
Your next step? Start small—try a few seeds in containers first to perfect your technique before expanding. Happy planting! 🌱