Flowers
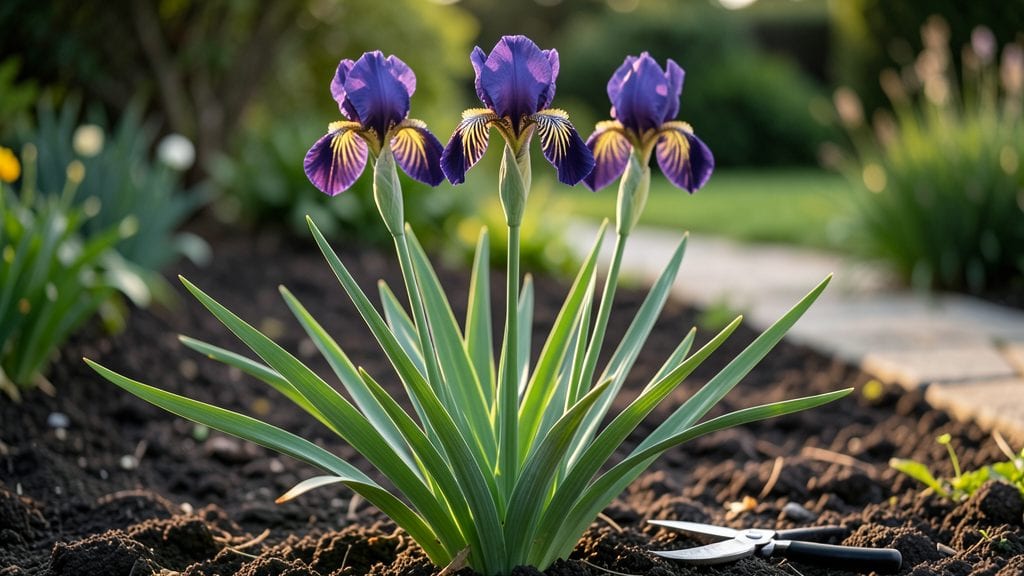
Growing zebra iris plants transforms any garden into a living work of art with their bold purple-and-yellow striped blooms. 🌿 I fell in love with these irises after seeing them dominate a neighbor’s border—tough as nails, yet impossibly elegant.
The secret lies in mimicking their natural Mediterranean habitat: well-draining soil, full sun, and minimal fuss once established.
The right conditions make all the difference. Plant in well-amended soil with a pH between 6.0 and 7.0, and choose a spot with 6+ hours of direct sunlight daily.
Water deeply after planting, then let the soil dry between waterings—zebra irises hate soggy roots. A balanced fertilizer in early spring keeps those signature blooms coming all season long.
By late summer, you’ll see clumps thicken naturally, ready for division every 3-4 years to keep them vigorous. The blooms arrive reliably in late spring, lasting weeks with proper care, and the foliage stays neat and upright—no flopping or fuss.
Design tip: Pair them with lavender or ornamental grasses for a striking, low-maintenance border.
Winter care is simple: reduce watering but don’t cut back the foliage until late winter—it protects the rhizomes. Few pests bother zebra irises, but watch for iris borers; a light dusting of diatomaceous earth keeps them at bay.
Once established, these plants reward you with decades of color and zero drama.
📚 In This Guide
- What you need
- Instructions
- Tips and common mistakes
- Wrapping up and next steps
What you need
- ● Zebra iris plants: Choose between: Bulbs/corms: 3–5 per planting spot (depending on desired density)
- ● Seeds: 10–15 seeds per pot (if starting from scratch)
- ● Divided clumps: 1–2 healthy rhizomes per location
- ● Well-draining soil: Mix 2 parts garden soil + 1 part perlite/sand (critical for preventing rot!)
- ● Organic compost: 1–2 cups per planting hole (boosts nutrients)
- ● Slow-release fertilizer: 10-10-10 or bulb-specific formula (follow package rates)
- ● Garden trowel or spade: For digging holes (6–8" deep)
- ● Pruning shears: For trimming dead foliage post-bloom
- ● Gloves: Heavy-duty (rhizomes can be sharp!)
- ● Watering can or hose: With a gentle spray nozzle (avoid soaking rhizomes)
- ○ Mulch (optional): Pine straw or shredded bark (2–3" layer to retain moisture)
- ● Full sun exposure (6+ hours/day)
- ● USDA Zones 3–9 (check your local climate zone!)
- ● Patience! Zebra irises thrive best when planted after the last frost (spring/early summer)
Step-by-Step guide to planting and caring for zebra iris
Here’s how to cultivate these bold, striped beauties—from soil prep to long-lasting blooms.
🌱 Step 1: Choose the Right Location and Soil
Zebra iris thrives in full sun—at least 6 hours daily—so pick a spot where they’ll bask in morning light and afternoon warmth. I always test the soil first: dig a 6-inch hole, fill it with water, and wait. If it drains within 2 hours, your soil is ideal. If not, amend with 2-3 inches of coarse sand or perlite to improve drainage, since soggy roots will rot these plants overnight.
Zebra iris prefers slightly acidic to neutral soil (pH 6.0-7.0). If your soil tests higher, mix in 1-2 inches of peat moss into the top 12 inches of soil before planting. These plants also love well-draining, rocky soil—mimic their natural habitat by adding a handful of gravel or small stones to the planting hole.
🪴 Step 2: Plant Rhizomes at the Correct Depth and Spacing
Handle rhizomes gently—they’re delicate and bruise easily. Plant them no deeper than 2 inches below the soil surface, with the top third exposed. This ensures proper airflow and prevents rot. Space them 12-18 inches apart in rows 2-3 feet apart for a full, dramatic display. I like to arrange them in clusters of 3-5 rhizomes for a natural, layered look.
Press the soil lightly around the rhizomes but don’t compact it. The exposed portion should stay dry—this prevents fungal issues. Water deeply once planted, then let the soil dry out completely before watering again. Overwatering at this stage is the fastest way to kill them.
☀️ Step 3: Provide Low-Maintenance Care for Season-Long Blooms
Zebra iris is drought-tolerant once established, but water weekly during the first growing season to help roots spread. After that, water only when the soil feels bone-dry 3 inches down. These plants store moisture in their rhizomes, so they’ll bounce back quickly if you forget a week. Fertilize lightly in early spring with a balanced, slow-release fertilizer (10-10-10) to encourage strong foliage and blooms.
Deadhead spent blooms by cutting the stem down to the base—this redirects energy to next year’s flowers instead of seed production. I also snip any yellow or brown leaves in late fall to keep the plant tidy and reduce disease risk. Mulch lightly with 2-3 inches of shredded bark in winter to protect rhizomes from freezing, but avoid piling mulch against the crown.
✂️ Step 4: Divide and Propagate Every 3-4 Years
Zebra iris multiplies quickly, so divide clumps in early spring or fall when the plant is dormant. Dig up the rhizomes, separate the sections with a sharp knife, and replant the healthiest pieces. Each division should have 2-3 fans of leaves and at least one dormant bud. Discard any rhizomes that look mushy or shriveled—they won’t regrow.
Replant divisions at the same depth, spacing them 18 inches apart for maximum impact. Water deeply after transplanting, then reduce irrigation to encourage root establishment. You’ll see new growth within 3-4 weeks—a sure sign your divisions are thriving. This is also the perfect time to refresh old plantings and fill in gaps in your garden.
🌿 Step 5: Protect Against Pests and Diseases
Watch for iris borers, the biggest threat to zebra iris. These pests tunnel into rhizomes, causing wilting and yellowing leaves. I prevent them by applying neem oil in early spring and again after blooms fade. For fungal issues like leaf spot, remove infected foliage immediately and space plants 3 feet apart to improve airflow.
Deer and rabbits often nibble on iris leaves, but the rhizomes are toxic to them—so they usually leave the plants alone once established. If you’re in a high-traffic area, wrap young plants in chicken wire until they’re sturdy enough to deter browsers. A little prevention now saves hours of damage control later.
Tips & tricks for perfect zebra iris planting and care
Here's what I've learned from years of growing these showstopping striped beauties—avoid these common pitfalls for thriving zebra iris.
The Sunlight Secret: The 6 hours of full sun requirement is non-negotiable for vibrant blooms. I've seen plants in partial shade produce pale, weak stems—place them where they'll receive morning light and afternoon warmth. If your garden has afternoon shade, consider a location with reflected light from nearby walls or fences. For container growing, place pots in the sunniest spot you have, even if it means moving them seasonally to follow the sun's arc.
Soil Test Savvy: Don't skip that 2-hour drainage test in Step 1—it's the single most important diagnostic. If your soil fails this test, the 2-3 inches of coarse sand or perlite amendment is crucial. I've had clients skip this step and lose entire plantings to root rot. For heavy clay soils, consider raised beds where you can control the soil composition completely. The 12-inch soil depth for peat moss amendment ensures proper pH adjustment throughout the root zone.
Rhizome Handling: Those delicate rhizomes in Step 2 deserve gentle treatment—never drop them or let them dry out before planting. I always plant mine the same day I receive them, keeping them in a cool, shaded place while I prepare the soil. The exposed top third is intentional: it prevents fungal issues by allowing airflow. If you notice any soft spots on the rhizomes, trim them away with a sterile knife before planting to prevent infection.
Watering Wisdom: The weekly watering during the first season is critical for root establishment, but resist the urge to overdo it. I've seen beginners drown these plants by watering on a strict schedule rather than checking soil moisture. After the first year, let the soil dry completely between waterings—those rhizomes store moisture like little water tanks. For container-grown plants, check moisture at the 3-inch depth with your finger rather than relying on a watering schedule.
Pro Tips for Zebra Iris Plants
- Here's what I've learned from years of growing these showstopping striped beauties—avoid these common pitfalls for thriving zebra iris.
- The Sunlight Secret: The 6 hours of full sun requirement is non-negotiable for vibrant blooms.
- Soil Test Savvy: Don't skip that 2-hour drainage test in Step 1—it's the single most important diagnostic.
Frequently asked questions
Got questions about zebra iris plants? You’re not alone!
These striking blooms are full of personality, but they do come with a few quirks. Below, we’ve rounded up the most common questions—plus expert tips to help you grow them like a pro.
How do I tell if my zebra iris is healthy?
A thriving zebra iris has firm, upright rhizomes (not mushy or rotting) and glossy, vibrant foliage. Look for plump, unopened buds—if they’re shriveled or falling off, it may need more water (or less, if overwatered). Yellowing leaves often signal overwatering or fungal issues, while brown edges can mean underwatering or salt buildup.
When is the best time to plant zebra iris?
Plant them in early spring or late summer/fall, when the soil is 60°F+ (15°C+) but not scorching. Avoid planting in extreme heat or frost, as rhizomes can rot or dry out. Pro tip: If planting in fall, do it 6-8 weeks before your first frost to give roots time to establish.
How much water do zebra iris plants need?
These plants are drought-tolerant once established (after 1-2 years), but they hate soggy soil. Water deeply 1-2 times per week in dry spells, keeping the soil moist but not waterlogged. After blooming, reduce watering to encourage strong rhizomes for next year’s flowers. Warning: Overwatering is the #1 killer—ensure your garden has good drainage!
Can zebra iris grow in containers? What’s the best setup?
Yes! Use a wide, shallow container (at least 12” in diameter) with fast-draining mix (like cactus/succulent soil + perlite). Plant 2-3 rhizomes per pot, keeping them above soil level. Containers dry out faster, so water more frequently than in-ground plants. Bonus: Move pots to partial shade in hot afternoons to protect blooms.
What pests or diseases should I watch for?
Zebra iris are generally pest-resistant, but keep an eye out for:
- Iris borers: Tiny moth larvae that tunnel into rhizomes. Prevent with neem oil or remove affected rhizomes in fall.
- Fungal leaf spot: Brown spots on leaves? Space plants for airflow and avoid overhead watering.
- Slugs/snails: They love young leaves. Use copper barriers or diatomaceous earth.
Wrapping up and next steps
Growing zebra iris plants is a rewarding way to add bold, striking color to your garden with minimal fuss! Their unique purple-and-yellow striped blooms thrive in the right conditions, offering season-long beauty that’s sure to turn heads.
Whether you’re a seasoned gardener or just starting out, these hardy perennials are a fantastic choice for adding drama and texture to your outdoor space.
Ready to transform your garden? Start by picking a sunny spot, prepping the soil, and planting your zebra iris with confidence. Before you know it, you’ll be enjoying their vibrant blooms year after year—so grab your gloves and get growing! 🌸✨