
Pruning
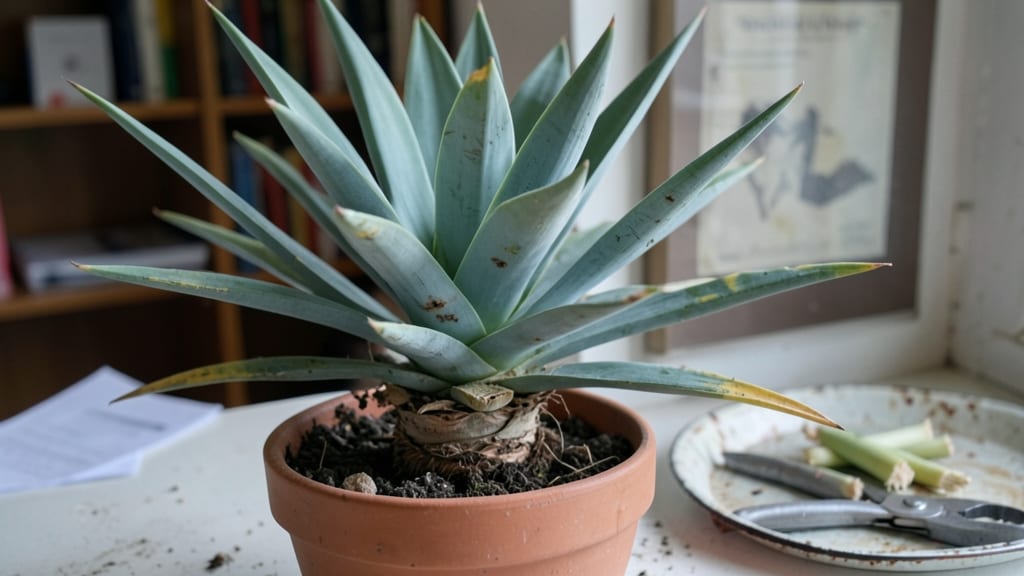
Yucca plant trimming isn’t just about cutting back—it’s about unlocking that second wind your plant’s been hiding. 🌱 I’ve learned the hard way that aggressive trimming can shock these tough desert plants, but the right cuts in the right season can transform a leggy, sparse yucca into a bushier, more vibrant centerpiece.
The secret lies in three precise cuts that target dead growth, spent blooms, and overcrowded stems without sacrificing the plant’s slow-but-steady recovery.
Timing matters more than you’d think. Wait until after flowering in late spring or early summer when new growth has started, or tackle it in early spring before the heat peaks.
You’ll need sharp pruners, rubbing alcohol for sterilizing cuts, and a clear view of the plant’s structure—healthy growth is bright green and firm, while dead leaves turn brown and crisp. Most yuccas bounce back within weeks, but patience is key; these plants heal on their own schedule.
What you’ll end up with is a yucca that looks like it was designed for your space—fuller, more upright, and ready to handle the next season.
The first cut removes any dead or damaged leaves at the base, the second trims back old flower stalks just above a healthy bud, and the third thins out congested stems to let light and air reach the center.
After trimming, hold off on fertilizing for a month to let the plant focus on recovery, not new growth.
Common mistakes—like cutting too close to the base or trimming in winter—can set your yucca back for months. But once you master these three cuts, you’ll see why trimming isn’t just maintenance; it’s the difference between a struggling plant and one that thrives for years.
Here’s how to do it right the first time.
📚 In This Guide
- What you need
- Instructions
- Tips and common mistakes
- Wrapping up and next steps
What you need
- ● Pruning shears or bypass pruners – Choose sharp, sterilized tools with a 4- to 6-inch blade for clean cuts.
- ● Disinfectant (rubbing alcohol or bleach solution) – Clean tools before and after use to prevent disease spread.
- ● Rubbing gloves – Protect your hands from sharp edges and potential sap irritation.
- ● Newspaper or drop cloth – Lay down to catch debris and keep your workspace tidy.
- ○ Small pruning saw (optional but helpful) – For thick, woody stems (1+ inch in diameter).
- ● Horticultural sealant (e.g., pruning wax) – Apply to cuts to prevent sap bleeding and speed healing.
- ● Garden twine or zip ties – Secure large cuts if needed for stability.
- ● Spray bottle with water – Mist the plant after trimming to reduce stress.
- ● Notebook & pen – Sketch your plant’s shape before cutting for reference.
Step-by-Step guide to trimming your yucca plant
Reviving your yucca’s shape and vigor only takes a few strategic cuts—here’s how to do it right.
✂️ Step 1: Remove Dead or Damaged Leaves and Stems
Start by inspecting your yucca for any brown, crispy, or shriveled leaves—these are dead and won’t recover. Use clean, sharp pruning shears to cut them away at the base, about ½ inch below the damaged area. This prevents disease from spreading to healthy growth.
If a stem is completely brown and dry, snip it off at the base. Yuccas are tough, so don’t worry about cutting too much—what’s left will regrow stronger. Just avoid cutting into green tissue, as that can harm the plant. You’ll see fresh, vibrant growth emerging from the center within weeks.
✂️ Step 2: Prune Overgrown or Leggy Growth
If your yucca has stretched too tall or grown unevenly, trim back the longest stems to encourage bushier growth. Cut just above a leaf node—this is where new branches will sprout. For a 12-inch-tall yucca, aim to reduce height by about ⅓ to maintain balance.
Use your shears at a 45-degree angle to prevent water from pooling on the cut. Avoid cutting into the main trunk unless it’s completely dead—yuccas store water there, and unnecessary cuts can stress the plant. After pruning, step back to check the shape—you want a full, rounded look rather than a sparse silhouette.
✂️ Step 3: Trim Flower Stems After Blooming
Once your yucca’s flower stalks fade and turn brown, cut them back to the base. This redirects the plant’s energy into new foliage instead of seed production. Use your shears to make a clean cut, avoiding any ragged edges that could attract pests.
If you want to propagate from the cuttings, place the trimmed flower stalks in a dry, shaded spot for a few days to callus over. Then, plant them in well-draining soil to grow new yuccas. Otherwise, simply discard the old blooms—your plant will thank you with fresh, healthy growth in no time.
💧 Step 4: Care for Your Yucca After Trimming
After pruning, withhold water for 3-5 days to let cuts heal. Yuccas store moisture, so they don’t need immediate hydration. Once you resume watering, use well-draining soil and let the top 2 inches dry out between waterings to prevent rot.
Place your yucca in bright, indirect light for a week to help it recover. Avoid direct sun until new growth appears—this gives the plant time to adjust. You’ll notice fresh leaves emerging within 4-6 weeks, signaling that your trimming was successful.
Tips & tricks for perfect yucca plant trimming
A few simple tricks will help you transform your yucca from leggy to lush with minimal effort.
The Cutting Angle Matters: When pruning in Step 2, that 45-degree angle isn't just for show—it prevents water from pooling on the cut, which could lead to rot. I've seen too many yuccas suffer from simple water pooling after cuts. Make the cut clean and angled, then wipe away any sap that forms with a damp cloth.
Don't Fear the Scissors: Between us, I used to hesitate cutting back my yucca because I worried about damaging it. But yuccas are tougher than they look! In Step 1, you can't cut too much—what's left will regrow stronger. Just avoid green tissue, and you'll be fine. Think of it like giving your plant a fresh haircut—it comes back looking better than ever.
Propagate with Confidence: That optional propagation tip in Step 3 is where the magic happens. After trimming flower stalks, let them callus over for a few days before planting. I've propagated three new yuccas from old blooms this way! Use well-draining soil and keep them in bright, indirect light until they establish roots—you'll have baby yuccas in no time.
Recovery Timeline: The 3-5 days of withholding water after pruning is crucial for healing. Yuccas store moisture, so they don't need immediate hydration, but those cuts need time to seal. After that, let the top 2 inches of soil dry out between waterings. I've seen yuccas recover beautifully in just 4-6 weeks when given proper care during this period.
Pro Tips for Yucca Plant Trimming
- A few simple tricks will help you transform your yucca from leggy to lush with minimal effort.
- The Cutting Angle Matters: When pruning in Step 2, that 45-degree angle isn't just for show—it prevents water from pooling on the cut, which could lead to rot.
- Don't Fear the Scissors: Between us, I used to hesitate cutting back my yucca because I worried about damaging it.
Frequently asked questions
Got questions about trimming your yucca plant? You're not alone! Here are some of the most common concerns—plus clear, actionable answers to keep your plant thriving.
When is the best time to trim a yucca plant?
The ideal time is late winter or early spring, just before new growth begins. This gives your yucca time to recover before summer heat. Avoid trimming in fall or winter—your plant needs energy to survive dormancy. If you spot dead or damaged leaves anytime, remove them promptly to prevent pests or disease.
How do I trim a yucca plant without killing it?
Focus on healthy cuts:
- Use sterilized pruners (rubbing alcohol works) to avoid infections.
- Cut just above a leaf node (the bump where leaves grow) to encourage new shoots.
- Avoid over-trimming—never remove more than 1/3 of the plant at once.
- Let cuts air-dry for 10–15 minutes before watering to prevent rot.
Can I propagate my yucca from trimmings?
Yucca cuttings root easily. After trimming:
- Let the cut end callus over (2–3 days).
- Plant in well-draining soil (cactus/succulent mix) and keep in bright, indirect light.
- Water sparingly—only when soil is completely dry.
- New roots should appear in 4–6 weeks.
Why is my yucca plant turning brown after trimming?
Brown tips or leaves after trimming usually mean:
- Underwatering: Yuccas store water—wait until soil is bone-dry before watering again.
- Overwatering: Yellowing or mushy stems signal root rot. Let soil dry completely between waterings.
- Sunburn: If new growth looks crispy, it’s getting too much direct sun. Gradually acclimate it to sunlight.
Do I need to trim a yucca plant every year?
Not necessarily! Trim only when:
- Leaves are dead, yellow, or damaged.
- The plant looks overgrown or leggy.
- You want to shape it for aesthetics.
Wrapping up and next steps
Trimming your yucca plant isn’t just about aesthetics—it’s a game-changer for its health and growth! 🌱 By mastering the three key cuts (dead leaves, overgrowth, and flowering stalks), you’ll encourage lush foliage, prevent pests, and keep your plant thriving for years.
Remember, patience and precision pay off, so don’t rush the process.
Ready to give your yucca the TLC it deserves? Grab your pruners, follow the steps, and watch your plant flourish! For extra confidence, check out this video guide to see the cuts in action. Happy trimming! ✂️