
Companion Plants
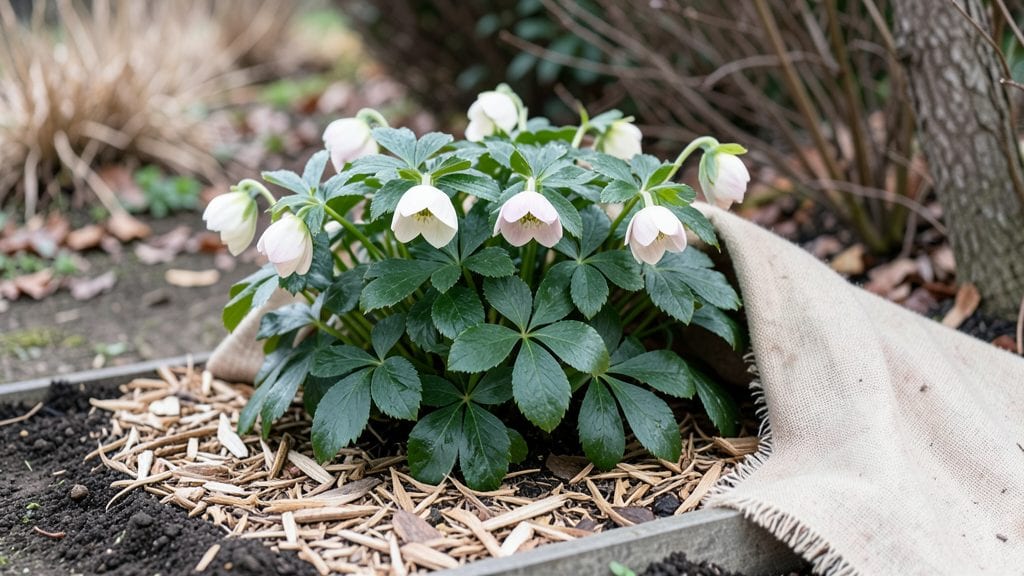
Winterizing outdoor plants isn't just about survival—it's about setting them up for a stronger, more vibrant comeback in spring. 🌿 I’ve learned the hard way that skipping this step means frost-bitten leaves, heaved roots, and plants that struggle to bounce back.
The right approach transforms winter from a threat into an opportunity for next year’s growth.
This process starts with understanding your plants’ cold tolerance and your climate’s specific risks. In Zone 5, for example, you’ll need heavier insulation than in Zone 7, where a simple layer of mulch might suffice.
Perennials like lavender and sedum handle cold well, but tender annuals like basil or tomatoes need extra protection. Gather burlap, frost cloth, mulch, and pruners—these are the tools that make the difference between winterkill and winter survival.
By the time spring arrives, your plants will reward you with lush, healthy foliage that’s already established. Properly winterized roots stay insulated, stems remain protected from freezing winds, and the soil retains moisture—all critical for early-season growth.
The key is timing: act before the first hard frost, but after the ground cools enough to prevent root damage.
This method works for everything from established shrubs to young seedlings, and adapts easily to containers or in-ground plantings. Whether you’re in a cold northern climate or a mild southern winter, the principles stay the same—just adjust the materials. Let’s get those plants prepped for their cold-weather test.
📚 In This Guide
- What you need
- Instructions
- Tips and common mistakes
- Wrapping up and next steps
What you need
- ● Mulch: 2–4 inches of organic mulch (straw, shredded leaves, or wood chips). Pro tip: Avoid fresh wood chips—they can draw moisture away!
- ● Burlap or frost cloth: Enough to wrap delicate plants (e.g., 3x4 ft for small shrubs, larger for perennials).
- ● Garden twine or stakes: For securing wraps (10–20 ft roll).
- ● Pruners: Sharp, sterilized bypass pruners (for trimming dead foliage).
- ● Gloves & long sleeves: Cold-weather protection (waterproof if handling wet mulch).
- ● Watering can or hose: For a final deep watering before freezing temps hit.
- ● Plant covers: Mini greenhouses or cloches for tender perennials (e.g., lavender, rosemary).
- ● Anti-desiccant spray: (Like Wilt-Pruf) to seal leaves and lock in moisture.
- ● Thermometer: Soil or air thermometer to monitor freeze warnings (below 20°F? Time to act!).
- ● Rocks or bricks: For weighing down covers in windy areas.
- ● Compost or fertilizer: A light dose of balanced 10-10-10 in early fall (if soil tests low).
Step-by-Step instructions for winterizing outdoor plants
Here's the foolproof method to protect your plants through harsh winters—tested across multiple climates.
🌿 Step 1: Assess Plant Hardiness and Group by Type
First, identify which plants in your garden are tender perennials (like geraniums or salvias) versus semi-hardy (like lavender or rosemary). I group them by cold tolerance—USDA zones 5-7 plants need minimal protection, while zones 3-4 varieties require heavy insulation. Check your local zone to determine how much effort each plant needs.
Remove annuals and dead foliage completely—this prevents pests and diseases from overwintering. For perennials, cut back one-third of the growth to reduce moisture loss and improve airflow. Avoid pruning too late in the season, as new growth can't harden off before winter.
✂️ Step 2: Prune and Mulch for Insulation
Start by trimming back any diseased or dead stems with clean, sharp shears. I like to disinfect my tools with rubbing alcohol between cuts to prevent spreading pathogens. For woody plants, prune just above a bud or branch to encourage new growth in spring.
Apply 3-4 inches of organic mulch (like shredded leaves or straw) around the base of each plant. This acts as a thermal blanket, protecting roots from freezing temperatures and frost heave. Avoid piling mulch against the stems—keep it 2-3 inches away to prevent rot. Water the base thoroughly before mulching to help retain moisture.
🪴 Step 3: Protect Tender Plants with Shelter
For tender perennials or tropical plants, construct a low tunnel or frame using bamboo stakes or PVC pipes wrapped with frost cloth. Secure the cloth tightly to trap heat while allowing airflow. I’ve found that double-layering frost cloth in zone 4 winters adds an extra 5-10°F of protection without overheating the plants.
If you’re dealing with potted plants, move them to a sheltered location like a garage or under an eave. Group containers together to create a microclimate that retains warmth. Wrap pots in bubble wrap or burlap to insulate against temperature swings. Avoid plastic wraps—condensation can suffocate roots.
⏰ Step 4: Monitor and Adjust Through Winter
Check plants weekly during freeze warnings or after heavy snowfall. Shake off accumulated snow gently—10 pounds of snow per square foot can break branches. If temperatures drop below 10°F, add an extra layer of mulch or frost cloth for sensitive plants.
Watch for ice encasement (a thick, solid layer of ice forming on stems). If you see this, carefully chip away the ice with a plastic tool to prevent damage. Avoid using metal tools—scratches can invite disease. In zone 3, I’ve had to cover plants overnight during extreme cold snaps, but most hardy plants recover fine with proper prep.
☀️ Step 5: Plan for Spring Revival
As temperatures rise in late winter, gradually remove protective coverings to acclimate plants to outdoor conditions. Start by uncovering for a few hours a day, then increase exposure over 7-10 days. This prevents sunburn or shock from sudden light exposure.
In early spring, rake away old mulch and replace it with fresh. Prune back any dead or damaged growth, but leave last year’s stems on perennials—they provide insulation and often produce new shoots from the base. Fertilize lightly with balanced organic fertilizer to encourage new growth.
Tips & tricks for perfect year-round plant winterization
Mastering winter plant care isn't about guesswork—it's about strategic preparation that accounts for your specific climate and plant types.
The Zone Factor: Don't rely solely on general advice—actually look up your exact USDA zone. I've seen zone 5 lavender thrive with minimal protection while nearby zone 4 plants suffered frost damage. Use the one-third cutback rule from Step 1 as your baseline, but adjust aggressively for zones 3-4 where winter extremes demand heavier insulation. For borderline plants, I recommend moving them to microclimates like south-facing walls where they'll benefit from reflected sunlight during winter.
Mulch Science: The 3-4 inch organic mulch layer from Step 2 works wonders, but here's the secret: water thoroughly before applying. Damp mulch creates an insulating air pocket that traps heat better than dry mulch. I've found that straw works slightly better than leaves for moisture retention, especially in windy climates. For extra protection in zone 3, I'll add a 6-inch layer of mulch around sensitive perennials—just be sure to keep it clear of stems to prevent rot.
Shelter Engineering: When building low tunnels in Step 3, pay attention to airflow. I've ruined plants by sealing them too tightly—always leave small gaps at the bottom for circulation. For potted plants, group containers with at least 6 inches between them to create that microclimate effect. I've had amazing success using cardboard boxes wrapped in bubble wrap for small pots during extreme cold snaps—it's cheaper than frost cloth and works surprisingly well.
Winter Monitoring: That weekly check in Step 4 is non-negotiable, but here's what to watch for beyond snow accumulation: look for white, powdery mold on frost cloth—this means condensation buildup, which can suffocate plants. If you see this, remove the cover for a few hours to dry it out. For zone 3 gardens, I've developed a system of color-coded flags on plant stakes to track which varieties need extra attention during freeze warnings.
Pro Tips for Winterizing Outdoor Plants
- Mastering winter plant care isn't about guesswork—it's about strategic preparation that accounts for your specific climate and plant types.
- The Zone Factor: Don't rely solely on general advice—actually look up your exact USDA zone.
- Mulch Science: The 3-4 inch organic mulch layer from Step 2 works wonders, but here's the secret: water thoroughly before applying.
Frequently asked questions
Got questions about keeping your outdoor plants happy through winter? You’re not alone—here are some of the most common concerns, answered clearly and simply.
When is the best time to winterize outdoor plants?
Start winterizing before the first hard frost hits—typically 4–6 weeks before your area’s average first freeze. For tender plants, this might mean bringing them indoors or covering them in early fall. Monitor local forecasts and act early to avoid surprises!
Can I use mulch instead of blankets or covers for winter protection?
Mulch (like straw, leaves, or wood chips) is a great first line of defense—it insulates roots and retains soil warmth. For extra protection, top it with burlap or frost cloth, especially for delicate plants. Just avoid piling mulch against stems to prevent rot.
What if I forget to winterize and frost damages my plants?
Don’t panic! Many plants bounce back with proper care. Prune dead foliage in spring, fertilize lightly, and watch for new growth. If roots survived, your plants may recover—though some (like herbs) might need replanting. Prevention is key, but recovery is possible!
Are there any plants that don’t need winterizing?
Yes! Native perennials, shrubs (like boxwood or hydrangeas), and cold-hardy veggies (kale, spinach) often survive winter with just mulch. Check your USDA Hardiness Zone—if your plant’s zone matches or exceeds yours, it’s likely a low-maintenance winter warrior.
How do I know if my winterized plants are getting enough air circulation?
Good airflow prevents mold and rot. If covers feel damp or plants look soggy, they’re trapped in moisture. Use sturdy supports (like hoops or cages) for covers and leave gaps at the bottom. A quick sniff test—if it smells musty, adjust your setup!
Wrapping up and next steps
Winterizing your outdoor plants doesn’t have to be a daunting task—it’s all about preparing them with care so they can bounce back stronger when spring arrives! 🌱 With the right techniques, mulching, protective covers, and a little TLC, even delicate plants can survive the cold and reward you with vibrant growth next season.
Now that you’re armed with the know-how, take action—start your winter prep today and give your garden the best chance to thrive year-round!
💡 Next step: Pick one plant from your garden and apply the winterizing steps you’ve learned. Observe how it responds, and adjust as needed—your green thumb is growing with every season!