Watering
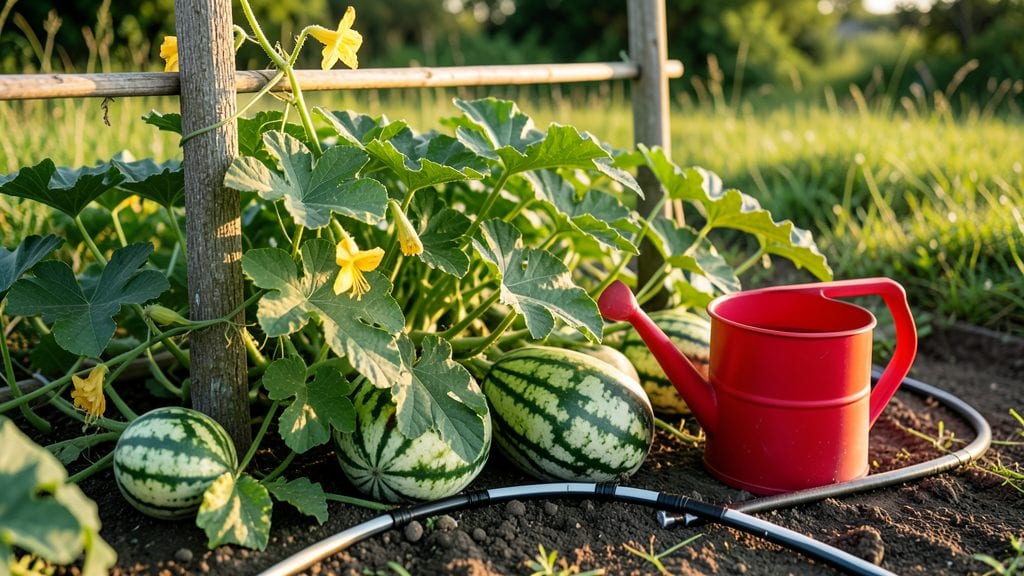
Proper watering watermelon plants is the secret to juicy, sweet fruits—skimp and you’ll get bitter melons, overdo it, and roots rot. 🌱 I learned this the hard way after my first crop turned to leather last summer, and now I treat watering like a science (with a little intuition).
The key is deep, infrequent watering—soak the soil 6 to 8 inches down every 2 to 3 days when it’s hot, but cut back to once a week in cooler weather.
Mulch helps lock in moisture, and drip irrigation keeps water right where the roots need it without wetting the leaves. Overwatering is just as bad as underwatering—yellow leaves or wilting vines mean you’ve got the balance wrong.
You’ll know you’re doing it right when the soil feels like a damp sponge between your fingers and the vines stay plump and green. The fruit will start swelling, and those stripes will turn from pale to deep green—signs of perfect moisture.
Too little water, and the rind thickens; too much, and the melon splits open before it’s ripe.
Adjust for your climate—dry heat means more frequent watering, while humidity slows things down. A simple soil probe or your finger can tell you everything you need to know. Master this, and you’ll go from store-bought blandness to homegrown sweetness every season.
📚 In This Guide
- What you need
- Instructions
- Tips and common mistakes
- Wrapping up and next steps
What you need
- ● Water source: Hose with adjustable nozzle (or a watering can with a long spout for precision) 💦
- ○ Soil moisture meter: Digital or analog (optional but helpful for tracking hydration levels)
- ● Organic mulch: Straw, grass clippings, or wood chips (2–3 inches thick to retain moisture)
- ○ Drip irrigation system (optional): Kits with emitters (1–2 per plant) for consistent watering
- ○ Water storage container (optional): 5-gallon bucket for collecting rainwater or diluting fertilizer
- ● Garden trowel or small shovel: For checking soil depth and aerating roots
- ● Timer (for drip systems): Programmable for 1–2 hours/day during peak heat
- ● Gloves and knee pads: For comfort while working in the garden
- ● Well-draining soil: Sandy loam or amended soil (pH 6.0–7.0)
- ● Sunny spot: Full sun (6–8 hours/day) for optimal growth
- ● Space: 3–6 feet between plants (depending on variety)
Step-by-Step instructions for watering watermelon plants
Watermelons thrive when their roots stay consistently moist—not soggy, not dry. Here’s how to balance watering for bigger, sweeter fruit.
💧 Step 1: Water Deeply at Planting
When you transplant watermelon seedlings, give them a deep soak right away. Use 1-2 gallons of water per plant to settle the soil around the roots. This helps eliminate air pockets that can stress young plants. Water slowly at the base—avoid splashing leaves, which can spread disease.
After planting, let the top 2 inches of soil dry out slightly before watering again. This prevents root rot while encouraging roots to grow deeper. Watermelons develop a strong root system when they have to reach for moisture, which leads to healthier vines and bigger fruit.
🌱 Step 2: Maintain Even Moisture Through Flowering
Once watermelons start flowering, consistency is key. Water every 2-3 days during dry spells, but always check the soil first. Stick your finger 1-2 inches deep—if it feels dry, it’s time to water. Overwatering now can cause blossom-end rot or weak vines.
I like to water early in the morning so the foliage dries quickly, reducing fungal risks. Use a soaker hose or drip irrigation to deliver water directly to the roots. This keeps leaves dry and prevents powdery mildew, a common watermelon problem.
☀️ Step 3: Increase Water During Fruit Set
When watermelons begin forming, they need more moisture to support rapid growth. Aim for 1.5-2 gallons per plant every 2 days during hot weather. The soil should stay evenly damp but not waterlogged—think of a wrung-out sponge.
Watch for yellowing leaves or wilting vines, which signal underwatering. If the fruit feels soft or hollow when tapped, it’s a sign of uneven moisture. Mulch around plants with 2-3 inches of straw to retain humidity and keep roots cool.
⏰ Step 4: Taper Off Before Harvest
Two weeks before picking, reduce watering slightly to concentrate sugars in the fruit. Let the top 1 inch of soil dry out between waterings, but don’t let the roots dry completely. This final adjustment is what makes watermelons sweeter.
Harvest when the tendril nearest the fruit turns brown and the watermelon sounds hollow when tapped. After picking, water the vines one last time to encourage any remaining fruit to ripen. Save healthy vines for seeds if you want to grow next year’s crop!
Tips & tricks for perfect watermelon plant watering
Here's what I've learned after growing watermelons for years—these tricks make all the difference between average fruit and garden showstoppers.
Soil Test Trick: Before watering, do the "squeeze test" on the soil. Grab a handful about 1-2 inches deep—it should feel like a damp sponge, not a dripping wet rag. In Step 1, when you're giving that initial deep soak, press your finger into the soil after watering. If water pools on top, you're overdoing it. The goal is moist roots, not soggy soil. This simple check prevents root rot while encouraging those deep roots we want.
Morning Watering Secret: Watering early in the morning (as mentioned in Step 2) is non-negotiable for me. The foliage dries completely by afternoon, which drastically reduces fungal diseases like powdery mildew. I set my watering schedule for 6-8 AM—this gives plants all day to absorb moisture before the heat of midday. Pro tip: If you must water later, do it by 10 AM to prevent evening moisture that invites mildew.
Mulch Magic: That 2-3 inches of straw mulch in Step 3 isn't just decoration—it's a game-changer. The mulch acts like a blanket, keeping soil temperatures stable and moisture levels consistent. I like to refresh the mulch every few weeks, especially after rain, to maintain that protective layer. This simple step can reduce watering needs by up to 30% while keeping roots cool during hot weather.
Harvest Prep: Two weeks before harvest (Step 4), I start my "sugar concentration" routine. Let that top inch dry out between waterings, but keep checking the soil 2-3 inches down—it should still feel moist. This final adjustment is what transforms good watermelons into sweet, juicy masterpieces. Think of it like making jam—the longer the sugar concentrates, the sweeter the final product.
Pro Tips for Watering Watermelon Plants
- Here's what I've learned after growing watermelons for years—these tricks make all the difference between average fruit and garden showstoppers.
- Soil Test Trick: Before watering, do the "squeeze test" on the soil.
- Morning Watering Secret: Watering early in the morning (as mentioned in Step 2) is non-negotiable for me.
Frequently asked questions
Got questions about keeping your watermelon plants happy with the perfect watering routine? You’re not alone! Here are answers to the most common queries—so you can grow juicier, sweeter fruit without the guesswork.
How often should I water watermelon plants?
Watermelon plants need 1–2 inches of water per week, especially during flowering and fruiting. Water deeply 2–3 times per week (more in extreme heat) to encourage strong roots. Avoid shallow, frequent watering—it leads to weak vines and cracked fruit. Pro tip: Use a moisture meter or stick your finger 1–2 inches into the soil; if it’s dry, it’s time to water!
What’s the best time of day to water watermelons?
Water in the early morning (6–9 AM) to reduce evaporation and fungal risks. Avoid evening watering—wet leaves overnight can cause powdery mildew. If you must water later, aim for the soil base (not foliage) and let leaves dry quickly. Bonus: Mulch around plants to retain moisture and keep roots cool!
Can I use drip irrigation instead of hand-watering?
Drip irrigation
is ideal for watermelons because it delivers water directly to the roots, saving time and reducing waste. Set it to run for 30–60 minutes, 2–3 times per week, and adjust for heatwaves. Just ensure emitters are 6–12 inches from the vine base to avoid overwatering leaves. Warning: Avoid overhead sprinklers—they spread disease!
Why are my watermelon leaves yellowing? Overwatering or underwatering?
Yellow leaves usually mean overwatering (soggy soil, root rot) or underwatering (dry, crispy edges). Check the soil: if it’s mushy, cut back watering and improve drainage. If it’s bone-dry, water deeply and mulch. Wilting + yellowing? It could be powdery mildew—prune affected leaves and water at the base moving forward.
Does watering affect watermelon sweetness?
Yes! Consistent moisture (without soggy soil) helps watermelons develop higher sugar content. Stress from uneven watering (like drought or flooding) can make fruit bland or seedy. For sweeter melons, aim for steady soil moisture and avoid sudden changes. Fun fact: Ripe watermelons have a creamy yellow spot where they touched the ground—check that too!
Wrapping up and next steps
Mastering the art of watering watermelon plants is your ticket to juicy, homegrown sweetness! 🍉 By keeping soil consistently moist (but not soggy), adjusting for growth stages, and avoiding stress triggers like uneven watering, you’re well on your way to a bountiful harvest. Your patience and care will pay off with fruit so ripe, it practically melts in your mouth.
Now that you’re armed with the secrets, roll up your sleeves and get growing! Start by checking your soil moisture today—your future watermelon slices are cheering you on. 🌱