
Watering
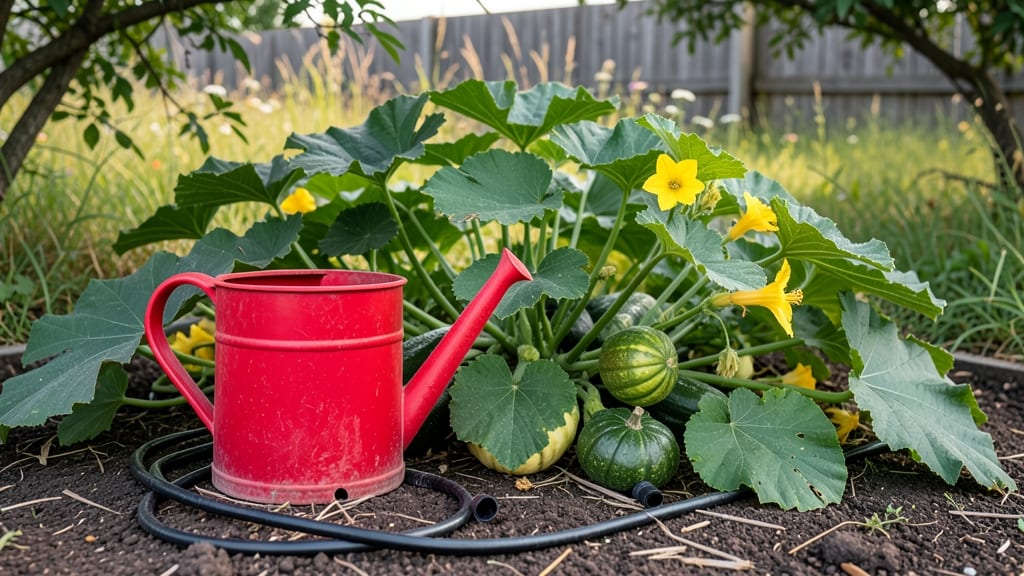
Squash plants thrive when their soil stays consistently moist—not soggy, not dry, but that perfect in-between that keeps vines sprawling and fruit swelling. 🌱 I’ve learned the hard way that skipping watering checks leads to bitter fruit or cracked blossoms, but getting it right means harvests that feed the family for months.
The key is 1-2 inches of water per week, delivered at the base where roots drink deeply—not just a quick sprinkle that evaporates by noon. Young seedlings need gentle moisture to prevent rot, while flowering plants demand steady hydration to set fruit.
Mulch helps lock in that moisture, saving you time and keeping roots cool in scorching summers.
You’ll know you’ve nailed it when vines grow lush and dark green, flowers stay plump, and fruit develops smoothly without bumps or cracks. Too little water?
Leaves curl like taco shells. Too much? Roots suffocate, and vines wilt despite damp soil. The goal is balance—like Goldilocks’ bowl of porridge, but for squash.
Container-grown squash need more frequent watering than in-ground plants, while hot climates may require daily checks. The secret isn’t complicated—just attentive. Once you master this, your squash will reward you with heavy vines and sweet, unblemished fruit that taste like summer in every bite.
📚 In This Guide
- What you need
- Instructions
- Tips and common mistakes
- Wrapping up and next steps
What you need
- ● Watering can or hose with a gentle spray nozzle: A 1-gallon watering can (for small gardens) or a soaker hose (for larger patches) works best. Avoid high-pressure streams to prevent soil erosion.
- ● Organic mulch (straw, grass clippings, or wood chips): Spread a 2-3 inch layer around plants to retain moisture and suppress weeds.
- ● Well-draining potting mix or garden soil: Squash thrives in loamy, fertile soil with a pH of 6.0–7.0. Amend heavy clay with compost.
- ○ Drip irrigation system (optional but ideal): Automates watering at the base, delivering 1–2 inches of water per week (adjust for heat/drought).
- ● Moisture meter: Ensures soil stays in the 60–80% moisture range (squash hates soggy roots!).
- ● Pruners or scissors: For trimming damaged vines or excess foliage (sterilize with rubbing alcohol).
- ● Garden gloves: Protects hands from prickly vines and soil-borne pathogens.
- ○ Rain gauge (optional): Tracks natural rainfall to adjust watering schedules.
- ● Sunlight: Squash needs 6–8 hours of full sun daily—choose a south-facing spot or use grow lights for containers.
- ● Spacious planting area: Vines spread 3–6 feet wide; space plants 2–3 feet apart (or 5–6 feet for large varieties like pumpkins).
- ● Disease-free seedlings: Start with healthy, disease-resistant varieties (e.g., ‘Butternut,’ ‘Zucchini,’ or ‘Hubbard’).
Step-by-Step guide to watering squash for consistent moisture
Mastering squash irrigation means watching for wilting vines and checking soil moisture before you water.
💧 Step 1: Water Deeply at Planting and Transplanting
When you first set out squash seedlings or transplant mature plants, give them a thorough soaking—about 1-2 gallons per plant—to settle the soil and encourage root expansion. This initial deep watering helps establish roots in the lower soil layers where moisture lingers longer. I always water at the base, avoiding the leaves to prevent fungal diseases like powdery mildew.
After planting, maintain a 1-2 inch deep moist zone in the soil. You'll know you've done it right when the surface feels damp but not soggy, and excess water drains away within 30 minutes. This prevents waterlogging, which can rot roots and invite pests. Real talk: Overwatering at this stage is the fastest way to kill young squash plants.
☀️ Step 2: Establish a Consistent Watering Routine
Once established, squash plants need 1-2 inches of water per week, delivered consistently rather than in sporadic bursts. I water mine in the early morning to allow foliage to dry out during the day, reducing disease risk. Use a rain gauge or tuna can to measure water—eyeballing it leads to uneven moisture.
Check soil moisture by inserting your finger 1-2 inches deep—if it feels dry, water again. Squash roots spread widely, so focus on deep, infrequent watering rather than light daily sprinkles. You'll see strong vine growth and fewer blossom-end rot issues when moisture is steady. Here's the thing—squash plants wilt easily, but they bounce back quickly if the soil is moist below the surface.
🌿 Step 3: Adjust for Heat and Fruit Development
During hot spells or when fruit begins to form, increase watering to 1.5-2 inches per week. The extra moisture supports rapid vine growth and fruit expansion. I often use soaker hoses or drip irrigation to deliver water directly to the root zone, which cuts down on evaporation and keeps leaves dry.
Watch for signs of stress: Drooping leaves or fruit that feels soft to the touch signals underwatering, while yellowing leaves or mushy stems indicate overwatering. When squash begins to swell, maintain even moisture—fluctuations cause fruit to crack or develop bitter flavors. I promise, a little extra attention here pays off with sweeter, healthier harvests.
✂️ Step 4: Mulch to Retain Moisture and Reduce Weeds
Spread a 2-3 inch layer of organic mulch around your squash plants to lock in moisture and regulate soil temperature. Straw or shredded leaves work best—they break down slowly while keeping the soil cool. Mulch also prevents soil-borne diseases from splashing onto leaves during watering.
Replenish mulch as it decomposes, keeping it 2 inches away from plant stems to avoid rot. You'll notice fewer weeds competing for water, and the soil stays consistently moist longer between waterings. This step alone cuts my summer watering time in half—no more rushing to water every afternoon.
🌱 Step 5: Monitor and Adjust for Seasonal Changes
As summer progresses, squash plants may need more frequent watering—sometimes daily during heatwaves. Pay attention to the weather forecast: After a heavy rain, skip watering entirely unless the soil feels dry 3 inches down. Overhead watering can spread diseases, so stick to drip irrigation or water at the base when possible.
In late summer, reduce water slightly as plants prepare for harvest. You'll see fewer new vines and more fruit development—this is your cue to taper back to 1 inch per week unless the soil is bone-dry. The goal is to keep roots active without overburdening them as harvest approaches. Here's what I do: I check the soil every 3 days in extreme heat, adjusting as needed.
Tips & tricks for perfect squash watering
Between us, the key to thriving squash isn't just about watering—it's about watering right. These insights will help you maintain that perfect moisture balance for lush vines and sweet fruit.
The 30-Minute Drainage Test: After your initial deep watering in Step 1, let excess water drain completely within 30 minutes. This ensures proper aeration while preventing root suffocation. I've learned this the hard way—soggy soil after planting leads to fungal issues and stunted growth. Use a trowel to check drainage by digging 2 inches deep; if water pools, your soil needs better drainage or less frequent watering.
Soil Moisture Depth Matters: The instructions mention checking 1-2 inches deep, but here's what nobody tells you—squash roots actually extend 2-3 feet deep! Focus your watering efforts below that 2-inch surface level by using soaker hoses or drip irrigation. This encourages roots to grow deeper, making your plants more drought-resistant. I've seen squash plants with shallow roots struggle even with consistent surface watering.
Mulch Timing Strategy: Apply your 2-3 inch mulch layer in Step 4 after the soil has warmed (usually 2-3 weeks after transplanting). Early mulching can trap cold soil and delay plant establishment. I wait until the soil reaches at least 60°F before mulching—this prevents rot and encourages faster vine growth. Plus, warm soil means faster decomposition of the mulch, which adds organic matter over time.
Heatwave Watering Hack: During extreme heat in Step 5, I split my watering into two sessions: once in early morning and again in late afternoon. This mimics natural rainfall patterns and prevents leaf scorch. The key is to water slowly—about ½ inch per session—to allow absorption rather than runoff. You'll notice the difference in leaf turgor and fruit firmness compared to one heavy watering session.
Pro Tips for Watering Squash Plants
- Between us, the key to thriving squash isn't just about watering—it's about watering right.
- The 30-Minute Drainage Test: After your initial deep watering in Step 1, let excess water drain completely within 30 minutes.
- Soil Moisture Depth Matters: The instructions mention checking 1-2 inches deep, but here's what nobody tells you—squash roots actually extend 2-3 feet deep!
Frequently asked questions
Got questions about keeping your squash plants thriving with the perfect watering routine? You’re not alone! Here are answers to the most common concerns—from timing to troubleshooting—so you can grow healthy vines and juicy fruit without the guesswork.
How often should I water squash plants?
Squash plants need 1 to 2 inches of water per week, especially during flowering and fruiting. Water deeply 2–3 times per week (or daily in extreme heat ) to encourage strong roots. Avoid shallow watering—consistency is key! Mulch helps retain moisture and reduces evaporation.
When is the best time of day to water squash?
Water in the early morning (6–9 AM) to let foliage dry before nightfall, preventing fungal diseases like powdery mildew. Avoid evening watering, as damp leaves overnight create a cozy home for pests and mold. Pro tip: Use a soaker hose to deliver water straight to the roots!
Can I use rainwater or tap water for squash plants?
Both work, but rainwater is ideal—it’s naturally soft and free of chlorine/fluoride that can stress plants. If using tap water, let it sit out for 24 hours to dissipate chemicals. Avoid salty or heavily treated water, which can harm soil over time.
Why are my squash flowers falling off?
Flower drop is often a sign of inconsistent watering or stress (like heat waves or poor soil). Keep soil evenly moist, especially during blooming. Hand-pollinate flowers by gently shaking vines or using a paintbrush to transfer pollen. Also, ensure plants get enough phosphorus (bone meal helps!) for better fruit set.
What do I do if my squash leaves look wilted?
Wilted leaves usually mean underwatering or overwatering. Check the soil: If it’s dry 1–2 inches down, water deeply. If soggy, let it dry out and improve drainage. Yellowing leaves? Could be overwatering or a nutrient deficiency (try compost tea!). Shade cloth on hot days can also help prevent stress.
Can I water squash plants from above?
While it’s not ideal, you can water from above occasionally—but aim for the soil, not the leaves to avoid fungal issues. For best results, use a drip irrigation system or soaker hose to deliver water at the base. If overhead watering is unavoidable, do it early in the day so leaves dry quickly.
Wrapping up and next steps
Mastering the art of watering squash plants is all about consistency and care—deep, even moisture keeps those vines thriving and fruits plump! Whether you’re a seasoned gardener or just starting, remember: less frequent, deeper watering beats shallow, daily sprinkles.
With these secrets in hand, your squash patch is well on its way to a bountiful harvest. 🌱
Ready to put it into action? Grab your watering can, check your soil, and give those plants the love they deserve! Happy gardening—your future summer meals will thank you! 🍉✨