Pruning
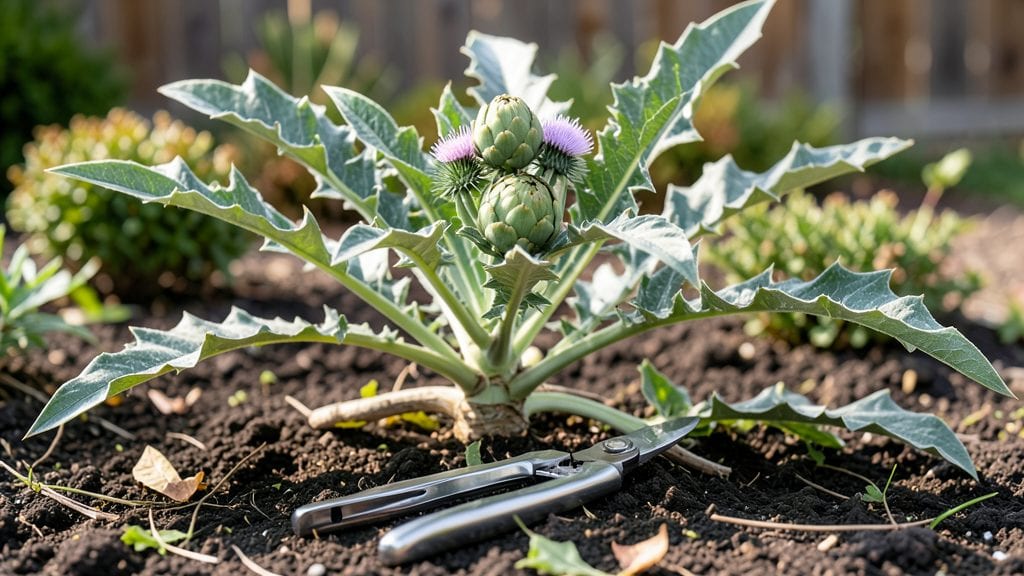
Trimming artichoke plants isn't just about keeping them tidy—it's the secret to bigger harvests and bushier growth all season long. ✨ I learned this the hard way after letting my first plants grow wild, only to watch them produce tiny, bitter buds instead of the plump, tender ones I dreamed of.
The key is timing: early-season trims encourage new shoots, while late-season cuts keep energy flowing to the main stems. You’ll need sharp pruners, gloves (those thorns don’t play nice), and a clear morning to work—artichokes respond best when the air is crisp and dry.
Most gardeners skip this step, but it’s what turns a decent harvest into a neighborhood bragging-rights moment.
By the end of summer, you’ll have plants that look like overgrown shrubs but produce glossy, golf-ball-sized buds instead of scraggly stems. The trimming also keeps pests at bay, since healthy growth outcompetes their favorite hiding spots.
Plus, the more you cut, the more your plants reward you with second (and third!) harvest waves.
Works for both globe and French artichokes, whether you’re growing in Mediterranean climates or cooler zones with a little extra care. The same principles apply—just adjust your schedule for your local frost dates. Let’s get those shears sharp and those plants thriving!
📚 In This Guide
- What you need
- Instructions
- Tips and common mistakes
- Wrapping up and next steps
What you need
- ● Pruning shears or sharp bypass pruners – Choose sterilized, sharp tools (1 pair) to avoid damaging plants or spreading disease. A 5-inch blade works best for most artichoke varieties.
- ● Garden gloves – A pair of cut-resistant, breathable gloves (e.g., nitrile-coated) to protect your hands from thorns and sharp stems.
- ● Disinfectant (70% isopropyl alcohol or bleach solution) – Use to sterilize tools before and after trimming to prevent bacterial/fungal infections.
- ● Garden twine or plant ties – 1-2 rolls (¼-inch width) to support heavy stems or redirect growth if needed.
- ● Compost bin or mulch – A small container or 3-5 cubic feet of mulch (e.g., straw or wood chips) to dispose of trimmings and enrich soil.
- ● Watering can or hose with a gentle nozzle – For post-trimming hydration (aim for 1-2 gallons per plant after heavy pruning).
- ● Hand pruners (smaller, 4-inch blade) – For precision trimming in tight spaces.
- ● Plant growth regulator (e.g., seaweed extract or paclobutrazol) – Diluted solution to promote bushier growth (follow label instructions).
- ● Garden journal or labeled markers – To track trimming dates and plant responses for future reference.
- ● Thorn-proof long sleeves – Extra protection if your artichoke variety has aggressive thorns (e.g., 'Green Globe').
- ● Epsom salt (magnesium sulfate) – 1 tbsp per gallon of water for a post-trimming foliar spray to boost recovery.
Step-by-Step guide to trimming artichoke plants for maximum yield
Here's how to keep your artichoke plants productive all season with simple pruning techniques.
✂️ Step 1: Remove Dead or Diseased Foliage First
Start by inspecting your plants for any yellowed, browned, or wilted leaves—these are your first targets. Grab your pruning shears and snip just above a healthy leaf node or bud, making clean cuts at a 45-degree angle. This prevents water from pooling and causing rot. I always work from the bottom up, removing the worst offenders first.
Don't skip this step—diseased leaves spread pathogens to healthy parts of the plant. If you see signs of fungal issues like powdery mildew, remove those leaves immediately and sterilize your shears with rubbing alcohol between cuts. Healthy foliage means more energy for those prized artichoke buds.
🌿 Step 2: Prune Side Shoots for Bushier Growth
Once your main stems have developed 4-5 leaves, you'll notice smaller side shoots emerging from the leaf axils. These are called suckers, and while they don't produce artichokes, they compete with your main buds for nutrients. Use your fingers to pinch off the smallest suckers when they're still under 2 inches tall—no need for shears here.
For larger suckers over 3 inches, cut them off at the base with clean shears. I like to leave just one or two suckers per plant if they're vigorous—these can become future main stems. The key is balance: too many suckers drain the plant, but complete removal can stress it. Watch your plant's response over a week to adjust.
☀️ Step 3: Thin Out Crowded Buds for Larger Harvests
When you spot artichoke buds forming, you'll need to make some tough choices. Leave only the largest, healthiest buds on each stem, spacing them about 12-18 inches apart. Smaller buds won't mature properly and will steal energy from your keepers. Use your shears to snip off the competition at the base, making sure to cut just above a leaf node.
Here's where timing matters: remove buds when they're still tight and fuzzy—about 3-4 inches in diameter. If you wait until they're larger, you'll reduce yield and quality. I always prioritize buds facing outward on the plant, as these get better sunlight exposure. After thinning, give your plant a good drink of water to help it recover.
⏰ Step 4: Summer Maintenance for Continuous Production
Throughout the growing season, keep an eye out for any new growth that forms in the center of your plant. This "blind" growth won't produce artichokes and can become a haven for pests. Snip these off regularly to maintain airflow and prevent disease. In late summer, when your main harvest winds down, you can give your plants a light haircut by trimming back any leggy growth by about one-third.
This encourages new flushes of growth that might produce a second harvest in warm climates. Just remember to stop all pruning 6-8 weeks before your first frost—you want the plant to focus on hardening off for winter. I always mark my calendar with this cutoff date to avoid last-minute mistakes.
🪴 Step 5: Winter Preparation Pruning
As temperatures drop below 50°F at night, your artichoke plant will start slowing down. This is the time to give it a final trim before winter. Cut back all remaining foliage to about 6 inches above the ground, leaving the sturdy stems. This helps prevent snow accumulation and reduces winter dieback. Remove any dead or diseased stems completely—they won't regrow in spring.
Here's a pro tip: after your final pruning, spread a 2-3 inch layer of mulch around the base (using the materials you've gathered). This protects the crown from freezing temperatures and keeps the soil moist during winter. In spring, you'll see new growth emerging from the base—proof your plant survived and is ready for another productive season.
Tips & tricks for perfect artichoke plant trimming
These simple but game-changing techniques will transform your artichoke harvest from decent to spectacular—without adding extra work.
The Angle Matters: When you make those 45-degree cuts in Step 1, resist the urge to rush. A proper angle prevents water from pooling at the cut site, which is how fungal infections start. I've seen plants recover from pruning mistakes, but never from waterlogged cuts. Take your time—this small detail prevents big headaches later.
Sucker Strategy: In Step 2, here's what nobody tells you about those pesky suckers: the 2-inch rule is your friend, but don't be afraid to leave one or two vigorous suckers if your plant looks stressed. These can become your next main stems. I've had plants bounce back beautifully after keeping just one strong sucker—it's all about reading your plant's energy levels.
Bud Timing Secret: That 3-4 inch diameter window in Step 3 is tighter than it sounds. I learned this the hard way after letting buds grow too large—suddenly, I was harvesting small, tough artichokes instead of the plump beauties I wanted. Check your buds every 3-4 days during peak season to catch that perfect moment when they're still fuzzy but clearly forming.
Winter Prep Insight: The 6-inch height recommendation in Step 5 might seem arbitrary, but it's actually based on artichoke plants' natural hardiness. Leaving too much growth risks winter dieback, while cutting too low removes protective foliage. I've found that 50°F nights are the real trigger—wait until you see consistent nighttime temps below this before your final trim. This timing ensures your plant has enough energy reserves for spring.
Pro Tips for Trimming Artichoke Plants
- These simple but game-changing techniques will transform your artichoke harvest from decent to spectacular—without adding extra work.
- The Angle Matters: When you make those 45-degree cuts in Step 1, resist the urge to rush.
- Sucker Strategy: In Step 2, here's what nobody tells you about those pesky suckers: the 2-inch rule is your friend, but don't be afraid to leave one or two vigorous suckers if your plant looks stressed.
Frequently asked questions
Got questions about trimming your artichoke plants? You’re not alone! Whether you're a first-time gardener or a seasoned green thumb, these FAQs will help you master the art of pruning for a bountiful harvest. Let’s dive in!
When is the best time to trim artichoke plants?
Trim your artichoke plants throughout the growing season, but focus on early spring (just before new growth starts) and after harvest. Avoid heavy pruning in late summer or fall, as this can stress the plant before winter. Light maintenance trims (removing dead or yellowing leaves) can happen anytime—just don’t cut more than ⅓ of the plant at once!
How much should I cut back artichoke plants?
For established plants, aim to trim back 10–20% of the foliage in one session. Cut just above a leaf node (where new leaves grow) to encourage bushier growth. Avoid over-trimming—artichokes are perennials and need energy to regrow. Pro tip: If your plant looks leggy, prioritize pruning the top third to redirect energy to the base.
What if I prune at the wrong time or too aggressively?
Over-pruning or trimming too late in the season (after Labor Day in most climates) can stunt growth or even kill the plant. Signs of stress include yellowing leaves, wilting, or no new buds. If this happens, reduce watering slightly, fertilize lightly with compost, and avoid pruning for 4–6 weeks. Most artichokes bounce back with patience!
Can I use the trimmings for anything besides compost?
While compost is ideal, you can also use artichoke trimmings for mulch (chop and spread around the base to retain moisture) or herb-infused oils (simmer leaves in olive oil for a unique culinary touch). Just avoid using diseased or pest-ridden clippings—toss those in the trash instead.
Do artichoke plants need pruning in winter?
Minimal pruning is needed in winter. Focus on removing dead or frozen foliage in early spring (when new growth appears). Avoid heavy cuts—artichokes are semi-dormant and vulnerable to cold stress. If your plant looks healthy but bare, wait until after the last frost to encourage fresh growth.
Bonus Tip:
Label your pruning shears with colored tape (e.g., green for artichokes, red for tomatoes) to avoid cross-contamination with diseases. Happy trimming!
Wrapping up and next steps
Trimming your artichoke plants isn’t just about keeping them tidy—it’s the secret to bigger harvests and healthier growth! 🌱 By mastering the right techniques, you’ll encourage bushier plants, reduce pests, and enjoy a longer season of delicious artichokes.
Whether you’re a beginner or a seasoned gardener, every snip brings you closer to a thriving garden.
Ready to put your new skills to work? Grab your pruners and start trimming today! Your future harvest—and your plant’s happiness—will thank you. 🌟