
Pruning
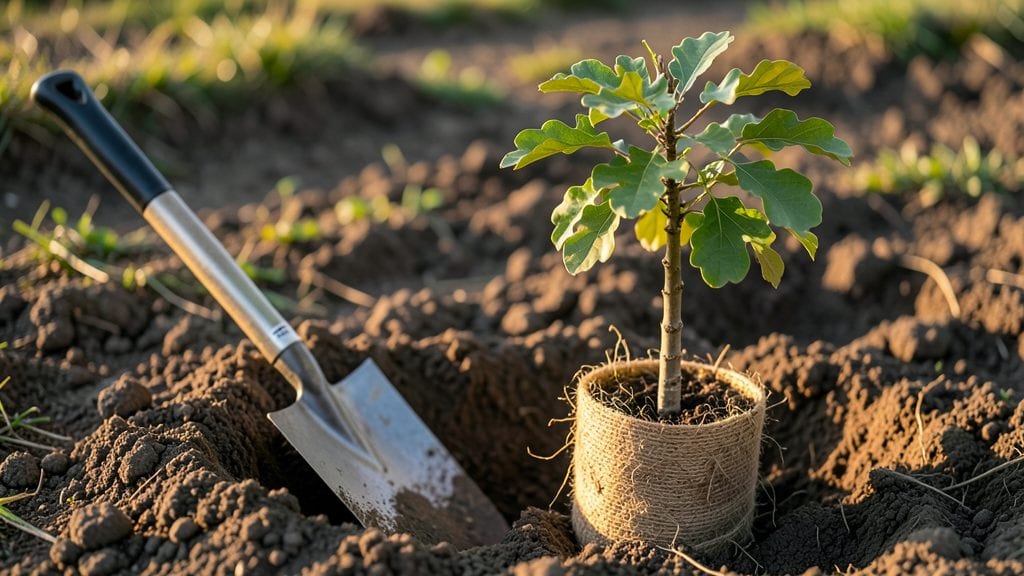
The right tree planting process makes all the difference between a thriving shade provider and a struggling sapling. I’ve planted over two dozen trees—some flourished, others struggled—and the difference always came down to those first few critical steps.
The secret isn’t just digging a hole; it’s about prepping the soil, handling the roots just right, and giving the tree the best possible start. 🌱
You’ll need basic tools—a shovel, gloves, and a wheelbarrow for soil—and the right spot that matches your tree’s sunlight and space needs. Deciduous trees like oaks need wider planting zones, while evergreens often prefer slightly shallower holes.
The goal is to create an environment where roots can spread without competition, and the soil drains well enough to avoid rot. Most people skip soil amendments, but a little compost mixed into the native soil works wonders for the first few years.
What you end up with is a sturdy, well-anchored tree that grows strong roots and resists storms better than anything from a nursery pot. Within a year, you’ll see new shoots forming, and by the third season, the tree will be self-sufficient—no more babying required.
The key is patience: proper planting now means decades of healthy growth with minimal maintenance. Here’s how to make it happen without the common pitfalls.
This method works for everything from fruit trees in your backyard to ornamental specimens along your driveway. Whether you’re planting a single shade tree or a whole grove, the same principles apply—just adjust the scale. Let’s get those roots settled right from the start.
📚 In This Guide
- What you need
- Instructions
- Tips and common mistakes
- Wrapping up and next steps
What you need
- ● Tree sapling: Choose a species native to your region (e.g., oak, maple, or fruit trees). Select a 1-3 gallon container-grown sapling for ease of planting.
- ● High-quality soil: Mix 60% native soil with 40% compost or organic matter (e.g., peat moss, coconut coir, or well-rotted manure). Aim for 2-3 cubic yards per tree.
- ● Mulch: Use 2-4 inches of organic mulch (wood chips, straw, or pine needles) to retain moisture and suppress weeds. Cover an area 3 feet wide and 3 feet deep around the tree’s base.
- ● Water: Have 5-10 gallons of water ready for immediate post-planting hydration.
- ● Shovel or spade: A round-point shovel (for digging) or a flat-edged spade (for precision). Size: 18-24 inches long.
- ● Garden fork: Loosens compacted soil. Opt for a heavy-duty, 4-tine fork with 18-inch handles.
- ● Pruners or saw: Bypass pruners (for small branches) or a hand saw (for thicker stems). Keep them sharp and sterilized.
- ● Gloves: Wear durable, breathable gardening gloves to protect your hands.
- ● Measuring tape or ruler: Ensures proper planting depth (sapling’s root flare should sit 1-2 inches above soil level).
- ○ Stakes and ties (optional): Use 3-4 wooden or metal stakes (6 feet tall) and soft tree ties for young, unstable trees.
- ● Location scouting: Pick a spot with 6+ hours of sunlight (adjust for shade-tolerant species) and well-draining soil. Avoid low areas where water pools.
- ● Soil test: Check pH and nutrient levels (ideal range: 5.5-7.0). Amend soil as needed with lime (for acidic soil) or sulfur (for alkaline soil).
- ● Weather window: Plant during cooler months (fall or early spring) to reduce transplant shock. Avoid extreme heat or frost.
- ● Permits (if applicable): Check local regulations—some areas require permits for large trees or urban planting.
Step-by-Step guide for planting trees with healthy roots
Here's how to plant trees the right way—so they grow strong and thrive for decades.
🌱 Step 1: Choose the Right Spot and Dig the Perfect Hole
Pick a location with 6-8 hours of sunlight daily and space to accommodate the tree's mature size. Avoid low spots where water pools after rain. Dig a hole twice as wide as the root ball but no deeper—this encourages roots to spread horizontally instead of circling the hole.
Loosen the soil at the bottom with a shovel or your hands. Compacted soil restricts root growth, so break it up until it feels light and crumbly. If your soil is heavy clay, mix in a handful of organic matter like compost to improve drainage.
🪴 Step 2: Prepare the Tree and Root Ball
Remove the tree from its container and gently loosen the root ball with your fingers. If the roots are circling tightly, use a knife to make 2-3 vertical cuts around the edges to encourage outward growth. Never pull or force roots—this damages them and slows establishment.
Check the root flare—the area where the roots meet the trunk. It should sit 1-2 inches above the surrounding soil level. If the root ball is buried too deep, roots will suffocate and the tree may fail. Adjust the hole depth if needed before planting.
💧 Step 3: Plant at the Right Depth and Water Deeply
Place the tree in the hole so the root flare is visible above the soil line. Fill the hole halfway with native soil, tapping it gently to remove air pockets. Add water to settle the soil, then fill the rest of the hole, again tapping to eliminate gaps.
Water immediately after planting to eliminate air pockets and help roots make contact with the soil. Use 10-15 gallons of water for each inch of trunk diameter. For example, a 3-inch diameter tree needs 30-45 gallons total. Let the water soak in completely.
☀️ Step 4: Mulch and Protect the New Tree
Spread 2-3 inches of mulch (like wood chips or shredded bark) in a circle around the tree, keeping it 3-4 inches away from the trunk. Mulch helps retain moisture and regulate soil temperature, but too much touching the trunk can cause rot.
Install a tree stake only if necessary—usually for young trees in windy areas. If staking, use a single flexible stake and tie it loosely with a soft material like a strip of old T-shirt. Check the tie every few weeks to ensure it's not cutting into the trunk as the tree grows.
⏰ Step 5: Monitor and Maintain for Long-Term Success
Water deeply once a week during the first growing season, providing 10-15 gallons total per watering. After that, water only when the soil feels dry 2-3 inches below the surface**. Overwatering is just as harmful as underwatering—roots need oxygen too.
Fertilize lightly in the second year with a balanced, slow-release fertilizer. Avoid heavy fertilizers in the first year—they encourage weak, fast-growing roots that can't support the tree long-term. Prune only to remove dead or crossing branches; never "top" a tree to control its size.
Tips & tricks for perfect tree planting
Planting a tree that thrives for decades starts with these simple but critical insights—trust me, I've seen too many trees fail from small mistakes.
Location is Everything: That 6-8 hours of sunlight isn't just a suggestion—it's non-negotiable for most trees. I learned this the hard way when a shade-loving maple I planted in full sun struggled for years. Check your yard's sunlight patterns throughout the day, especially in winter when days are shorter. And remember: mature size matters too—give that oak at least 50 feet of clearance from structures and power lines.
Root Ball Rescue: When you see those circling roots in Step 2, don't just cut them haphazardly. Make those 2-3 vertical cuts carefully—think of them as release valves for the roots. I use a sharp knife to create clean cuts, then gently spread the roots outward before planting. This single step can mean the difference between a tree that thrives and one that slowly declines from girdling roots.
Watering Wisdom: Those 10-15 gallons per inch of trunk diameter might seem like a lot, but it's essential. I measure the trunk diameter at chest height and calculate accordingly—it's worth the effort. The key is slow, deep watering that encourages roots to grow downward. A good test: after watering, stick your finger 2-3 inches down—it should feel moist but not soggy. Overwatering is just as deadly as underwatering.
Mulch Matters: The 2-3 inches of mulch isn't just for looks—it's a protective blanket for your tree's roots. But here's what nobody tells you: that mulch should form a doughnut shape, never touching the trunk. I've seen too many trees develop rot from mulch piled against the bark. Keep it 3-4 inches away and you'll prevent this common problem entirely.
Pro Tips for Tree Planting Process
- Planting a tree that thrives for decades starts with these simple but critical insights—trust me, I've seen too many trees fail from small mistakes.
- Location is Everything: That 6-8 hours of sunlight isn't just a suggestion—it's non-negotiable for most trees.
- Root Ball Rescue: When you see those circling roots in Step 2, don't just cut them haphazardly.
Frequently asked questions
Got questions about planting trees the right way?
Here are answers to the most common queries—from timing to troubleshooting—so you can grow a thriving tree with confidence.
When is the best time to plant a tree?
The ideal window is early spring or fall (before the ground freezes or when temperatures are mild). These seasons give roots time to establish before extreme weather. Avoid planting in summer heat or winter frost—both stress young trees. Pro tip: Check your local frost dates for precision!
How long does it take for a tree to fully establish?
Most trees need 1–3 years to establish strong roots, depending on species and conditions. Fast-growing trees like willows may stabilize sooner, while oaks or maples take longer. Monitor soil moisture and mulch depth—consistency is key!
What if my newly planted tree’s leaves turn yellow?
Yellowing leaves often signal overwatering, underwatering, or poor drainage. Check soil moisture (it should feel damp but not soggy) and ensure proper mulching. If roots are exposed, backfill gently. A slow-release fertilizer can also help if nutrients are lacking.
Can I plant a tree in a small yard or container?
Yes! Dwarf or compact varieties (like Japanese maples or columnar fruit trees) thrive in tight spaces. For containers, use large pots (15+ gallons) with drainage holes and well-draining soil. Rotate pots occasionally for even sunlight exposure.
Do I need to prune my tree right after planting?
Only trim broken or diseased branches immediately. Avoid heavy pruning—focus on root care first. Light shaping can wait until spring when the tree is actively growing. Use clean, sharp tools to prevent damage.
| Quick Fixes | When to Call a Pro |
|---|---|
| Yellow leaves → Check water/mulch | Fungal spots or wilting despite care |
| Poor growth → Test soil pH | Tree leans or cracks appear in trunk |
Wrapping up and next steps
Planting a tree isn’t just about digging a hole—it’s about nurturing future generations of life and beauty. By following these steps, you’ve set the foundation for strong root development, resilience, and long-term growth.
Whether you’re a gardening novice or a seasoned green thumb, every tree you plant makes a difference—literally for the planet! 🌱
Ready to take action? Start small—plant one tree today, then share your progress or tips with others. The more we plant, the greener (and healthier!) our world becomes. Let’s grow together! 🌎✨