Size
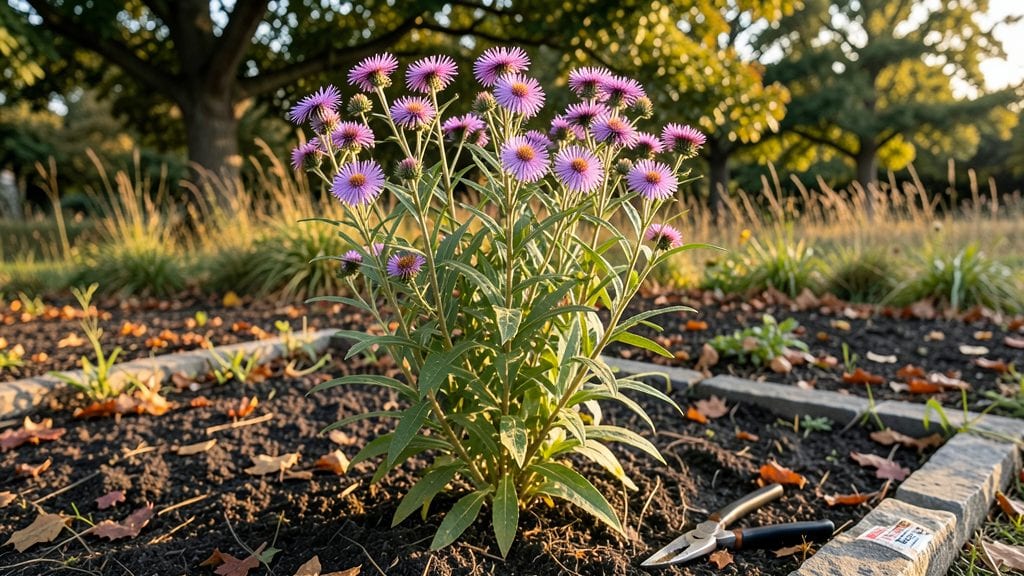
Growing tall aster plants like Symphyotrichum novae-angliae means your garden stays vibrant from late summer through frost with almost no extra work. 🌟 I’ve let these beauties grow wild in my backyard for years—they thrive on neglect while still packing a punch with their daisy-like blooms in shades of purple, pink, and white.
The key isn’t fussing over them; it’s giving them the right spot and basic care so they focus on flowering instead of fighting for survival.
These plants love full sun and well-draining soil, but they’re tough enough to handle average garden conditions. Space them 2-3 feet apart so they have room to reach their full height of 3-6 feet, and water them once a week unless you’re in a drought.
They don’t need rich soil or frequent fertilizing—just a light feeding in early spring keeps them happy. The real secret? Deadheading spent blooms encourages more flowers, but even if you skip that, they’ll still bloom reliably.
By late summer, you’ll have a towering display of blooms that butterflies and bees can’t resist. The foliage stays green until frost, and the stems add winter interest if you leave them standing. Prune back in early spring to tidy up, but beyond that, these plants take care of themselves.
They’re the perfect low-maintenance star for borders, cottage gardens, or even cutting gardens—just cut stems in the morning for the longest vase life.
Works in USDA zones 3-8, making them versatile for most gardens. Whether you’re a busy gardener or just love plants that don’t demand attention, tall asters deliver effortless beauty. Here’s how to get them growing strong in your yard.
📚 In This Guide
- What you need
- Instructions
- Tips and common mistakes
- Wrapping up and next steps
What you need
- ● Tall aster plants: Choose Symphyotrichum varieties (e.g., 'Wood’s Blue', 'Albert Chatham') from nurseries or seed packets. 3–5 plants per 4–6 ft. garden space is ideal.
- ● Well-draining potting mix: 10–15 lbs of a blend with 50% peat moss, 30% perlite, and 20% compost (or pre-mixed garden soil with added sand for sandy soils).
- ● Garden tools: Trowel (for transplanting)
- ● Pruners (bypass or anvil type, sharp and sanitized)
- ○ Garden gloves (optional but recommended)
- ● Fertilizer: Balanced 10-10-10 or slow-release 5-10-10 granules (apply 1 tbsp per plant at planting and mid-season).
- ● Mulch: 2–3 inches of shredded bark or straw mulch to retain moisture and suppress weeds.
- ● Watering can or hose with a gentle nozzle (for consistent moisture without disturbing roots).
- ● Support stakes: 6–8 ft. bamboo stakes or metal plant cages (if your aster variety is top-heavy).
- ● Drip irrigation system: Saves time and ensures 1–1.5 inches of water per week (adjust for rain).
- ● Plant labels: Waterproof markers to track varieties and planting dates.
- ● Compost tea or liquid fertilizer: For a monthly boost during peak bloom season.
Step-by-Step instructions for growing tall aster plants
Here's the straightforward approach I use to keep my tall asters thriving with vibrant blooms all season long.
🌱 Step 1: Choose the Perfect Planting Location
Tall asters need full sun—at least 6-8 hours daily—to produce their showy blooms. I always pick a spot that gets morning sun and afternoon shade if your climate runs hot, as this prevents leaf scorch. The soil should drain well, so avoid low-lying areas where water pools after rain.
Test your soil by digging a small hole. If water sits above the hole after 30 minutes, amend the area with 2-3 inches of compost to improve drainage. Asters hate soggy roots, so this step is critical if your yard tends toward clay. I like to plant mine near the back of borders so their 3-5 foot height doesn't overshadow shorter perennials.
💧 Step 2: Plant at the Right Depth and Spacing
Dig a hole twice as wide as the aster's root ball but only as deep as the container it came in. This ensures the plant sits at the same soil level as it did in the nursery. Gently remove the plant from its pot and loosen any circling roots with your fingers—this encourages outward growth instead of a tangled mess.
Space tall asters 18-24 inches apart in all directions. Crowding leads to weak stems and fewer blooms, so don't skimp here. Fill the hole halfway with soil, place the plant in, and backfill while pressing lightly to eliminate air pockets. Water immediately after planting to settle the soil and remove any air gaps around the roots.
☀️ Step 3: Water Deeply but Infrequently
Once established, tall asters are drought-tolerant, but they need 1-1.5 inches of water weekly during their first growing season. Water deeply at the base—never overhead—to prevent fungal diseases like powdery mildew. I use a soaker hose or drip irrigation to deliver moisture slowly and evenly.
Check soil moisture by pushing your finger 1-2 inches deep. If it feels dry, water again. Overwatering is the fastest way to kill asters, so resist the urge to water on a schedule. Mature plants can handle dry spells better than consistent dampness. Mulch around the base with 2-3 inches of organic mulch to retain moisture and suppress weeds.
✂️ Step 4: Prune for Longer Blooming Seasons
Here's where minimal pruning pays off: deadhead spent blooms every 2-3 weeks by snipping stems just above a set of healthy leaves. This encourages the plant to produce more flowers instead of going to seed. I use clean, sharp pruners to make clean cuts—never tear stems, as this invites disease.
In early spring, cut back any brown or damaged stems to the ground. This gives the plant fresh energy for new growth. If your asters get leggy by midsummer, give them a light haircut—cutting back 1/3 of the height promotes bushier growth and more blooms. Just avoid heavy pruning after mid-August, as new growth won't have time to harden off before winter.
🌿 Step 5: Protect and Prepare for Winter
Tall asters are hardy perennials, but they benefit from a little winter protection in colder climates. Once foliage turns brown and dies back, cut stems to 4-6 inches tall and remove any debris around the base. This prevents pests and diseases from overwintering.
Mound 2-3 inches of mulch over the crown to insulate roots from freezing temperatures. I use straw or shredded leaves because they break down slowly and add nutrients to the soil. In spring, remove the mulch when new shoots appear—usually by mid-April in most zones. This simple step ensures your asters bounce back stronger every year.
Tips & tricks for perfect tall aster plant care
A few simple strategies will help your tall asters thrive with minimal effort and maximum blooms.
Soil Test Tip: That 30-minute water test in Step 1 is your best friend for avoiding soggy roots. If water lingers after 30 minutes, mix in 2-3 inches of compost and consider adding a handful of perlite or sand to improve drainage. I've seen asters drown in heavy clay soil—trust me, this simple test prevents that heartbreak.
Root Care: When loosening circling roots in Step 2, be gentle but thorough. Use your fingers to tease apart any tight roots—this encourages outward growth instead of a tangled mess. I make sure to remove any damaged roots too, as they can harbor diseases. The extra 10 minutes spent here pays off with stronger plants.
Pruning Secret: For the 2-3 week deadheading in Step 4, I use a pair of clean pruners and always cut just above a set of healthy leaves. This small detail makes a huge difference—it signals the plant to produce more flowers instead of going to seed. I've seen gardens with asters that barely bloom because they didn't follow this simple rule.
Winter Prep: That 4-6 inch stem height in Step 5 is crucial for winter protection. Cutting too short removes next year's growth buds, while leaving stems too tall creates wind catchers. I mark my plants with small flags to remember where they are before cutting—this prevents accidental over-pruning in the dark winter months.
Pro Tips for Tall Aster Plant
- A few simple strategies will help your tall asters thrive with minimal effort and maximum blooms.
- Soil Test Tip: That 30-minute water test in Step 1 is your best friend for avoiding soggy roots.
- Root Care: When loosening circling roots in Step 2, be gentle but thorough.
Frequently asked questions
Got questions about keeping your tall aster plants thriving?
Here are answers to the most common ones—so you can enjoy those show-stopping blooms with ease!
How tall do tall aster plants actually grow?
Tall aster plants (like Symphyotrichum varieties) typically reach 3 to 5 feet tall, though some dwarf types stay under 2 feet. Give them full sun and well-draining soil to hit their full height potential. If they flop over, stake them early for support!
When is the best time to plant tall asters for year-round blooms?
Plant them in early spring or fall for the best results. Spring gives them time to establish roots before summer heat, while fall planting lets them settle in before winter. Avoid planting in late summer—hot weather can stress young plants.
Do tall asters need a lot of pruning, or can I skip it?
Minimal pruning is key! Cut back dead or faded blooms to encourage more flowers, and trim leggy stems in early spring. Skip heavy pruning—asters grow best with a natural, wildflower look. Just remove spent stems to keep the plant tidy!
Are tall asters deer-resistant, or will they become a buffet?
While not fully deer-proof, tall asters are less appealing than hostas or tulips. To deter deer, try mild repellents (like garlic spray) or plant them near thorny shrubs. If deer are a problem, opt for dwarf varieties or pair them with deer-resistant perennials.
How do I keep tall asters blooming all season long?
For continuous blooms, deadhead spent flowers regularly and fertilize lightly in early spring with a balanced 10-10-10 formula. Water deeply once a week (more in droughts) and mulch to retain moisture. Choose late-blooming varieties (like ‘Wood’s Purple’) for extended color!
Wrapping up and next steps
The tall aster plant is a stunning, low-maintenance addition to any garden, offering vibrant blooms from late summer to frost—with minimal pruning required! 🌸 Whether you’re a seasoned gardener or just starting, its hardy nature and striking beauty make it a winner.
Ready to enjoy a year-round show with almost no fuss?
Your next step? Grab some seeds or seedlings, pick a sunny spot, and let nature do the rest! With just a little care, you’ll be surrounded by cheerful, towering blooms in no time.