
Blooming
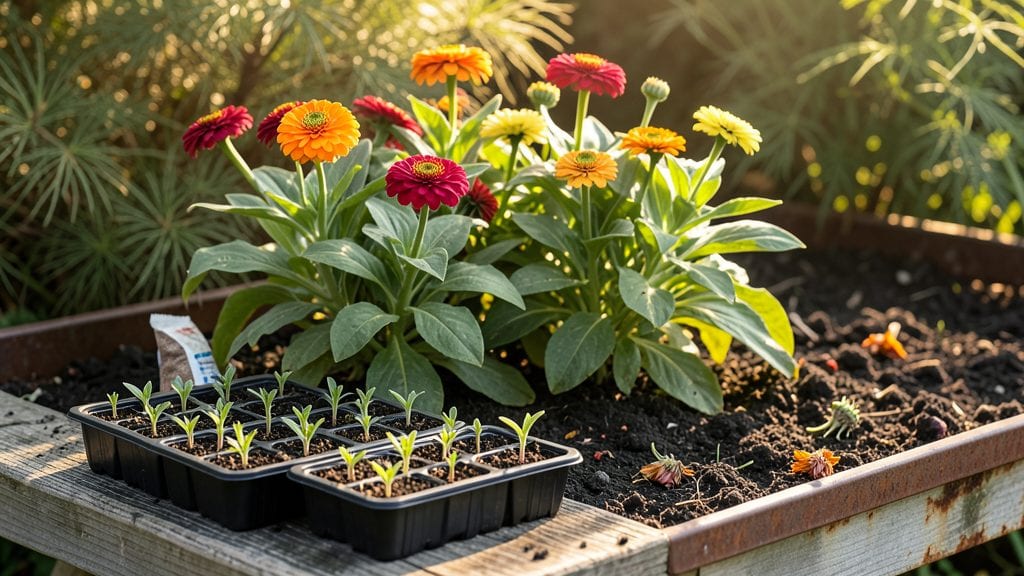
Succession planting zinnias turns a single season of color into a year-round display of bold striped blooms that never quit. 🌻 I learned this trick after watching my zinnias fade by August—until I staggered plantings every three weeks, keeping the vase always full and the garden buzzing with pollinators.
The secret lies in timing: start your first batch 6-8 weeks before your last frost, then repeat every 3-4 weeks until mid-summer. Zinnias thrive in warm soil, so avoid early plantings—they’ll bolt or rot.
Use 12-inch spacing between plants to prevent crowding, and deadhead spent blooms to encourage nonstop production.
By following this schedule, you’ll harvest continuous blooms from June through frost, with cut flowers that last 7-10 days in water. The striped varieties like ‘Benary’s Giant’ or ‘Crystal’ hold their color best when succession-planted, ensuring your garden stays vibrant even as summer winds down.
This method works in zones 3-10, though southern gardeners may extend plantings into early fall. For containers, use 5-gallon pots and plant two per container—just repeat the schedule. The payoff? A garden that never looks tired, and bouquets that cost pennies instead of dollars.
📚 In This Guide
- What you need
- Instructions
- Tips and common mistakes
- Wrapping up and next steps
What you need
- ● Zinnia seeds: Choose heat-tolerant varieties like ‘Benary’s Giant’ or ‘Profusion’ (1–2 oz per planting batch).
- ● Seed-starting mix: 1–2 gallons of sterile, well-draining potting soil (or compost blend).
- ● Containers or seed trays: 4–6" deep with drainage holes (or biodegradable pots).
- ● Garden soil: Loamy, well-amended soil with compost (test pH: 6.0–7.0).
- ● Fertilizer: Balanced 10-10-10 or slow-release organic granules (1 tbsp per sq. ft.).
- ● Watering can or hose: With a gentle spray nozzle for seedlings.
- ● Hand trowel or transplanting tool (for digging small holes).
- ○ Gloves (optional but helpful for messy soil).
- ● Plant labels (to track planting dates).
- ● Sunlight access: 6+ hours of direct sun daily (zinnias are sun-hungry!).
- ● Weather check: Wait until soil is at least 60°F (last frost risk passed).
- ● Row covers or shade cloth (for seedlings in hot climates).
- ● Mulch (straw or shredded leaves to retain moisture).
- ● Pruning shears (for deadheading spent blooms).
- ● Companion plants (marigolds or nasturtiums to deter pests).
Step-by-Step instructions for succession planting zinnias
Here's how I keep zinnias blooming nonstop—plant in waves for continuous color.
🌱 Step 1: Prepare the Soil and Plant Initial Batch
Zinnias thrive in well-draining soil with a pH between 6.0 and 7.0. Work 2 inches of compost into the top 6 inches of soil to improve fertility and drainage. I like to loosen the soil to a depth of 12 inches—this prevents root binding as plants mature. For 4 servings, create 4 planting holes spaced 12 inches apart in a square pattern. This layout maximizes airflow and reduces disease risk.
Drop 2-3 seeds per hole at a depth of ¼ inch—deeper planting delays germination. Cover lightly with soil and pat gently to ensure good seed-to-soil contact. Water immediately with a gentle spray until the soil surface feels evenly moist. Avoid soaking the area, as zinnias dislike soggy conditions. You'll see sprouts in 7-14 days, depending on your climate.
🌿 Step 2: Time Subsequent Plantings Every 2-3 Weeks
Here's the key to nonstop blooms: plant new batches every 2-3 weeks starting 6-8 weeks before your first frost date. For 4 servings, prepare 4 additional holes in the same layout, repeating the soil prep and planting steps. I mark each planting date on a small stake near the row—this helps track maturity and harvest timing. Each new batch ensures fresh blooms as the previous ones fade.
Watch for first true leaves (the second set after the initial cotyledons) to appear. This confirms successful germination and signals it's time to thin seedlings. Once seedlings reach 2 inches tall, carefully remove the weakest one, leaving the strongest plant per hole. Thin at the base with clean shears to avoid damaging roots. You'll have 4 evenly spaced, robust zinnias ready for peak performance.
☀️ Step 3: Provide Full Sun and Consistent Care
Zinnias demand 6-8 hours of direct sunlight daily—they won’t bloom without it. Position your rows where they’ll receive morning sun and afternoon shade if temperatures exceed 90°F. I stake taller varieties like 'Benary’s Giant' to prevent flopping, but dwarf zinnias like 'Thumbelina' stay compact without support. Water at the base every 2-3 days during dry spells, ensuring the top 2 inches of soil stay dry to the touch—this prevents fungal issues.
Fertilize lightly with a balanced 10-10-10 formula when seedlings reach 4 inches tall, then again when they begin flowering. Over-fertilizing leads to lush foliage but fewer blooms. Deadhead spent flowers by pinching off the stem ½ inch below the bloom—this redirects energy to new growth. You’ll notice a surge of fresh buds within 7-10 days of deadheading, keeping your display vibrant.
✂️ Step 4: Harvest and Extend the Season
Harvest zinnias in the early morning when blooms are fully open but still firm. Cut stems at a 45-degree angle just above a leaf node to encourage branching. Bundle stems with rubber bands and place in a bucket of cool water to extend vase life. For 4 servings, you’ll harvest 10-15 blooms per week at peak season—enough for bouquets or fresh-cut arrangements.
To prolong blooming, apply a layer of 1-2 inches of mulch around plants after the last harvest. This insulates roots and retains moisture. As temperatures drop below 50°F, zinnias slow but don’t die off—cover tender varieties with frost cloth on chilly nights. With this method, you’ll enjoy zinnias from early summer until the first hard frost, creating a bold, striped display that never fades.
Tips & tricks for perfect succession planting of zinnias
A few strategic moves will transform your zinnias from sporadic blooms to a never-ending floral display that steals the show.
Soil Preparation Secret: The 12-inch deep loosening in Step 1 isn't just about roots—it creates micro-channels that prevent waterlogging during those critical 2-3 day watering intervals. I've found that adding a handful of perlite to the 2 inches of compost creates even better drainage for these drought-sensitive beauties. This prevents the fungal issues that often derail zinnia success when the top 2 inches stay too wet.
Planting Timing Strategy: That 6-8 week window before frost isn't arbitrary—it accounts for zinnias' 7-14 day germination plus 4-6 weeks to maturity. Use a frost date calculator to pinpoint your exact start date, then mark your calendar for those 2-3 week intervals. Pro tip: I plant my first batch on Mother's Day weekend (around May 10th in most zones) to ensure summer-long color.
Thinning Technique: When thinning those 2-3 seedlings to one per hole at the 2-inch mark, I use a pair of clean scissors to cut at the base rather than pulling. This prevents disturbing the roots of neighboring plants and reduces stress on the remaining seedling. The clean cut also minimizes disease entry points—something that's crucial when plants are this close together.
Heat Management: The 90°F threshold isn't random—it's when zinnias start showing heat stress. I've learned to monitor afternoon shade needs by checking leaf color: if leaves start curling or turning yellow at the edges, it's time to provide that afternoon relief. For container growers, move pots to shaded areas during peak heat while maintaining those 6-8 hours of morning sun.
Pro Tips for Succession Planting Zinnias
- A few strategic moves will transform your zinnias from sporadic blooms to a never-ending floral display that steals the show.
- Soil Preparation Secret: The 12-inch deep loosening in Step 1 isn't just about roots—it creates micro-channels that prevent waterlogging during those critical 2-3 day watering intervals.
- Planting Timing Strategy: That 6-8 week window before frost isn't arbitrary—it accounts for zinnias' 7-14 day germination plus 4-6 weeks to maturity.
Frequently asked questions
Got questions about keeping your zinnias blooming nonstop with succession planting? We’ve got answers!
Here are some of the most common queries—plus practical tips to make your garden thrive.
What’s the best time to start my first zinnia succession planting?
For a continuous bloom, stagger plantings every 2–3 weeks from early spring until mid-summer. Start seeds indoors 6–8 weeks before your last frost date, then transplant outdoors when soil is warm (60°F+). If you’re direct-sowing, plant seeds every 3–4 weeks for a steady supply of blooms.
How long does it take for zinnias to flower after planting?
Zinnias typically bloom 60–75 days after sowing, depending on the variety. Succession planting ensures you always have fresh flowers by overlapping plantings. For example, if your first batch blooms in July, plant a second round in early June to take over in August.
Can I use succession planting for zinnias in containers or small spaces?
Zinnias thrive in containers as long as pots are at least 12 inches deep and have good drainage. Use compact varieties like ‘Thumbelina’ or ‘Crystal’ for space-saving success. Plant 2–3 seeds per pot, thin to the strongest seedling, and enjoy blooms in just a few weeks.
What should I do if my zinnias get pests or diseases?
Zinnias are generally pest-resistant, but watch for Japanese beetles, aphids, or powdery mildew. Remove affected leaves promptly, and spray with neem oil or insecticidal soap if needed. For mildew, improve airflow by spacing plants 12–18 inches apart and water at the base (not overhead).
Are there any zinnia varieties that work better for succession planting?
Yes! Choose fast-blooming, heat-tolerant varieties like ‘Benary’s Giant,’ ‘Profusion,’ or ‘Zahara.’ These varieties mature quickly (50–60 days) and produce abundant blooms, making them ideal for staggered plantings. Mix heights and colors for a dynamic, long-lasting display!
Wrapping up and next steps
Succession planting zinnias isn’t just a gardening trick—it’s a game-changer for vibrant, year-round blooms that brighten your space and attract pollinators. 🌸 By staggering your plantings and following a few simple steps, you’ll enjoy bold, striped beauty without the guesswork.
Whether you’re a seasoned gardener or just starting, this method makes it easy to keep your garden thriving.
Ready to dive in? Start small—pick one variety to try first, then expand your colorful patch as you gain confidence. Happy planting! 🌱