
Planting
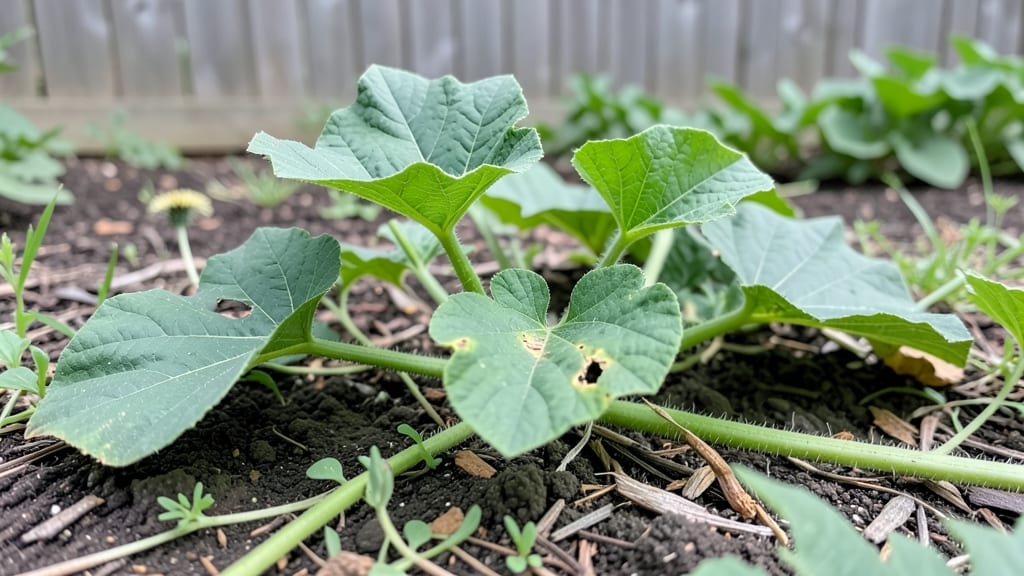
Watch a squash young plant sprout into a hungry vine overnight—then marvel as it produces 20-pound zucchinis in just 60 days, beating slow starters by months. 🌱 The trick isn’t just patience; it’s giving them the right start, whether you’re popping seeds indoors or planting straight into warm soil.
Squash thrives when soil stays warm—70°F or above—so I always test mine with a thermometer. A 5-gallon bucket of compost mixed into garden beds gives them the nutrients they crave, and mulch keeps moisture steady.
Too much water? Roots rot. Too little? Plants wilt fast. Balance is everything, and I’ll show you how to nail it from day one.
You’ll recognize healthy young squash by their bold, deep-green leaves and sturdy stems—no leggy, weak seedlings here. By transplanting at the right time (after frost risk passes), you’ll see vines spreading within weeks, ready for pollination. The first harvests arrive faster than you’d expect, and the taste? Nothing beats homegrown.
Works for both butternut and zucchini varieties, whether you’re growing in raised beds or containers. Let’s get those seeds sprouting—your first harvest is closer than you think.
📚 In This Guide
- What you need
- Instructions
- Tips and common mistakes
- Wrapping up and next steps
What you need
- ● Squash seeds: Fast-germinating varieties like Zucchini (e.g., 'Black Beauty'), Summer Squash (e.g., 'Yellow Crookneck'), or Butternut Squash (e.g., 'Waltham Butternut'). Buy 3–5 seeds per plant (squash germinates easily, so extras are handy!).
- ● Seed-starting trays or biodegradable pots: 2–4" deep with drainage holes. 6–12 cells per tray (or 1 pot per seed if direct-sowing).
- ● Seed-starting mix: Lightweight, sterile soilless mix (avoid garden soil—it’s too dense!). 1–2 cubic feet per tray.
- ● Grow lights or sunny windowsill: 12–16 hours of light daily (south-facing window or LED grow lights 6–12" above seedlings).
- ● Spray bottle: For gentle watering (avoid drowning seeds!).
- ○ Plastic wrap or humidity dome: To retain moisture while seeds germinate (optional but helpful for faster sprouting).
- ○ Warmth: Squash seeds need 70–90°F (21–32°C) to germinate. Use a heat mat (optional) if your space is cooler.
- ● Humidity: Keep soil moist but not soggy. 60–80% humidity speeds germination.
- ● Space for transplanting: Squash plants need 2–3 feet of diameter (or a trellis for vining types like Butternut). Plan your garden layout early!
- ● 🔥 Pre-soak seeds: Soak in warm water for 4–6 hours before planting to jumpstart germination.
- ● 🌡️ Monitor temperature: Use a seedling heat mat if your home dips below 65°F (18°C) at night.
- ● ✨ Label your trays: Squash seedlings look similar—use toothpicks + masking tape to mark varieties!
How to grow fast-germinating squash seedlings for early harvests
Here's how to get your squash off to a flying start—these seeds sprout in days, not weeks.
🌱 Step 1: Soak Seeds Overnight for Faster Germination
Place the squash seeds in a small bowl and cover them with lukewarm water for 12 hours. The outer seed coating slows germination, and soaking softens it considerably. You'll see the seeds swell slightly—this is your cue they're ready for planting. I use a fine mesh bag to keep them contained while soaking, which also makes draining easier later.
After soaking, drain the seeds thoroughly. Pat them dry with a paper towel to prevent mold. Squash seeds germinate fastest at 75-85°F, so if your home runs cooler, place the bowl near a sunny window or use a seedling heat mat. This step cuts germination time in half—from 7-10 days to just 3-5 days.
🪴 Step 2: Fill Containers with Warm, Moist Seed Starting Mix
Fill 4-inch deep containers with the seed-starting mix (never garden soil—it's too dense and may harbor diseases). Moisten the mix until it holds together when squeezed but doesn't drip. I like to warm the soil slightly by placing the containers in a sunny windowsill for an hour before planting. Warm soil speeds germination and encourages strong root development.
Press the soil down lightly to remove air pockets. You want it firm enough to support the seedlings but loose enough for roots to push through easily. Tap the container gently on the table to settle everything evenly. Plant 2-3 seeds per container at a depth of 1 inch, about twice the seed diameter. This depth ensures they have enough energy reserves to reach the surface without rotting.
💧 Step 3: Cover and Maintain Moisture for Rapid Sprouting
Cover the containers with a clear humidity dome or plastic wrap to trap warmth and moisture. Squash seeds need consistent moisture to germinate—do not water from above once planted. Instead, place the containers in a shallow tray filled with ½ inch of water, letting the soil absorb moisture from below. This prevents disturbing the seeds and ensures even hydration.
Check daily for condensation on the dome. If it fogs up, the humidity is perfect. If it stays dry, mist the soil lightly with a spray bottle. You'll see the first sprouts in 3-5 days—watch for tiny green hooks breaking through the soil. Once 50% of seeds have sprouted, remove the dome immediately to prevent damping-off, a fungal disease that collapses seedlings overnight.
☀️ Step 4: Provide Bright, Indirect Light Immediately
The instant seedlings emerge, move them to bright, indirect light—a south-facing window or grow light positioned 4 inches above the plants. Squash seedlings grow fast but need 12-14 hours of light daily to avoid becoming leggy. You'll notice strong seedlings have thick stems and deep green leaves spaced closely together. Weak seedlings stretch toward the light with pale, sparse foliage.
Rotate the containers a quarter turn daily so all sides receive even light. If you're using a grow light, raise it as the seedlings grow to maintain the 4-inch gap. After 2-3 weeks, when seedlings show 2-3 true leaves, transplant them into larger containers or the garden. Harden them off by placing them outside in a sheltered spot for 1-2 hours the first day, gradually increasing time over 5-7 days. This prepares them for the outdoors without shock.
⏰ Step 5: Transplant When Ready for the Garden
Transplant squash seedlings 2-3 weeks after germination, when they have 4-6 true leaves and are 3-4 inches tall. Choose a spot with full sun (6+ hours daily) and well-draining soil. Squash plants need space—space them 2-3 feet apart in rows 4-5 feet apart to allow for vining. Dig holes just deep enough to accommodate the root ball, then firm the soil gently around the base.
Water deeply at transplanting to settle the soil and encourage root growth. Mulch with 2-3 inches of straw to retain moisture and suppress weeds. Squash thrives in warm soil—wait until the soil temperature reaches 60°F before transplanting outdoors. This ensures fast establishment and early harvests. You'll see flowers in 4-6 weeks, followed by fruit in 50-60 days for summer varieties.
Tips & tricks for fast-germinating squash seedlings
These game-changing strategies will help you bypass the slow, frustrating wait and get your squash seedlings sprouting in record time.
Soaking Strategy: The 12-hour soaking period in lukewarm water is non-negotiable for speedy germination. I've found that using a fine mesh bag makes draining effortless and prevents seed loss. After soaking, I like to place the seeds between two paper towels in a sealed container overnight—this creates a humid environment that mimics the perfect germination conditions. The key is maintaining that 75-85°F temperature range; if your home runs cooler, a seedling heat mat placed under the container works wonders.
Container Selection: While 4-inch deep containers work perfectly, I recommend using biodegradable pots made from coconut coir or peat. These can be planted directly into the garden, eliminating transplant shock entirely. For non-biodegradable containers, opt for those with drainage holes—squash seedlings hate soggy roots. The 2-3 seeds per container approach gives you backup plants if one fails to germinate, but be prepared to thin to the strongest seedling once they emerge.
Lighting Hack: The instant those first green hooks appear, move your seedlings to bright, indirect light immediately. I've had success using a combination of a south-facing window and a simple LED grow light on a timer. The 12-14 hours of daily light is crucial—any less and your seedlings will stretch leggily toward the light source. Pro tip: If using a grow light, position it just 4 inches above the seedlings and raise it as they grow to maintain that distance. This prevents heat stress while ensuring optimal light exposure.
Transplant Timing: Waiting until your seedlings have 4-6 true leaves and are 3-4 inches tall ensures they're strong enough to handle transplanting. I've found that checking soil temperature with a soil thermometer is worth the investment—squash plants won't thrive until the soil reaches that critical 60°F mark. For an extra boost, I mix a bit of compost into the planting holes at transplant time. This gives the seedlings a nutrient head start and helps them establish faster in their new home.
Pro Tips for Squash Young Plant
- These game-changing strategies will help you bypass the slow, frustrating wait and get your squash seedlings sprouting in record time.
- Soaking Strategy: The 12-hour soaking period in lukewarm water is non-negotiable for speedy germination.
- Container Selection: While 4-inch deep containers work perfectly, I recommend using biodegradable pots made from coconut coir or peat.
Frequently asked questions
How long does it take for squash seeds to germinate when planted indoors?
Most squash seeds (like zucchini or summer squash) sprout in 5–10 days indoors, given warmth (70–90°F) and moisture. Use a heat mat if your space is cool—consistency is key! Avoid overwatering, as soggy soil can delay germination or cause rot. Pro tip: Keep seeds in a sealed plastic bag to trap humidity until they sprout.
Can I transplant squash seedlings too early?
Yes—but it’s risky! Squash seedlings are sensitive to cold and frost. Wait until nighttime temps stay above 55°F (13°C) and soil is at least 60°F (16°C). Harden off seedlings (acclimate them to outdoors) for 5–7 days before transplanting. Signs of shock: wilting, yellowing leaves, or stunted growth. If in doubt, delay!
What’s the best alternative if my squash seeds won’t germinate?
Try these fixes first:
- Fresh seeds: Squash seeds lose viability after 4–5 years. Test old seeds by soaking in warm water—if they sink, they’re likely viable.
- Scarification: Nick the seed coat with sandpaper or a knife to help water penetrate.
- Warmth boost: Place seeds on a sunny windowsill or use a seedling heat mat.
Why are my young squash plants wilting or turning yellow?
Common culprits:
- Overwatering: Squash hates soggy roots. Let soil dry slightly between waterings.
- Pests: Check for aphids, squash vine borers, or cucumber beetles. Use neem oil or row covers if needed.
- Nutrient deficiency: Yellow leaves? Add compost or a balanced fertilizer (like 10-10-10).
- Transplant shock: If recently moved, keep plants shaded and watered for a few days.
Can I grow other fast-germinating veggies alongside squash?
Pair squash with:
- Radishes (ready in 3–4 weeks)
- Lettuce (shade-tolerant)
- Bush beans (fix nitrogen in soil)
- Spinach (harvest early before squash vines spread)
Wrapping up and next steps
Growing squash from young plants is a rewarding way to enjoy an early harvest and maximize your garden’s potential! 🌱 With the right materials—and a few key tips—you’ll be well on your way to a thriving crop.
Whether you’re a seasoned gardener or just starting out, these fast-germinating seeds make the process simple and exciting.
Now that you’re armed with knowledge, it’s time to take action! Start small—plant a few seeds in pots or directly in the garden—and watch your squash grow. Happy planting! 🌿
- Next step: Mark your calendar for planting dates and get ready to nurture your young squash plants with care.