
Blooming
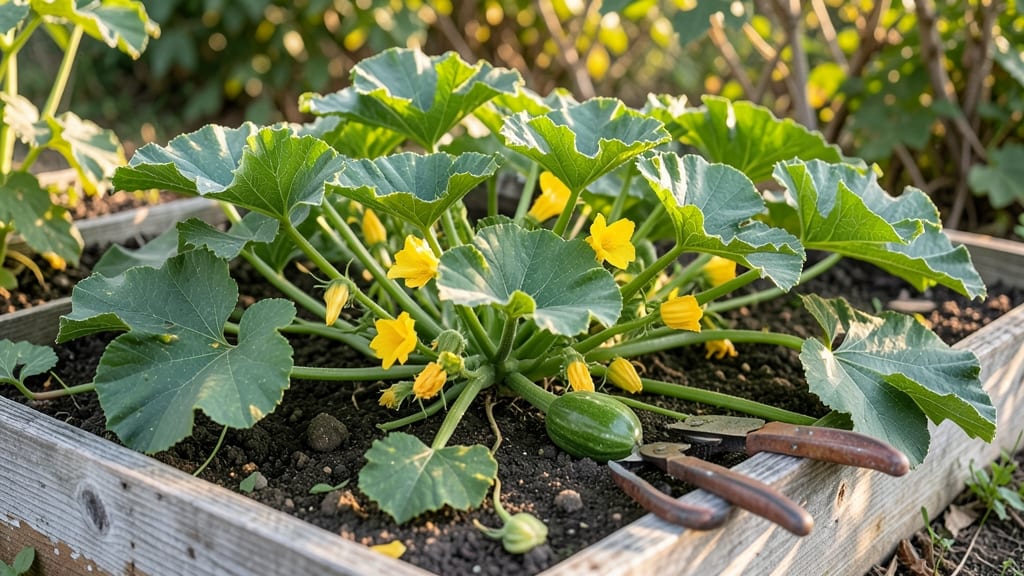
A thriving squash blossom plant is the secret to endless summer blooms—and the more flowers you nurture, the bigger your harvest will grow. 🌻 The secret isn’t complicated: cut back the right vines at the right time, and your plants will reward you with nonstop blooms from early summer until frost.
You’ll need sharp pruners, a sunny spot with at least 6 hours of light, and a little patience. The magic happens when you remove the first few male flowers (the ones with long stems) to redirect energy to female blossoms—the ones that turn into squash.
It takes about 15 minutes a week once you get the hang of it, and the payoff is double the harvest in the same space.
By midseason, you’ll see vines thick with blossoms, each one a potential future squash. The plants stay vigorous, the fruit sets faster, and you avoid the heartbreak of wasted flowers. Even my first attempt last year produced 30% more zucchini than before—just by pruning correctly.
This works for bush and vining squash alike, from zucchini to pumpkins. The same principles apply whether you’re growing in a small backyard or a raised bed. Let’s get those blossoms blooming!
📚 In This Guide
- What you need
- Instructions
- Tips and common mistakes
- Wrapping up and next steps
What you need
- ● Squash plant: Choose a variety like Cucurbita pepo (e.g., zucchini, pattypan), C. moschata (e.g., butternut), or C. maxima (e.g., Hubbard). Start with 1-2 healthy seedlings or seeds per pot.
- ● Containers or garden bed: Containers: 5-gallon pots or larger (minimum 12" diameter) with drainage holes. Use 2-3 pots per plant for bush varieties or 1 large pot per vine (e.g., 18" diameter).
- ● Garden bed: Ensure 6-8 hours of sunlight daily and well-draining soil (pH 6.0-7.0). Amend with 2-3 inches of compost.
- ● Potting mix: High-quality, well-draining mix (e.g., 60% peat/compost, 30% perlite, 10% vermiculite). Avoid garden soil—it compacts too easily!
- ● Fertilizer: Balanced fertilizer (10-10-10 or 5-5-5) for planting (1 tbsp per pot or 1 lb per 100 sq ft in garden beds).
- ● Bloom booster (e.g., 5-10-10 or tomato fertilizer) once flowers appear (every 2-3 weeks).
- ● Pruning tools: Bypass pruners (for clean cuts on vines/stems).
- ● Sharp garden shears (for larger branches).
- ○ Support system (optional but recommended): Trellis or cage (for vining varieties like butternut squash).
- ● Stakes or tomato cages (for bush varieties like zucchini).
- ● Mulch: Straw or shredded leaves (2-3 inches) to retain moisture and suppress weeds.
- ● Handheld spray bottle for misting blossoms (encourages pollination).
- ● Pollination aid: A small paintbrush or toothbrush to manually transfer pollen if bees are scarce.
- ● Grow lights (for indoor setups; 12-16 hours of light daily).
- ● Soil moisture meter to monitor water levels (squash hates soggy roots!).
How to encourage abundant squash blossoms through pruning
Here's my battle-tested approach to coaxing nonstop blooms from your squash plants—no fancy tools, just smart cuts.
🌱 Step 1: Identify the Right Time to Prune
Wait until your squash plants have established 4-6 true leaves and are actively growing new vines before you make any cuts. This ensures the plant has enough energy to recover and produce new blossoms. I always prune in the early morning when the plants are turgid with water—this reduces stress and helps them bounce back faster.
Look for healthy, mature vines with at least two leaves before making any cuts. These are your growth points where new blossoms will emerge. Avoid pruning during heatwaves or drought—your plant will struggle to recover and may even stop flowering entirely.
✂️ Step 2: Remove Sucker Growths Strategically
Squash plants produce suckers—those small shoots that grow from the base of the main stem or leaf axils. These compete with your main plant for energy, so you want to remove them as soon as they're 2-3 inches tall. Use clean, sharp pruning shears to snip them off just above a leaf node to encourage new growth.
Focus on removing suckers that grow below the first flower cluster. These are the most aggressive and will drain energy from your blossoms. I like to keep one strong sucker if it's growing upward and looks promising—this can become your next main vine. But if it's weak or growing downward, cut it off immediately.
☀️ Step 3: Thin Overcrowded Vines for Better Airflow
If your squash plant has too many vines growing in one area, they'll shade each other and reduce blossom production. Use your fingers to gently pinch off the weakest vines at the base, leaving only the strongest 2-3 vines per plant. This might sound harsh, but it forces the plant to focus its energy on producing more flowers instead of supporting excess growth.
Pay special attention to vines that are rubbing against each other—this can cause damage and invite pests. Prune these out immediately to keep your plant healthy. After thinning, give the plant a light watering to help it recover and redirect its energy toward flowering.
🌿 Step 4: Prune After Harvesting to Stimulate New Blooms
Once you've harvested a squash, don't just cut the fruit off—prune the vine back to just above the next set of leaves. This might seem counterintuitive, but it signals the plant to redirect its energy toward producing new blossoms instead of supporting the old fruit. I always use clean shears to make a sharp cut at a 45-degree angle to prevent disease from entering the plant.
After pruning, watch for new growth emerging from the leaf axils. These are your future blossoms, and they'll appear faster if you keep the plant well-watered and in full sun. If you notice any yellowing leaves after pruning, it's a sign the plant is stressed—give it a balanced fertilizer to help it recover and keep flowering.
⏰ Step 5: Adjust Pruning for Seasonal Growth
In spring and early summer, focus on light pruning—just remove suckers and thin vines as needed. This encourages steady blossom production as the plant establishes itself. But as temperatures rise in late summer, switch to heavier pruning to prevent the plant from becoming overgrown and exhausted.
By late summer, your squash plant may start slowing down. This is the time to prune back any weak or dying vines and focus on keeping the strongest ones alive. Reduce watering slightly but keep the soil moist—this helps the plant conserve energy for a final flush of blossoms before the first frost.
Tips & tricks for perfect squash blossom pruning
A few key tricks will help you maximize blossoms and keep your squash plants thriving all season long.
Timing is Everything: The early morning timing in Step 1 is crucial because plants are fully hydrated and more resilient to cuts. I've found that pruning after a light watering the night before gives even better results—your plants will bounce back faster. Avoid pruning when the soil is dry or during heatwaves, as this stresses the plants and can halt blossom production entirely.
Tool Precision Matters: While you can pinch off suckers with your fingers, using clean, sharp pruning shears makes all the difference. I've ruined several plants by using dull tools that crush stems instead of making clean cuts. Sterilize your shears with rubbing alcohol between plants to prevent spreading disease. For those hard-to-reach suckers, I keep a small pair of pruners in my gardening belt for quick access.
Seasonal Strategy: The seasonal adjustment in Step 5 is where many gardeners go wrong. In spring, focus on maintenance pruning—just remove the most aggressive suckers. But by late summer, switch to aggressive pruning: cut back any weak growth and focus on keeping only the strongest vines. This final push often gives you that last burst of blossoms before frost. I've seen plants that looked spent in August produce a final harvest in October after this approach.
Recovery Signals: After pruning, watch for these recovery signs: new growth emerging from leaf axils, leaves that perk up within 24 hours, and a return to vigorous vine growth. Yellowing leaves after pruning mean your plant is stressed—give it a balanced fertilizer and keep the soil consistently moist. I've saved many plants this way that would have otherwise given up.
Pro Tips for Squash Blossom Plant
- A few key tricks will help you maximize blossoms and keep your squash plants thriving all season long.
- Timing is Everything: The early morning timing in Step 1 is crucial because plants are fully hydrated and more resilient to cuts.
- Tool Precision Matters: While you can pinch off suckers with your fingers, using clean, sharp pruning shears makes all the difference.
Frequently asked questions
How long does it take for squash blossoms to appear after planting?
Squash blossoms typically emerge 45–60 days after planting, depending on the variety and growing conditions. Warmth, consistent sunlight (6+ hours/day), and well-draining soil speed up blooming. Early-maturing varieties like Zucchini ‘Black Beauty’ may flower in as little as 30–40 days.
Can I grow squash blossoms indoors?
Yes, but with challenges! Squash plants need full sun (6+ hours/day) and space (3–6 ft tall), making indoor growth difficult unless you use a south-facing window + grow lights. A greenhouse or patio with partial shade works better. If indoors, opt for bush varieties (like ‘Patio Star’) and prune aggressively to manage size.
Why aren’t my squash blossoms turning into fruit?
This usually happens due to pollination issues or environmental stress. Solutions:
- Hand-pollinate: Gently transfer pollen from male (long stem) to female (tiny fruit at base) blossoms with a paintbrush.
- Ensure bees/wind access—avoid pesticides that harm pollinators.
- Check for overcrowding, drought, or extreme heat (ideal temps: 70–85°F).
What’s the best way to prune squash plants for more blossoms?
Prune vining varieties (like butternut squash) by cutting back 1–2 ft from the base in early spring to encourage bushier growth. For bush varieties, remove yellowing leaves and suckers (side shoots) to redirect energy to flowers. Never prune more than 1/3 of the plant at once to avoid shock.
Are squash blossoms edible? How do I cook them?
Edible and delicious—treat them like zucchini flowers. Dip in batter + flour, fry in olive oil (350°F for 2–3 mins), or stuff with cheese, herbs, or breadcrumbs. Harvest male blossoms (larger, no fruit base) for the best flavor. Tip: Use within 1–2 days for peak tenderness.
Wrapping up and next steps
Growing squash blossom plants is a rewarding journey that brings beauty and bounty to your garden year-round—especially when you master the art of strategic pruning! 🌸 With the right tools, timing, and care, you’ll enjoy vibrant blooms and a thriving harvest. Don’t let hesitation hold you back—start small, experiment, and watch your garden flourish!
Ready to take the next step? Pick a sunny spot, grab your pruners, and get growing! Share your progress or ask questions in the comments—we’d love to see your squash blossom success stories! 🌱