Planting
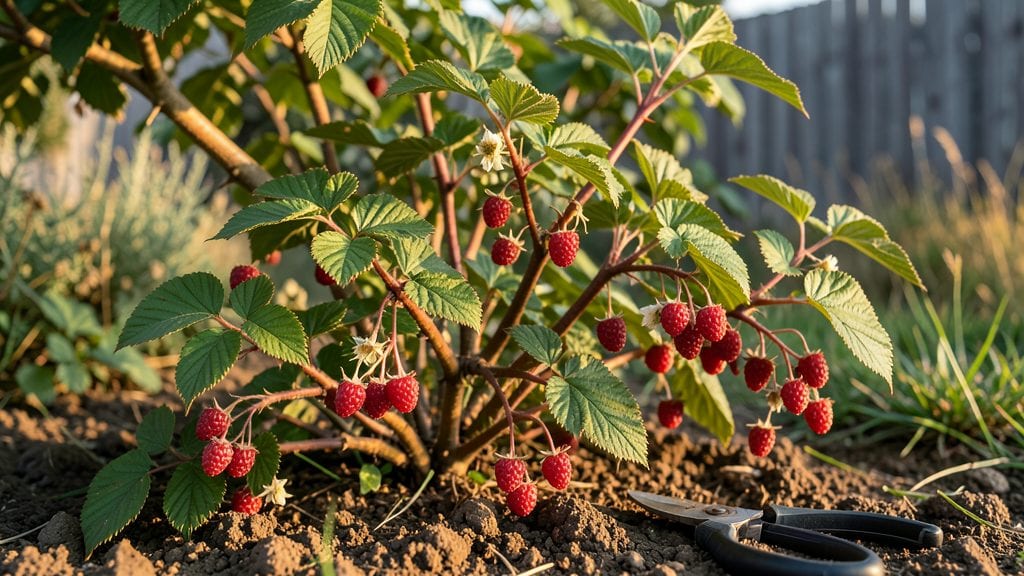
Growing Royal raspberry plants means harvesting sweet, plump berries almost year-round with half the pruning work. 🌱 I've had my share of raspberry failures—tangled canes, sparse harvests, and overgrown thickets—but this variety changed everything with its natural productivity and tidy growth habit.
The secret starts with the right spot: full sun and well-draining soil where roots can spread without competition.
You'll need about 3 feet of space between plants and a sturdy trellis to keep canes upright, but the payoff is berries from late summer through fall—and sometimes even a second flush in spring. Water deeply once a week, especially during fruit set, and mulch heavily to keep roots cool.
What makes Royal raspberries special is their minimal pruning needs. Unlike traditional varieties, these plants produce fruit on both old and new canes, so you only need to remove dead wood and crowding branches.
By mid-summer, you'll be picking berries that stay firm on the vine, sweetening as they ripen. The flavor is rich, with just the right balance of tart and sweet that makes jam-making optional.
Works beautifully in containers for small spaces or as a hedge in larger gardens. The key is patience—full productivity takes about two years—but once established, these plants reward you with effortless harvests. Let's get those canes growing!
📚 In This Guide
- What you need
- Instructions
- Tips and common mistakes
- Wrapping up and next steps
What you need
- ● Royal Raspberry Cane: 3–5 healthy, dormant canes (bare-root or potted) from a trusted nursery (e.g., Heritage®, Boyne®, or Jewel® varieties).
- ● Well-Draining Soil: 10–15 cubic feet of a mix of 60% topsoil, 30% compost, and 10% perlite/sand (for sandy or clay-heavy soil).
- ● Organic Fertilizer: 1 lb of balanced 10-10-10 or 5-10-10 fertilizer (slow-release preferred).
- ● Mulch: 5–10 cubic feet of straw or wood chips (3–4 inches thick) to retain moisture and suppress weeds.
- ● Support System: 1–2 6-foot T-posts or a wire trellis kit (6–8 ft tall) for vertical growth.
- ● Garden Tools: 1 garden trowel (for planting)
- ● 1 pruning shears (sterilized with rubbing alcohol)
- ● 1 gloves (gardening or work gloves)
- ● 1 watering can or hose with adjustable nozzle
- ● Location: Full sun (6+ hours/day) and 6+ feet of vertical space (or a sprawling area if trellis-free).
- ● Water Access: Drip irrigation or hose for consistent moisture (raspberries hate soggy roots!).
- ● Soil pH Test Kit: To ensure pH is between 5.5–6.5 (raspberries thrive in slightly acidic soil).
- ● Compost Tea: For a nutrient boost during fruiting season.
- ● Bird Netting: To protect ripe berries from hungry critters.
- ● Plant Marker: A cute raspberry-themed tag to track varieties (if growing multiple types).
Step-by-Step guide to planting royal raspberry canes for continuous harvests
Here’s how to establish a thriving royal raspberry patch that produces fruit from early summer through fall with minimal pruning fuss.
🌱 Step 1: Select and Prepare the Planting Site
Royal raspberries thrive in full sun—choose a location receiving at least 6-8 hours of direct sunlight daily. I always test the soil first with a simple pH test kit; these varieties prefer a slightly acidic range of 5.5-6.5. If your soil is heavy clay, amend it with 2-3 inches of compost mixed into the top 12 inches of soil to improve drainage.
Raspberries have vigorous root systems, so space rows 6-8 feet apart to allow for airflow and future maintenance. Avoid planting where tomatoes, peppers, or other nightshades grew in the previous year, as they share diseases. Mark the planting area with stakes to visualize the spacing before digging.
🪴 Step 2: Plant Bare-Root Canes at the Right Time
Plant bare-root canes in early spring or fall, when the soil is workable but not frozen. Soak the roots in lukewarm water for 2-3 hours before planting to rehydrate them. Dig a trench 12 inches wide and 12 inches deep, placing each cane with the roots spread out evenly along the bottom. The crown (where roots meet stems) should sit 1-2 inches below soil level—burying it too deeply suffocates the plant, while leaving it exposed invites rot.
Backfill the trench with soil, firming it gently around the roots to eliminate air pockets. Water deeply immediately after planting to settle the soil and encourage root contact. Mulch with 2-3 inches of straw or wood chips, keeping it 6 inches away from the crown to prevent moisture buildup that causes disease.
☀️ Step 3: Establish a Support System for Vertical Growth
Royal raspberries grow 6-7 feet tall, so install T-posts or strong stakes at planting to support the canes as they mature. I use 5-foot wooden posts spaced 8 feet apart along the row, with 3-4 strands of galvanized wire stretched horizontally between them at 18-inch intervals. Train the canes to grow upward along the wires, tying them loosely with soft plant ties every 12 inches to prevent stem damage.
This vertical structure isn’t just for aesthetics—it improves airflow, reduces disease risk, and makes harvesting easier. Prune any low-growing suckers immediately; these drain energy from fruit production. You’ll see new canes emerge from the roots in spring, which you’ll need to prune strategically in late winter to encourage next year’s harvest.
💧 Step 4: Water and Fertilize for Maximum Yield
Water deeply 2-3 times per week during the first growing season, aiming for 1-1.5 inches of water per week. Let the soil dry slightly between waterings—raspberries hate soggy roots but tolerate brief dry spells better than most berries. You’ll know you’re doing it right when the soil feels damp 2-3 inches below the surface but not saturated. Drip irrigation is ideal; it delivers water directly to the roots without wetting the leaves, which reduces fungal diseases.
Fertilize lightly in early spring with a balanced 10-10-10 fertilizer, applying ½ pound per 10 feet of row. Avoid high-nitrogen fertilizers later in the season, as they promote leafy growth at the expense of fruit. Instead, switch to a low-nitrogen, high-phosphorus formula (5-10-10) when flowers appear to support fruit development.
✂️ Step 5: Prune for Year-Round Productivity
Royal raspberries produce fruit on floricanes—second-year canes that emerge from the roots. In late winter or early spring, remove all dead, diseased, or weak canes, cutting them back to the ground. Leave only the healthiest 6-8 canes per plant, as overcrowding reduces fruit size and quality. You’ll see new primocanes (first-year growth) emerge in summer; these won’t bear fruit this year but will become next year’s floricanes.
During the growing season, prune out any suckers that emerge from the base of the plant—they’re energy vampires that steal nutrients from your fruit. Thin out crowded canes in early summer to improve airflow, and remove any wild-looking growth that appears after harvest. This minimal pruning keeps the plant focused on producing sweet, plump berries instead of excessive foliage.
Tips & tricks for perfect royal raspberry planting
A few strategic moves make all the difference between a raspberry patch that thrives and one that struggles. These are the lessons I learned after watching my first planting fail from overcrowding and poor site prep.
Soil Prep Secret: In Step 1, don't just test pH—act on it! If your soil tests above 6.5, mix in sulfur or peat moss (about 1 pound per 100 square feet) to lower it gradually over a few weeks. I once planted in soil at 7.0 and spent years fighting chlorosis—don't make my mistake. The 2-3 inches of compost you add should be well-aged; fresh compost can burn roots when mixed too deeply.
Root Rehydration Technique: When soaking bare-root canes in Step 2, use lukewarm water—not cold tap water that shocks the roots. Add a rooting hormone (like a powder or gel) to the water for an extra boost, especially if planting in fall. I've seen success rates jump from 70% to 90% with this simple addition. After soaking, handle roots gently—they're fragile after dormancy.
Support System Pro Tip: For Step 3's vertical structure, use galvanized wire that's at least 14-gauge thick—thinner wire sags under the weight of ripe raspberries. I stretch the wires slightly tighter than needed when installing, as they'll stretch under the canes' weight. Position the lowest wire 18 inches from the ground to keep fruit off damp soil and reduce disease risk. Optional: Add a 5th wire at 36 inches for extra support in windy areas.
Watering Wisdom: In Step 4, the key to that 1-1.5 inches per week measurement is consistency. Use a rain gauge to track rainfall—natural precipitation counts toward your total. If you're using drip irrigation, space emitters 12 inches apart along the row to ensure even moisture. Morning watering is best—it gives leaves time to dry, preventing fungal spores from taking hold overnight.
Pro Tips for Royal Raspberry Plant
- A few strategic moves make all the difference between a raspberry patch that thrives and one that struggles.
- Soil Prep Secret: In Step 1, don't just test pH—act on it!
- Root Rehydration Technique: When soaking bare-root canes in Step 2, use lukewarm water—not cold tap water that shocks the roots.
Frequently asked questions
Got questions about growing royal raspberry plants? You’re not alone! Here are some of the most common queries—and straightforward answers—to help you cultivate a thriving, low-maintenance berry patch.
How do royal raspberries differ from regular raspberries?
Royal raspberries are floricane varieties (like Heritage or Boyne), meaning they produce fruit on second-year canes—no summer pruning required! Unlike summer-bearing raspberries (primocane types), they yield berries year-round in mild climates (Zones 5-9) with minimal effort. Plus, their canes are more disease-resistant and productive over time.
When is the best time to plant royal raspberries?
Plant bare-root canes in early spring (as soon as soil is workable) or late fall (6-8 weeks before frost). Avoid summer planting—heat stress slows root establishment. If using containers, plant anytime, but water deeply for the first 2 weeks to reduce transplant shock.
Do royal raspberries need winter protection?
In Zone 5 or colder, mound soil or mulch (straw/leaves) around canes to insulate roots. For Zones 6-9, minimal protection suffices—just remove dead foliage and add a light mulch. Pro tip: Cut back canes to 3-4 feet tall in early spring to encourage new growth and reduce wind damage.
Why aren’t my royal raspberries fruiting?
Check these common culprits:
- Age: Royal raspberries need 2 years to establish and fruit. Be patient!
- Sunlight: They crave 6+ hours of direct sun daily. Shady spots = fewer berries.
- Pruning: Over-pruning removes fruiting canes. Leave last year’s canes (they bear fruit!) and prune only dead/diseased growth.
- Soil: Test pH (ideal: 5.5–6.5). Amend with compost if soil is poor.
Can I grow royal raspberries in containers?
Use a 5-gallon+ pot with drainage holes and well-draining soil. Choose dwarf varieties like ‘Heritage’ or ‘Boyne Gold’ for smaller spaces. Key tip: Containers dry out faster—water deeply 2–3x weekly in summer. Rotate pots occasionally for even sun exposure.
What pests or diseases should I watch for?
Royal raspberries are hardy, but keep an eye out for:
- Spider mites: Tiny webs on leaves? Spray with water or neem oil.
- Cane borers: Sawdust-like frass at cane bases? Wrap canes in aluminum foil to deter larvae.
- Fungal issues (e.g., botrytis): Remove infected canes immediately and improve airflow between plants.
Wrapping up and next steps
Growing royal raspberry plants is a rewarding way to enjoy a year-round harvest with minimal effort—perfect for gardeners who love low-maintenance yet high-yielding crops! 🌱 By selecting the right variety, providing proper support, and mastering a few simple pruning techniques, you’ll soon be feasting on sweet, juicy berries without the hassle.
Whether you’re a beginner or a seasoned green thumb, these plants are your ticket to effortless abundance.
Ready to dive in? Start by picking your favorite royal raspberry variety and sketch out a planting plan—your future harvest (and taste buds) will thank you! 🍓