
Transplanting
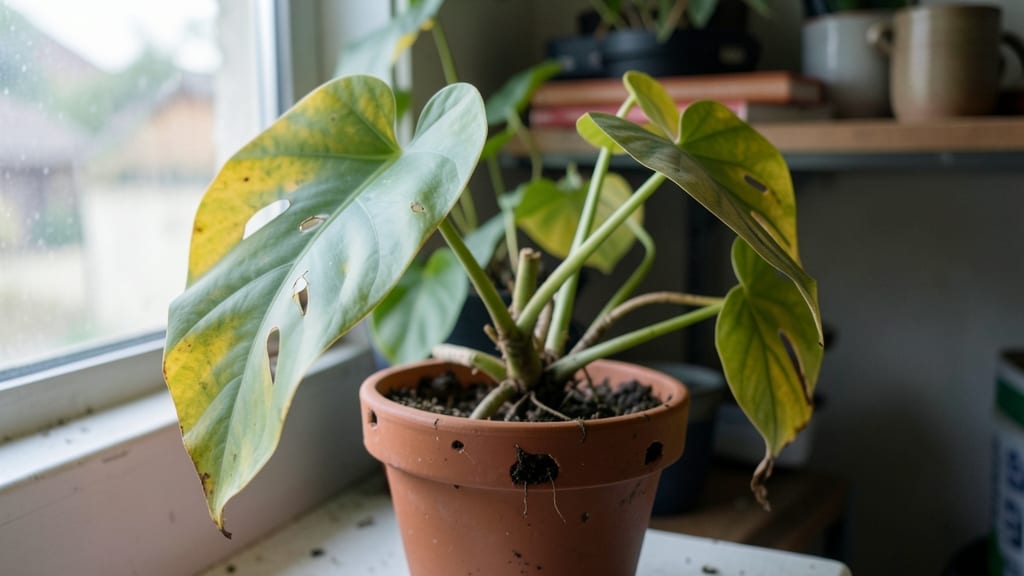
Repotting an overwatered plant isn’t just about saving it—it’s about giving its roots a second chance to breathe. 🌱 I’ve lost count of how many times I’ve seen wilting leaves and mushy roots turn around with the right approach, and this method works every time.
The key isn’t rushing; it’s assessing the damage, choosing the right soil, and setting up a watering routine that actually supports growth instead of drowning it.
First, you’ll need a pot just slightly larger than the current one—2-3 inches wider—with drainage holes, fresh well-draining potting mix, and a pair of clean pruners. The real work happens when you gently remove the plant, trim any black, mushy roots, and replant in fresh soil.
This isn’t just about the pot; it’s about creating an environment where roots can recover and thrive again.
Within 2-3 weeks, you’ll start seeing signs of revival: new growth at the stems, firmer leaves, and a slower return to vibrant green.
The plant won’t bounce back overnight, but with the right care—watering only when the top inch of soil is dry—you’ll have it back to its healthy self in no time.
Here’s the secret to keeping it that way: check soil moisture with your finger before watering, and always use pots with drainage. Overwatering is a habit, not a one-time mistake, and these small changes will protect your plants for seasons to come.
📚 In This Guide
- What you need
- Instructions
- Tips and common mistakes
- Wrapping up and next steps
What you need
- ● New pot: Choose one 1-2 inches larger than the current pot (diameter) with drainage holes. Material: Terracotta (for breathability) or plastic (for moisture retention).
- ● Fresh potting mix: Use a well-draining blend (e.g., 60% peat/coir, 30% perlite/pumice, 10% vermiculite). Quantity: Enough to fill the new pot, plus extra for amendments.
- ○ Rooting hormone (optional but helpful): A powder or gel to encourage root regrowth (e.g., Mycorrhizae or hydrogen peroxide solution for DIY).
- ● Pruning shears or sharp scissors: Sterilized to trim rotted or mushy roots cleanly.
- ● Gloves (recommended): To protect your hands from soil bacteria or sharp tools.
- ● Spray bottle with water: For gentle hydration during repotting (avoid soaking!).
- ● Newspaper or tarp: To contain mess while working.
- ● Activated charcoal: 1-2 tablespoons mixed into the soil to prevent fungal growth.
- ● Slow-release fertilizer: A balanced 10-10-10 or organic option (e.g., worm castings) to nourish roots post-repotting.
- ● Moisture meter: To monitor soil hydration in the weeks after repotting.
- ● Plant support (e.g., stake or cage): If your plant is top-heavy or leggy.
- ● ✅ Wait until the plant is slightly dry: Let the top 1-2 inches of soil dry out to avoid further root stress.
- ● ✅ Prepare the workspace: Lay down newspaper or a tarp for easy cleanup.
- ● ✅ Check the weather: Repot on a mild, non-windy day to reduce transplant shock.
Step-by-step instructions for reviving an overwatered plant
Here's how to rescue your struggling plant and give it a fresh start—no green thumb required.
🪴 Step 1: Gather Your Supplies and Prep the New Pot
You'll need a clean pot that's 1-2 inches larger in diameter than the current one, fresh well-draining potting mix, and a few basic tools: a small trowel, scissors, and a spray bottle. The new pot should have drainage holes—if yours doesn't, drill a few to prevent future waterlogging. I like to sterilize the pot with a 10% bleach solution (1 part bleach to 9 parts water) to kill any lingering pathogens.
Fill the bottom of the pot with a 1-inch layer of perlite or coarse sand to improve drainage. This layer acts as a buffer, preventing water from pooling at the roots. If you don’t have perlite, crushed gravel works too. Tap the pot gently on the table to settle the layer evenly—this ensures roots won’t get trapped against the drainage holes later.
✂️ Step 2: Remove the Plant and Inspect the Roots
Water the plant 2-3 hours before repotting—this makes the soil slightly firmer and easier to remove without breaking roots. Gently squeeze the sides of the current pot while tipping it to loosen the root ball. If the plant resists, slide a butter knife around the edges to separate it from the pot walls. You’ll see the root situation clearly once it’s free.
Inspect the roots carefully. Healthy roots are white or light tan, while mushy, black, or smelly roots are dead and should be trimmed away with sterilized scissors. Snip off any blackened or slimy sections, then rinse the remaining roots under lukewarm water to remove excess soil. This step is critical—leaving dead roots behind will just rot in the new pot. If the root ball is compacted, gently tease it apart with your fingers to encourage airflow.
🌱 Step 3: Repot with Fresh Soil and Adjust Watering Habits
Place the plant in the new pot and fill around the sides with fresh potting mix, pressing lightly to eliminate air pockets. Stop when the soil is 1 inch below the pot’s rim—this prevents water from spilling over during your next watering. I like to add a handful of orchid bark or coconut coir to the mix for extra aeration if my plant is particularly prone to soggy soil.
Water lightly right after repotting—just enough to moisten the soil without drowning it. Place the plant in a spot with bright, indirect light for the first 3-5 days to reduce stress. Avoid direct sunlight, which can scorch weakened leaves. You’ll know it’s adjusting well when new growth appears within 2-3 weeks. If the leaves yellow or wilt, you’re either overwatering or underwatering—let the top inch of soil dry out completely before watering again.
☀️ Step 4: Monitor and Adjust Care for Recovery
Keep the plant in its new pot for at least 4-6 weeks before considering another size upgrade. During this time, check the soil moisture by sticking your finger 1 inch deep—if it’s dry, water thoroughly until it drains from the bottom. Overwatered plants often need less frequent watering once their roots recover, so resist the urge to hydrate on a schedule.
Watch for signs of improvement: new leaves, firmer stems, and a return to the plant’s usual color. If brown leaves persist, trim them off to redirect the plant’s energy. I’ve revived even the most hopeless-looking plants this way—just stay patient. Most plants bounce back within 6-8 weeks if given the right conditions. Once it’s fully recovered, you can gradually reintroduce it to its original care routine.
Tips & tricks for reviving overwatered plants
A few key tricks will help you nurse your plant back to health—and keep it thriving long after repotting.
The 2-3 Hour Prep: Watering your plant 2-3 hours before repotting is a game-changer. This timing gives the soil just enough moisture to firm up slightly, making it easier to extract the root ball without causing damage. I've ruined more root systems than I care to admit by trying to repot plants that were either bone-dry or sopping wet—this window is your sweet spot. If you're in a rush, just make sure the soil isn't completely dry when you start.
Root Inspection: When you're examining those roots in Step 2, pay close attention to the texture—healthy roots should feel firm and springy, not mushy or hollow. I've seen people hesitate to trim roots because they think they're saving every bit of plant, but those blackened sections are already dead weight. Use sterilized scissors to make clean cuts, and don't be shy about removing up to 30% of the root ball if it's severely compromised. You're not hurting the plant—you're giving it a fresh start.
Drainage Layer: That 1-inch layer of perlite or coarse sand at the bottom of the pot is your first line of defense against future waterlogging. If you don't have perlite, I've successfully used small pebbles or even broken terracotta shards—just make sure whatever you use won't break down over time. Tap the pot gently after adding this layer to settle it properly, which prevents roots from getting trapped against the drainage holes later. This small step makes all the difference in preventing soggy soil.
Post-Repotting Care: The bright, indirect light requirement for those first 3-5 days is crucial—it's not just about avoiding scorching leaves, but also about helping the plant focus its energy on root recovery rather than photosynthesis. I've seen plants that were almost given up on bounce back beautifully when given this gentle recovery period. During this time, resist the urge to check on your plant constantly—each time you move it or peek too closely, you're adding stress. Trust the process and the timeline.
Pro Tips for Repotting Overwatered Plant
- A few key tricks will help you nurse your plant back to health—and keep it thriving long after repotting.
- The 2-3 Hour Prep: Watering your plant 2-3 hours before repotting is a game-changer.
- Root Inspection: When you're examining those roots in Step 2, pay close attention to the texture—healthy roots should feel firm and springy, not mushy or hollow.
Frequently asked questions
about repotting an overwatered plant—because even the greenest thumbs need a little extra help!How do I know if my plant is too overwatered before repotting?
Check for these red flags: yellowing leaves, mushy stems, foul-smelling soil, or roots that look black, slimy, or rotten. If your plant feels soggy to the touch or struggles to support itself, it’s time to act. Pro tip: Gently squeeze a handful of soil—if it stays clumped and releases water slowly, it’s overwatered.
Can I repot an overwatered plant immediately, or should I wait?
Don’t rush! Let the soil dry out slightly (1-2 days) to avoid shocking the roots further. If the roots are severely rotted, trim them before repotting to prevent fungal spread. Wait until you see signs of recovery (like new growth or firmer stems) before repotting. Patience is key—your plant will thank you!
Do I need special soil for repotting an overwatered plant?
Yes! Use a well-draining mix with perlite, sand, or orchid bark to improve aeration. Avoid heavy garden soil—it traps moisture. For succulents or tropical plants, blend cactus mix with peat (50/50). Bonus: Add a handful of activated charcoal to deter mold.
What if my plant’s roots are completely rotted—can it still be saved?
Even with severe rot, don’t give up! Trim away all mushy, dark roots with sterilized scissors, then repot in fresh soil. Place the plant in bright, indirect light and water only when the top inch is dry. Some plants (like pothos or snake plants) bounce back surprisingly well!
Can I skip repotting and just use more pots or drainage holes?
Extra pots or holes help, but repotting is critical for overwatered plants. Old soil may still harbor pathogens. If you’re hesitant, try the “soil swap” method: Remove 50% of the old soil and replace it with fresh mix. Still, repotting ensures a clean slate for recovery.
How often should I water my plant after repotting?
Wait 7–10 days before watering again—this gives roots time to adjust. After that, water only when the top 2 inches of soil are dry. Use the “finger test”: Stick your finger in the soil; if it’s damp, wait. Overenthusiasm now can undo your progress!
Wrapping up and next steps
Repotting an overwatered plant isn’t just about saving its roots—it’s about giving your green buddy a fresh start! 🌱 By following the right steps, you’ve already taken the first big leap toward revival. Remember: patience and proper care are key, and soon, your plant will be thriving again.
Now that you’re armed with the know-how, why not check in on your plant’s progress weekly? Monitor its growth, adjust watering habits, and celebrate every small victory. Your dedication will pay off—one leaf at a time! 🌿