
Pruning
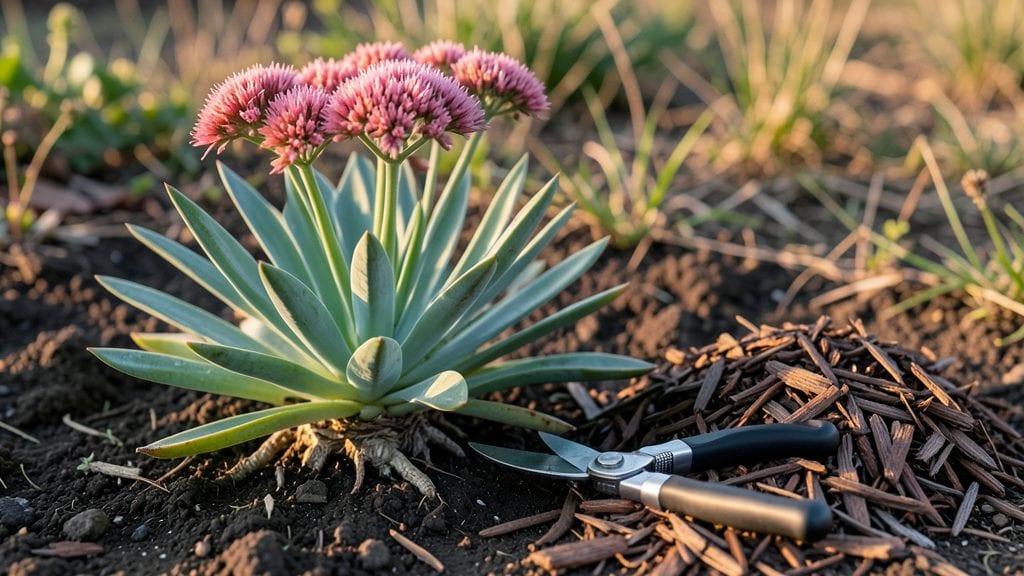
Pruning sedum plants isn't just about tidying up—it's the secret to keeping those plump stems and clouds of blooms coming back year after year. 🌿 I've learned the hard way that skipping this step means leggy plants and fewer flowers, but with just three strategic cuts, sedum stays bushy and productive for decades.
The key is timing: late winter for dormant plants, summer for shaping, and a quick touch-up after flowering.
You only need basic tools—a sharp pair of pruners and maybe some gloves if your sedum is spiky. For groundcover types like Sedum album, you can be bold and cut back hard in early spring, but succulent varieties like Sedum morganianum need gentle hand-pruning.
Always cut just above a leaf node or joint to encourage new growth—never hack at random. This keeps plants healthy and prevents those unsightly bare stems.
What you'll end up with is sedum that looks like it belongs in a botanical garden, not just your backyard. The flowers stay vibrant longer, the stems stay thick and sturdy, and you'll have fewer problems with pests or disease.
Plus, container-grown sedum stays compact and tidy when you prune regularly. Think of it as giving your plants a haircut—they'll thank you with better blooms and stronger growth.
Here's where it gets interesting—different sedum types respond differently. Succulents like Sedum morganianum (the "burro's tail") need minimal pruning, while Sedum spectabile (the showy autumn sedum) rewards aggressive early-spring cuts.
And if you're growing sedum in containers, you can even overwinter them indoors after pruning. The right cuts make all the difference between a wild tangle and a showstopper plant.
📚 In This Guide
- What you need
- Instructions
- Tips and common mistakes
- Wrapping up and next steps
What you need
- ● Pruning shears: Bypass pruners (sharp, clean, and sterilized with rubbing alcohol) – 1 pair (for small to medium stems). For thicker stems, use loppers (up to 2-inch diameter) – 1 pair.
- ● Garden gloves: Cut-resistant or nitrile-coated gloves (size medium or large) – 1 pair (to protect from thorns or sap).
- ● Disinfectant: Rubbing alcohol (70% isopropyl) or hydrogen peroxide (3%) – small bottle (for sterilizing tools between cuts).
- ● Trash bag or bucket: Heavy-duty (13-gallon capacity) – 1-2 (for debris).
- ● Watering can or hose: With a gentle spray nozzle – 1 (to hydrate plants post-pruning).
- ○ Compost bin or bag: For repurposing healthy clippings – 1 (optional but eco-friendly!).
- ● Hand pruners: For tiny stems (great for detailed work) – 1 pair.
- ● Plant marker: Waterproof labels (to track pruning dates if experimenting with timing).
- ● Mulch: Organic mulch (e.g., shredded bark) – 1 bag (to reduce stress post-pruning).
- ● Safety glasses: If working near thorny varieties like Sedum 'Dragon's Blood'.
- ● Pruning saw: For extremely thick stems (rare for Sedum, but useful for established plants).
Step-by-step instructions for pruning sedum plants
Here's how I keep my sedum thriving with just three well-timed cuts.
✂️ Step 1: Early Spring Cleanup (Late February to Early March)
Start by removing any dead or damaged stems from last season. Sedum plants often hold onto brown, crispy growth over winter, but these dead stems block light and nutrients from reaching new growth. I grab a pair of clean, sharp pruners and snip just above a healthy leaf node or bud—this ensures fresh growth will emerge from the right spot.
Watch for signs of rot or mold at the base of stems. If you see blackened or mushy areas, cut those stems back to healthy tissue immediately. This is also the time to thin out overly crowded stems. Sedum naturally grows in clusters, but too many stems competing for space leads to weak, leggy growth. Aim to leave about 3-4 strong stems per plant after thinning.
✂️ Step 2: Mid-Summer Deadheading (July to August)
When your sedum starts flowering, you'll notice clusters of small, star-shaped blooms. These flowers are beautiful, but they also signal the plant to start preparing for dormancy. To encourage more blooms and extend the flowering season, deadhead spent flowers by snipping the entire flower stalk back to just above a set of healthy leaves. Use clean pruners to avoid spreading disease.
Here's the thing—sedum blooms often develop at the tips of stems. If you see leggy growth without flowers, it's a sign the plant is stretching for light. In this case, cut the leggy stems back by about one-third to encourage bushier, more compact growth. You'll see new side shoots emerge within a few weeks, and those will produce even more flowers.
✂️ Step 3: Late Summer to Early Fall Renewal (September to October)
As temperatures cool and growth slows, it's time for a final pruning to shape the plant and prepare it for winter. Cut back any remaining leggy or weak stems by about half their length. This helps the plant focus its energy on root development and storing nutrients for next season. I like to leave the plant with a rounded shape—this encourages even growth and prevents a lopsided appearance.
Remove any stems that are crossing or rubbing against each other. These can create wounds where pests or diseases might take hold. After pruning, give the plant a light application of compost around the base. This adds nutrients and helps the roots recover before dormancy. Avoid heavy watering after this cut—sedum prefers to dry out slightly in late summer and fall.
Tips & tricks for pruning sedum plants
These simple strategies will help you keep your sedum looking its best all year long—without the guesswork.
Tool Prep Matters: Always use clean, sharp pruners to make precise cuts. Dull blades crush stems instead of cutting cleanly, which can damage the plant and invite disease. I wipe my pruners down with rubbing alcohol before each use—it takes 10 seconds and prevents cross-contamination between plants. For larger sedum clusters, consider using a small hand saw for thicker stems, but always sterilize it first.
Step 1 Visual Cues: In late winter, look for stems that are completely brown and crispy—they're ready to go. For stems that are mostly dead but still have some green at the base, cut just above the last healthy leaf node. You'll know you're doing it right when you see fresh green growth emerging within a few weeks. This is also your chance to shape the plant—sedum responds well to being guided into a fuller form.
Mid-Summer Pruning Hack: When deadheading in July-August, don't just cut off the flowers—snip the entire flower stalk back to just above a set of leaves. This encourages the plant to produce more side shoots, which means more blooms later. I like to do this on a cloudy day when the plant isn't stressed by heat. The extra foliage also helps shade the roots, keeping them cooler during hot summer months.
Fall Prep Strategy: In your final cut of the season (September-October), focus on creating a rounded shape rather than just cutting back randomly. This helps the plant store energy more efficiently over winter. After pruning, I always add a 1-inch layer of mulch around the base—it insulates roots from temperature swings and retains moisture. Just remember, sedum prefers to dry out slightly in fall, so don't overwater after this final cut.
Pro Tips for Pruning Sedum Plants
- These simple strategies will help you keep your sedum looking its best all year long—without the guesswork.
- Tool Prep Matters: Always use clean, sharp pruners to make precise cuts.
- Step 1 Visual Cues: In late winter, look for stems that are completely brown and crispy—they're ready to go.
Frequently asked questions
Got questions about pruning your sedum plants? You’re not alone!
Here are answers to the most common concerns—from timing to troubleshooting—so you can keep your succulents thriving and blooming all year.
When is the best time to prune sedum?
Prune sedum after it blooms (late summer to early fall) to encourage a second flush of flowers. For shaping, do it in early spring before new growth starts. Avoid pruning in winter—sedum is dormant and needs its energy for survival.
How much can I cut back without harming the plant?
You can safely remove up to one-third of the plant’s growth in a single pruning. For woody sedum (like Sedum ‘Autumn Joy’), trim back to healthy green stems—never down to bare wood. Over-pruning weakens the plant, so be gentle!
What if my sedum looks leggy after pruning?
Leggy sedum is often a sign of too little light or overcrowding. After pruning, move it to a sunnier spot (6+ hours of light daily) and space plants 12–18 inches apart for better airflow. A light fertilizer in spring can also boost compact growth.
Can I propagate sedum from pruned cuttings?
Stem cuttings
root easily in water or soil. Let cuttings dry for 1–2 days to callus over, then plant in well-draining mix. Keep them bright and warm (70°F+) until roots form (2–4 weeks). Perfect for free plants!
Do I need to prune sedum in winter?
No—sedum is hardy and low-maintenance in winter. Only remove dead or damaged stems in late winter (just before new growth). Avoid heavy pruning; the plant stores energy for spring. Mulch lightly to protect roots if temps drop below 20°F.
Pro Tip: Mark your calendar!
Set reminders for three key pruning times:
- Post-bloom (late summer) – Deadhead spent flowers.
- Early spring – Shape and remove dead stems.
- Fall (optional) – Light trim to prep for winter.
Wrapping up and next steps
Pruning your sedum plants doesn’t have to be intimidating—with just three strategic cuts, you can keep them thriving year-round while encouraging vibrant blooms! 🌸 The key is timing, the right tools, and a little patience.
Whether you’re trimming leggy stems, deadheading spent flowers, or giving them a hard prune in late winter, your sedum will reward you with lush, healthy growth and stunning displays.
Now that you’re armed with the know-how, grab those shears and get pruning! 🌿 Start with one section at a time, observe how your plants respond, and adjust as needed.
Happy gardening—your sedum’s next burst of color is just a cut away! Ready to dive deeper? Explore more sedum care tips or share your progress with the gardening community!