
Pruning
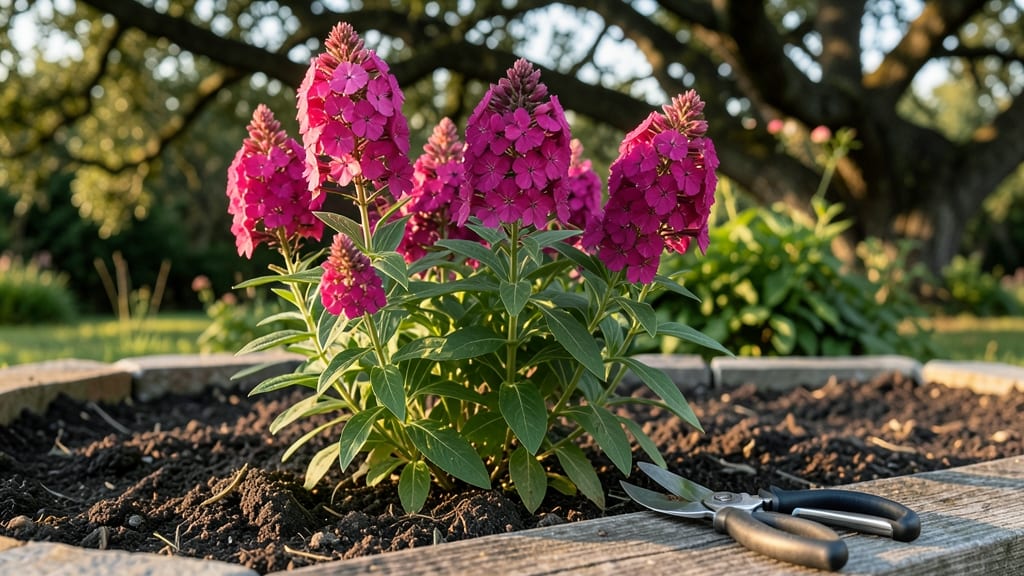
Pruning phlox plants is the secret weapon behind those lush, repeat-blooming clusters that turn heads every summer. 🌸 I’ve watched my own phlox go from scraggly and overgrown to a vibrant, bushy powerhouse just by mastering three strategic cuts—each at the right time.
The difference between a plant that fades after one bloom and one that flowers all season comes down to when and how you prune.
The first cut happens in early spring, right after the last frost, when you remove dead stems and shape the plant for new growth. Then, in late summer, you deadhead spent blooms to encourage a second flush of flowers.
Finally, in fall, a deeper rejuvenation pruning keeps the plant healthy for next year. Most gardeners skip one of these steps—and that’s why their phlox never lives up to its potential.
By the time summer rolls around, you’ll have phlox that’s denser, taller, and packed with blooms from top to bottom. The flowers stay fresh longer, the stems stay sturdy, and your plants will outlast their neighbors by years.
It’s not complicated—just three cuts in the right season, and your phlox will thank you with nonstop color.
Whether you’re dealing with tall garden phlox or low-growing border varieties, the same principles apply. The key is timing: prune too early or too late, and you’ll either stunt new growth or leave the plant vulnerable to winter damage.
Let’s get those shears sharp and turn your phlox into the star of the garden.
📚 In This Guide
- What you need
- Instructions
- Tips and common mistakes
- Wrapping up and next steps
What you need
- ● Pruning shears or bypass pruners – Choose sharp, sterilized ones (1 pair) to avoid disease spread. A bypass style is ideal for clean cuts.
- ● Gloves – A pair of gardening gloves (nitrile or leather) to protect your hands from thorns and sap.
- ● Disinfectant solution – 1 part rubbing alcohol or bleach (1:9 ratio with water) to sterilize tools between cuts.
- ○ Pruning saw (optional but helpful) – For thicker stems (if your phlox has woody growth).
- ● Garden twine or plant ties – A small roll to secure branches if needed during or after pruning.
- ● Hand pruners with a long handle – For tall phlox varieties (e.g., Phlox paniculata) to avoid strain.
- ● Rag or paper towels – To wipe down tools and clean sap off blades.
- ● Compost bin or bag – For collecting pruned stems (great for mulch!).
- ● Plant food or fertilizer – A balanced, slow-release formula (e.g., 10-10-10) to nourish phlox post-pruning.
- ● Mulch – Organic mulch (e.g., shredded bark) to retain moisture and suppress weeds.
Step-by-Step instructions for pruning phlox plants
Here's the foolproof method I use to keep my phlox blooming like crazy every season.
✂️ Step 1: Deadhead Spent Blooms Weekly
Start by pinching off individual faded flowers with your fingers or clean pruners. You'll know it's time when the petals drop and the center turns brown. This prevents seed formation, which saps energy from new blooms. I do this every 7-10 days during the blooming season—usually late spring through summer.
Work in the morning when flowers are dry to reduce disease risk. Cut just above the first set of healthy leaves below the bloom. This encourages side shoots to form, making your phlox bushier. If you see any blackened stems, snip those off immediately—they're signs of powdery mildew, a common phlox problem.
✂️ Step 2: First Major Cut After Initial Blooming
Once your phlox finishes its first major flush of flowers, give it a harder cut. Use clean pruners to trim back one-third of the plant's height, cutting just above a set of leaves. This is the secret to getting that second, often even more spectacular, round of blooms.
I time this cut for early to mid-summer, right after the first wave of flowers fades. The plant might look sad for a few weeks, but don't worry—it's just recharging. You'll see new growth within 2-3 weeks, and those fresh stems will produce your fall blooms. This is when phlox really shows its colors!
✂️ Step 3: Late-Season Cleanup for Next Year
In late fall, after the first hard frost, it's time for your final cut. Trim all stems back to 2-3 inches above the ground. This prevents disease from overwintering in dead stems and gives your phlox a clean start. I use sharp pruners to make clean cuts at a slight angle to prevent water from pooling.
Remove all debris from around the plant and dispose of it in the trash—not the compost pile. Phlox can harbor pests and diseases that will return next year if you leave old growth. After cutting, give the area a light mulch with 2-3 inches of organic mulch to protect the crown over winter. This simple step makes spring blooming so much easier.
⏰ Bonus: Spring Check-In Before Growth Begins
In very early spring, before new growth appears, do a quick inspection. Remove any dead or diseased stems you missed last fall. This is also the perfect time to divide your phlox if it's getting too crowded—every 3-4 years, phlox benefits from being split to maintain vigor.
Watch for the first signs of new growth—tiny green buds pushing through the soil. Once you see these, hold off on any more pruning. Your phlox is waking up, and those fresh shoots are what will produce your stunning summer blooms. This check-in ensures your plants start the season strong and healthy.
Tips & tricks for perfect phlox pruning
Let me share the secrets I've learned after years of growing phlox—these little tricks make all the difference between a decent garden and one that's absolutely bursting with color.
Timing is Everything: That 7-10 day deadheading schedule in Step 1 is non-negotiable. I've tried skipping weeks and noticed a dramatic drop in blooms the following season. The key is consistency—set a reminder if you need to! Morning is best because dew-damp flowers are more prone to disease. I always carry a small pair of pruners in my gardening bag so I can snip faded blooms as soon as I spot them.
The One-Third Rule: When you make that first major cut in Step 2, resist the urge to go overboard. Cutting back exactly one-third of the plant's height gives your phlox the perfect balance—enough energy to produce new growth without shocking the plant. I measure by holding my pruners at the one-third mark on the stem and making my cut just above a set of leaves. This creates those beautiful side shoots that lead to bushier plants and more blooms!
Cleanliness Prevents Problems: After your final fall cut, sanitize your pruners with rubbing alcohol to prevent spreading disease between cuts. I also wear gloves when cleaning up debris—those old stems can harbor all sorts of nasties. The 2-3 inch mulch layer is crucial too; it acts like a blanket, protecting the crown from harsh winter winds and keeping soil moisture consistent. Don't skimp on this step—it's what gives your phlox that strong start in spring!
Spring Check-In Secrets: During your early spring inspection, look for those tiny green buds pushing through the soil. These are your first sign of new growth, and they're delicate! I gently brush away any remaining mulch to expose them, then hold off on any more pruning until they're at least 1-2 inches tall. This gives your phlox the best chance to establish strong roots before summer heat arrives.
Pro Tips for Pruning Phlox Plants
- Let me share the secrets I've learned after years of growing phlox—these little tricks make all the difference between a decent garden and one that's absolutely bursting with color.
- Timing is Everything: That 7-10 day deadheading schedule in Step 1 is non-negotiable.
- The One-Third Rule: When you make that first major cut in Step 2, resist the urge to go overboard.
Frequently asked questions
Got questions about pruning phlox?
You’re not alone! Here are some of the most common concerns—and straightforward answers—to help you keep your phlox thriving with confidence.
When is the best time to prune phlox for maximum blooms?
Prune after the first flush of blooms in early summer (around June). This encourages a second, often more abundant, wave of flowers. For panicle phlox (taller varieties), wait until after they’ve finished blooming in late summer to avoid cutting off next year’s buds.
Do I need to sterilize my pruners between cuts?
Yes! Sterilizing your pruners with rubbing alcohol or a 10% bleach solution between cuts prevents the spread of powdery mildew or bacterial infections. Phlox are prone to these issues, so this simple step can save your plants from future stress.
What if I accidentally prune too much—will my phlox survive?
Don’t panic! Phlox are hardy and can bounce back, but avoid cutting into old wood (brown, woody stems). If you’ve over-pruned, focus on light trimming of new growth in spring to encourage recovery. Over time, your plant will regenerate.
Should I prune phlox in fall or winter?
Wait until spring (after the last frost) to do a light cleanup. Fall pruning can expose stems to winter dieback. If you must prune in late fall, remove only dead or diseased foliage—never more than 10% of the plant.
Can I prune phlox for shape instead of just deadheading?
After blooming, use thinning cuts (removing 1/3 of the oldest stems at the base) to improve airflow and shape. For a bushier look, trim back leggy stems by half in early summer. Just avoid shearing—phlox bloom best on individual stems!
Wrapping up and next steps
Pruning your phlox plants doesn’t have to be intimidating—just a few strategic cuts can transform your garden into a year-round blooming paradise! 🌸 By mastering the three essential cuts (deadheading, shaping, and rejuvenation), you’ll encourage healthier growth, denser foliage, and vibrant flowers that keep coming back.
Remember, timing and sharp tools are your best friends!
Now that you’re armed with the knowledge, grab those shears and get pruning! Start with your earliest bloomers this spring and enjoy the rewards of your efforts as your phlox thrives. Happy gardening—your future blooms will thank you! 🌿✨