
Pruning
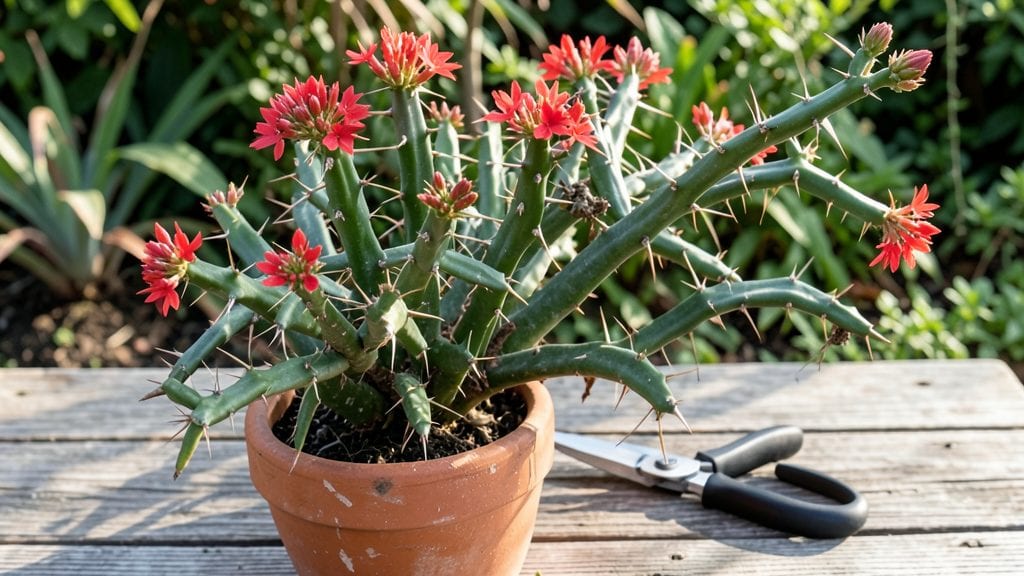
Pruning euphorbia plants starts with gloves and caution—those milky sap droplets pack a punch you won’t forget. 🌿 I’ve learned the hard way that skipping safety leads to itchy skin and regret, but with the right tools and timing, you’ll transform leggy, sprawling stems into bushier, healthier plants that thrive all season.
The best time to prune is early spring or right after flowering, when new growth is eager to take over. You’ll need sharp pruners, rubbing alcohol to clean blades between cuts, and a trash bag for sap-soaked clippings—no compost pile for these.
For candelabra types, trim back overgrown stems by a third to encourage branching, while spurges respond well to a light haircut to keep their compact shape.
After pruning, let the cuts heal for a week before fertilizing, and keep soil moist but not soggy. The results? Thicker stems, more blooms, and plants that look like they’ve been professionally groomed. Just avoid cutting into the woody center—euphorbias hate that kind of aggression.
This method works for both indoor poinsettias and outdoor varieties, though desert euphorbias need less frequent trimming. Start small, and you’ll soon be pruning like a pro—without the itch.
📚 In This Guide
- What you need
- Instructions
- Tips and common mistakes
- Wrapping up and next steps
What you need
- ● Safety gear: Nitrile or latex gloves (2–3 pairs) – thick, puncture-resistant for sap protection.
- ● Long-sleeved shirt and pants – cover exposed skin fully to avoid irritation.
- ● Safety goggles – protects eyes from accidental sap splashes.
- ● Pruning tools: Bypass pruners – sharp, clean, and sterilized (for stems <½" thick).
- ● Loppers – for thicker stems (½"–1.5").
- ● Pruning saw – for woody, oversized growth.
- ● Cleanup & disposal: Newspaper or cardboard – for wrapping pruned sections.
- ● Trash bag (heavy-duty) – for safe disposal of plant debris.
- ● Rubbing alcohol (70%+) – to clean tools and skin if sap touches.
- ● Hand sanitizer – for extra skin protection.
- ● Disinfectant spray (e.g., 10% bleach solution) – sterilize tools between cuts.
- ● Plant-based sap remover (e.g., dish soap + water) – for stubborn sap on tools.
- ● Notebook & pen – to track pruning dates and plant responses.
Step-by-Step instructions for pruning Euphorbia plants
Here's how to trim these striking succulents safely and effectively—without getting stuck with sticky sap.
🧤 Step 1: Protect Yourself First
Euphorbia sap is milky and toxic—it causes skin irritation, burns, and can even make you sick if you get it in your eyes. I always wear thick gardening gloves (nitrile or rubber) and a long-sleeved shirt before touching any part of the plant. The sap dries clear, so you won’t see it until it’s too late.
If you don’t have gloves, at least cover your hands with a damp paper towel—this helps contain the sap and makes cleanup easier. Work outdoors or in a well-ventilated area, as the fumes from the sap can be irritating. I keep a bucket of soapy water nearby to rinse any accidental splashes immediately.
✂️ Step 2: Use the Right Tools for Clean Cuts
A sharp pair of bypass pruners gives the cleanest cuts and reduces tearing, which is especially important for euphorbias because jagged edges invite rot. I sterilize my tools with rubbing alcohol before and after pruning to prevent bacterial infections from spreading between cuts.
For larger stems, I use a hacksaw—euphorbia branches can be woody, and dull tools will crush the stem instead of cutting through cleanly. Always cut at a 45-degree angle just above a leaf node or joint. This encourages new growth and prevents water from pooling on the cut surface, which could lead to rot.
🌿 Step 3: Trim for Shape and Health
Euphorbia responds well to pruning, so I focus on removing dead, damaged, or leggy growth first. Look for stems that are brown, mushy, or covered in black spots—these are signs of disease or pest damage. Snip them off at the base, and dispose of them in a sealed plastic bag (not your compost bin).
For shaping, I step back and visualize the plant’s natural form. Euphorbias often grow in a bushy or tree-like shape, so I trim back overgrown branches to maintain balance. Never cut more than one-third of the plant’s foliage at a time—this prevents shock and allows the plant to recover. Water lightly after pruning to help it bounce back.
💧 Step 4: Clean Up Sap and Monitor Recovery
After trimming, wipe down the cuts with a damp cloth to remove any residual sap. I then rinse the cloth in soapy water and dispose of it properly—never reuse it for other plants. The sap can linger on tools and surfaces, so I also clean my pruners and hacksaw thoroughly before storing them.
Watch the plant closely for the next 2-3 weeks. Healthy euphorbias will show new growth at the cut sites within 4-6 weeks. If you notice yellowing leaves, wilting, or oozing sap from the cuts, it’s a sign of stress or infection. In that case, reduce watering and keep the plant in bright, indirect light until it stabilizes.
⏰ Step 5: Schedule Pruning for Optimal Growth
Timing matters with euphorbias. I prune in early spring just as new growth begins, or in late summer after the heat of summer has passed. Avoid pruning during extreme heat or cold snaps—these conditions stress the plant and slow recovery. If you live in a warm climate, you can prune year-round, but always wait until temperatures are mild.
Regular pruning keeps euphorbias compact and encourages bushier growth. I like to do a light trim every 6-8 weeks to maintain shape and remove any unsightly or damaged branches. Just remember: patience is key. Euphorbias grow slowly, so don’t rush the process—let them heal between prunings.
Tips & tricks for pruning Euphorbia plants safely
Here's what I've learned from years of working with these striking but tricky plants—mistakes can lead to messy cleanup or stressed plants.
Safety First: In Step 1, I can't stress this enough—always wear gloves, even if it's just a thin layer of plastic wrap over your hands. The sap dries invisible, so you won't notice until irritation sets in. I keep a small bottle of rubbing alcohol handy to immediately wipe any accidental splashes on skin or tools. This neutralizes the sap before it causes irritation.
Tool Prep Matters: Before you start cutting in Step 2, take 2 minutes to properly sterilize your tools with rubbing alcohol. I use a spray bottle for quick application between cuts, especially when working with multiple plants. Dull tools will crush stems instead of cutting cleanly—this creates jagged edges that invite rot. For stubborn branches, a hacksaw works best, but always make that 45-degree angle cut to prevent water pooling.
Strategic Pruning: When shaping in Step 3, focus on removing no more than one-third of the foliage at once. I visualize the plant's natural shape by stepping back and looking at it from all angles. For bushy varieties, I trim back the longest stems first to encourage fuller growth. Always cut just above a leaf node—this is where new growth will emerge. Don't forget to dispose of pruned material in sealed bags; compost bins can spread sap contamination.
Recovery Monitoring: After pruning, the 2-3 week observation period in Step 4 is crucial. I keep a small notebook to track my plants' recovery progress. If you notice yellowing leaves during this time, it's a sign of stress—reduce watering immediately and move the plant to bright, indirect light. Healthy euphorbias should show new growth at the cut sites within 4-6 weeks, but patience is key with these slow growers.
Pro Tips for Pruning Euphorbia Plants
- Here's what I've learned from years of working with these striking but tricky plants—mistakes can lead to messy cleanup or stressed plants.
- Safety First: In Step 1, I can't stress this enough—always wear gloves, even if it's just a thin layer of plastic wrap over your hands.
- Tool Prep Matters: Before you start cutting in Step 2, take 2 minutes to properly sterilize your tools with rubbing alcohol.
Frequently asked questions
Got questions about pruning Euphorbia safely and effectively? Here are answers to common concerns—from timing to troubleshooting—so you can trim with confidence!
When is the best time to prune Euphorbia plants?
Prune Euphorbia in late winter or early spring (before new growth starts) or after flowering (if applicable). Avoid heavy pruning in fall, as it may stress the plant before dormancy. Light shaping can be done anytime, but always wear gloves and protective gear due to toxic sap!
How do I safely handle the toxic sap when pruning?
The sap is irritating and can cause skin rashes or eye irritation. Wear nitrile gloves, long sleeves, and safety goggles. Work outdoors or in a well-ventilated area. If sap touches skin, wash immediately with soapy water and avoid rubbing. For eye exposure, rinse with water for 15+ minutes and seek medical help if needed.
Can I propagate Euphorbia from pruned cuttings?
Yes! Use healthy, disease-free cuttings (3–6 inches long) from pruned stems. Let them dry for 1–2 days to seal the sap, then plant in well-draining soil. Keep soil slightly moist (not soggy) and place in bright, indirect light. Roots typically form in 2–4 weeks.
What do I do if my Euphorbia looks leggy or overgrown?
Leggy growth often means too little light. Move the plant to a sunnier spot (6+ hours of direct sun) and prune back overlong stems by 1/3 to 1/2. For woody species, cut just above a leaf node or joint. Avoid "topping" (cutting the very top) unless necessary—it can stunt growth.
Are there non-toxic alternatives to pruning Euphorbia?
If you’re concerned about sap exposure, try selective pruning (only trimming dead or unsightly growth) or use sterilized tools (like shears dipped in rubbing alcohol) to minimize contact. For sensitive skin, wear double gloves or delegate pruning to someone else. No true "non-toxic" alternative exists—safety gear is a must!
Why is my Euphorbia dying after pruning?
Over-pruning (removing >30% of foliage at once) or cutting into woody stems can stress the plant. Ensure cuts are clean and at a 45° angle (for stems) or just above a leaf node. Avoid pruning during heatwaves or cold snaps. If yellowing or wilting occurs, reduce watering and check for root rot or pests.
Wrapping up and next steps
Pruning your Euphorbia plants doesn’t have to be intimidating—just remember: safety first and precision matters! With the right tools, timing, and care for that toxic sap, you’ll keep your plants thriving while avoiding messy mishaps.
Whether you’re shaping a striking Euphorbia tirucalli or tidying up a sprawling Euphorbia characias, confidence grows with practice.
Ready to take the next step? Grab your gloves, dust off those pruners, and schedule your next pruning session—your Euphorbia will thank you with lush, vibrant growth! 🌱✨