Pruning
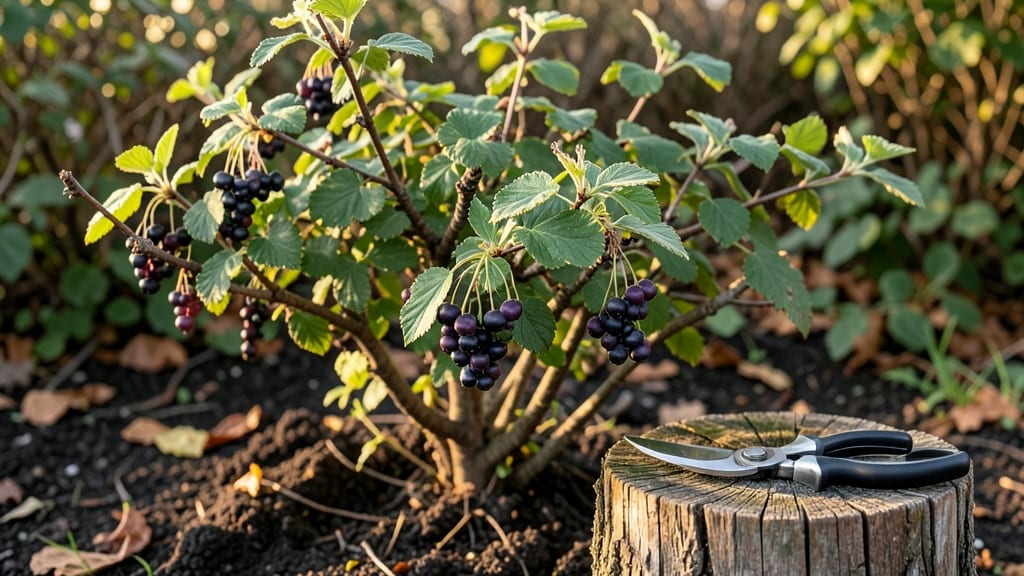
Pruning blackcurrant plants isn’t just about keeping them tidy—it’s the secret to year-round productivity that turns a wild tangle into a well-behaved fruit factory. 🌱 I learned the hard way that skipping this step means smaller berries, fewer canes, and a bush that looks like a tangled mess by summer.
The right cuts at the right time make all the difference.
You only need three tools: sharp secateurs, thick gloves (blackcurrant thorns are no joke), and a bottle of rubbing alcohol to disinfect your blades between cuts.
Timing matters too—winter’s the best time to tackle the big structural work, while summer pruning keeps the bush in check without sacrificing next year’s crop. Think of it like giving your plant a haircut and a spa day in one.
By the end, you’ll have a bush that’s easier to harvest from, produces bigger berries, and stays healthy for years. The key is removing old wood, opening up the center for air flow, and shaping it so sunlight reaches every cane.
No more struggling to pick fruit hidden in the middle—just a tidy, productive plant that rewards your effort with buckets of tart-sweet berries.
Works for both new bushes and neglected ones—just adjust the approach. Here’s how to make those cuts without turning your garden into a thorny nightmare.
📚 In This Guide
- What you need
- Instructions
- Tips and common mistakes
- Wrapping up and next steps
What you need
- ● Pruning shears: Bypass pruners (sharp, 5–8" blades) for clean cuts—1 pair (invest in high-quality stainless steel for longevity).
- ● Loppers: Bypass or anvil type (8–12" blades) for thicker branches—1 pair (ergonomic handles reduce hand fatigue).
- ● Pruning saw: Curved-tooth saw for stubborn, woody stems—1 small saw (avoid serrated blades; they tear wood).
- ● Gloves: Heavy-duty gardening gloves (cut-resistant, waterproof) to protect hands from thorns and sap—1 pair.
- ● Disinfectant: 70% isopropyl alcohol or rubbing alcohol in a spray bottle—1 bottle (prevents disease spread between cuts).
- ○ Pruning sealant: Optional (e.g., tree wound paint)—small tube (only needed for large cuts >1" diameter).
- ● Bucket or bag: For collecting pruned branches—1 large container (or a tarp for easy cleanup).
- ● Weather: Prune on a dry, overcast day or early morning to reduce stress on the plant (avoid midday sun).
- ○ Safety gear: Safety glasses (optional but recommended if branches are thick or thorny).
- ● Plant health check: Inspect bushes for diseases (e.g., white pine blister rust) or pests before pruning—treat if needed.
- ○ Map or sketch: Optional—sketch the plant’s structure beforehand to visualize cuts (great for beginners!).
How to prune blackcurrant plants for maximum fruit and health
Here's the straightforward approach I use to keep my blackcurrant bushes productive for decades.
✂️ Step 1: Winter Pruning (Late Dormant Season)
Start in late winter, just as buds begin to swell but before new growth appears. This is your chance to shape the plant and remove dead wood. I always begin by cutting out any branches that are completely dead or diseased—you'll recognize them by their hollow centers or dark, shriveled appearance.
Next, remove any branches that cross or rub against each other. These create wounds that invite disease. Use clean, sharp pruners to make cuts at a 45-degree angle, about ¼ inch above a bud that faces outward. This encourages new growth to develop away from the center of the plant, improving airflow and sunlight penetration.
For established plants, I thin out about 20% of the oldest wood—these are the branches that produce the least fruit. Cut them back to the ground. This rejuvenates the bush and prevents overcrowding. After pruning, I give the plant a light feeding with 10-10-10 fertilizer to support spring growth.
🌿 Step 2: Summer Pruning (After Harvest)
Once you've harvested your blackcurrants in early summer, it's time for the second pruning. This is all about maintaining shape and encouraging next year's fruit production. I start by removing any suckers—those vigorous shoots that sprout from the base of the plant. These drain energy from the main branches and rarely produce good fruit.
Next, I trim back any branches that have borne fruit this year. Cut them back to half their length, leaving only the strongest, most vigorous shoots. This ensures the plant puts energy into new growth rather than trying to sustain old, fruited branches. I also remove any weak, spindly growth that's growing toward the center of the plant.
This is also the time to check for any signs of disease or pest damage. If you spot any affected branches, remove them immediately and dispose of them in the trash—not the compost. Healthy blackcurrant plants should have strong, green stems with no signs of discoloration or unusual spots.
⏰ Step 3: Light Maintenance Pruning (Throughout Growing Season)
Between winter and summer pruning, I do a few quick checks throughout the growing season. Whenever I notice a branch growing in an awkward direction or rubbing against another, I trim it back immediately. This prevents damage and keeps the plant looking neat.
I also remove any watersprouts—those long, thin shoots that grow straight up from the base or branches. These don't produce much fruit and can make the plant look unkempt. Simply snip them off at the base with clean pruners. Regular maintenance like this keeps the plant healthy and productive year-round.
Finally, I always check the plant after heavy rains or storms. Wind or rain can damage branches, and prompt pruning of any broken or damaged wood prevents disease from setting in. A healthy blackcurrant bush should have strong, upright branches with plenty of space between them for airflow.
Tips & tricks for pruning blackcurrant plants
These practical strategies will help you maintain a thriving blackcurrant bush that produces abundant fruit year after year.
The Pruning Angle Matters: When making cuts in Step 1, that 45-degree angle isn't just for looks—it's essential. Cutting at this angle helps water run off the wound instead of pooling, which reduces the risk of rot. Always make your cuts just above an outward-facing bud so new growth develops away from the center, improving airflow and sunlight penetration throughout the bush.
Timing is Everything: I can't stress enough how important it is to prune in late winter when buds begin to swell but before new growth appears. This timing gives the plant time to heal before spring growth begins. If you prune too early, the cuts won't have time to heal before new growth starts, making the plant vulnerable to disease. If you wait too long, you risk damaging emerging buds.
Tool Maintenance is Critical: Your pruners should be as sharp as possible—dull blades crush stems instead of making clean cuts, which can damage the plant and invite disease. After each use, wipe your pruners with rubbing alcohol to sterilize them. I keep a small bottle of alcohol in my gardening toolbox specifically for this purpose. Clean tools prevent the spread of any potential diseases between plants.
Visual Cues for Healthy Growth: When doing your summer pruning in Step 2, look for branches that have borne fruit this year—they'll typically be thinner and less vigorous than the new growth. Cut these back to half their length to encourage the plant to focus its energy on new, productive branches. You'll notice the strongest shoots are usually the ones growing outward from the center rather than inward.
Pro Tips for Pruning Blackcurrant Plants
- These practical strategies will help you maintain a thriving blackcurrant bush that produces abundant fruit year afte...
- The Pruning Angle Matters: When making cuts in Step 1, that 45-degree angle isn't just for looks—it's essential. Cutt...
- Timing is Everything: I can't stress enough how important it is to prune in late winter when buds begin to swell but ...
Frequently asked questions
Got questions about pruning your blackcurrant plants? You’re not alone! Here are some of the most common concerns—plus expert answers to keep your bushes thriving.
When is the best time to prune blackcurrants?
Prune blackcurrants in late winter or early spring (just before buds swell) for best results. This timing avoids stressing the plant and encourages strong new growth. Avoid pruning in fall, as it can leave wounds vulnerable to disease over winter.
How much can I cut back without harming the plant?
Remove 1/3 to 1/2 of the oldest wood each year to maintain vigor. Focus on:
- Dead, diseased, or crossing branches (cut at the base).
- Overcrowded stems (thin to 6–8 strong canes per plant).
- Suckers or weak growth (prune to encourage energy toward fruit production).
What if I prune at the wrong time?
Pruning in summer or fall can stress the plant, inviting pests or fungal issues. If you must prune later, do it after harvest (late summer) and sanitize tools to minimize risks. Light trimming to remove dead wood is safer than heavy cuts.
Do I need to sterilize my pruners between cuts?
Absolutely! Dip pruners in a 10% bleach solution or rubbing alcohol between cuts to prevent spreading blackcurrant gall mite or bacterial blight. A clean tool = healthier plants. Pro tip: Keep a small spray bottle of disinfectant handy while pruning.
Will pruning reduce my blackcurrant harvest?
Not if done right! Pruning increases fruit quality and yield by:
- Improving airflow (reduces disease).
- Directing energy to younger, more productive canes.
- Preventing overcrowding (which steals nutrients).
Wrapping up and next steps
Pruning your blackcurrant plants isn’t just about keeping them tidy—it’s the secret to bountiful harvests and long-term health! 🌿 By mastering the three key trims (spring, summer, and winter), you’ll encourage strong growth, better airflow, and delicious fruit year after year.
With the right tools and timing, you’re well on your way to becoming a blackcurrant-growing pro.
Ready to see those berries thrive? Grab your pruners and start trimming! If you’re new to pruning, check out our step-by-step guide or revisit the FAQs for extra confidence. Happy pruning—and here’s to a fruitful season ahead! 🍇✨