
Pruning
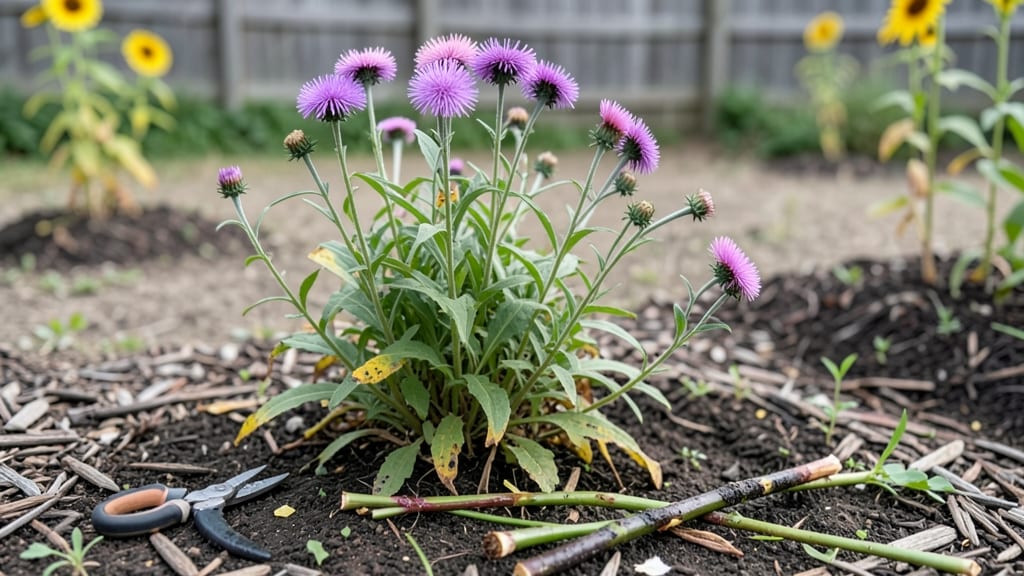
Pruning asters plants keeps them blooming from summer straight through fall—here’s the deadheading trick that works every time. 🌿 I used to watch my asters fade after the first flush of flowers, but after learning this simple technique, they’ve become my garden’s late-season superstars.
The key is timing and a sharp pair of shears, not complicated cuts or fancy tools.
You’ll need just three things: clean pruners, a sunny day, and about 15 minutes of your time. Grab your shears and look for spent blooms—the ones with brown centers or wilted petals. Snip just above the next set of healthy leaves, and you’ll encourage fresh flowers to take their place.
No need for gloves or special skills; this is beginner-friendly pruning that even my black thumb can handle.
After pruning, your asters will rebound with vibrant green foliage and new buds within 2-3 weeks. The plants stay bushier, resist powdery mildew better, and keep producing flowers until frost.
I’ve seen some varieties bloom for 8+ weeks with this method, turning a single plant into a showstopper that neighbors ask about.
The best part? This trick works for all aster varieties—whether you’re growing New England asters, Smooth asters, or Calico asters. Just adjust your pruning schedule: do it weekly in peak bloom (July-August) and taper off by September to let the plants harden off for winter.
Your garden will thank you.
📚 In This Guide
- What you need
- Instructions
- Tips and common mistakes
- Wrapping up and next steps
What you need
- ● Pruning shears or bypass pruners – Choose sharp, clean tools with bypass blades (not anvil-type) to avoid crushing stems. Size: 5–7 inches for precision.
- ● Garden gloves – Opt for cut-resistant or gardening gloves (size medium/large) to protect your hands from thorns or rough stems.
- ● Disinfectant (70% isopropyl alcohol or bleach solution) – 1 part bleach to 9 parts water to sterilize tools between cuts and prevent disease.
- ○ Garden twine or plant ties – 10–15 feet (optional but helpful for supporting leggy stems post-pruning).
- ● Trash bag or bucket – For removing deadheads and debris (1–2 gallon size).
- ● Water spray bottle – 8–16 oz with water to mist cuts and encourage healing.
- ● Hand pruners (for smaller stems) – Compact size for tight spaces.
- ● Garden kneeler or stool – For comfort while working close to the ground.
- ● Compost bin or mulch – To repurpose pruned material.
- ● Sunhat & sunscreen – Because even pruning in the shade can be sunny work! 🌞
Step-by-Step guide to pruning asters for continuous blooms
Here's how to keep your asters flowering until frost with minimal effort.
✂️ Step 1: Identify and Remove Spent Blooms
Use clean, sharp pruners to snip off flower heads as soon as they begin wilting—this is called deadheading. I target the stem just above the first set of healthy leaves below the bloom, cutting at a 45-degree angle to prevent water from pooling. This encourages the plant to redirect energy into new buds rather than seed production.
Watch for blooms that have turned brown or lost petals—these are ready for removal. If you wait until the entire flower head is completely dry, you'll miss the prime window for stimulating fresh growth. I like to do this in the early morning when stems are firm and less likely to tear.
✂️ Step 2: Prune Leggy or Overgrown Stems
After the initial flush of blooms, some stems may become leggy or overly tall, stretching toward the sun. Cut these back by one-third to one-half of their length, making your cuts just above a leaf node or side bud. This promotes bushier growth and prevents the plant from becoming top-heavy.
Leggy stems often appear pale and elongated with sparse foliage. By pruning them back, you force the aster to grow more compactly and produce stronger new shoots. I usually do this after the first major bloom cycle, around mid-to-late summer, when plants start to look tired.
✂️ Step 3: Thin Overcrowded Foliage
If your aster plant has become too dense, gently separate stems that are growing too close together. Use your fingers or pruners to make clean cuts, leaving 2-3 inches of space between remaining stems. This improves airflow, reducing the risk of fungal diseases like powdery mildew.
Overcrowded foliage often looks thick and congested, with leaves touching each other. By thinning, you also allow sunlight to reach the lower parts of the plant, encouraging more blooms along the stems. I do this in late summer when the plant has finished its first major flowering cycle.
✂️ Step 4: Lightly Trim New Growth for Bushiness
As new shoots emerge, pinch back the tips of the youngest stems to encourage branching. Use your fingers to gently pinch off the top 1-2 inches of growth, or use pruners for thicker stems. This technique is called "tip pruning" and helps create a fuller, more compact plant.
You'll notice new side shoots forming within 1-2 weeks of pinching. These side shoots will eventually produce more blooms, extending your aster's flowering season. I do this periodically throughout the growing season, especially after heavy rain or when the plant looks sparse.
⏰ Step 5: Time Your Final Pruning for Fall
In late fall, after the first frost has blackened the foliage, cut back the entire plant to within 2-3 inches of the ground. This removes dead growth and allows the plant to focus its energy on root development over winter. Use clean pruners to make sharp cuts and avoid tearing the stems.
This final pruning prepares the aster for dormancy and ensures a stronger start in the following spring. I always do this after the first hard frost, when the plant is completely dormant. Avoid pruning too early, as this can stimulate new growth that won't survive the cold.
Tips & tricks for pruning asters for nonstop blooms
Aster pruning might seem simple, but these key techniques will transform your plants from occasional bloomers to summer-to-fall showstoppers.
Timing is Everything: In Step 1, when deadheading those spent blooms, focus on early morning sessions when stems are firm and dew has evaporated. This reduces tearing and gives you the clearest view of which blooms are ready for removal. I've found that pruning at this time also minimizes stress on the plant, allowing it to redirect energy more efficiently to new buds. The 45-degree angle cut is crucial—it prevents water from pooling at the cut site, which could lead to rot or fungal issues.
Visual Cues for Leggy Stems: When you reach Step 2 and need to identify leggy stems, look for those pale, elongated growths with sparse foliage. These stems often grow toward the sun but produce fewer blooms. Cutting them back by one-third to one-half encourages the plant to grow more compactly. I've noticed that pruning these stems in mid-to-late summer, when they start looking tired, gives the plant a second wind of bushier growth and more abundant blooms.
Preventing Overcrowding: In Step 3, thinning overcrowded foliage isn't just about aesthetics—it's about plant health. When leaves touch, they create a humid microclimate that can lead to powdery mildew. Aim for 2-3 inches of space between stems to improve airflow. Late summer is the perfect time for this, as the plant has already finished its first major bloom cycle and has energy to redirect toward new growth. I always use clean pruners to make precise cuts, which helps prevent damage to the remaining stems.
Tip Pruning for Bushiness: For Step 4, when you're pinching back new growth, focus on the youngest stems. You'll see new side shoots forming within 1-2 weeks
Pro Tips for Pruning Asters Plants
- Aster pruning might seem simple, but these key techniques will transform your plants from occasional bloomers to summer-to-fall showstoppers.
- Timing is Everything: In Step 1, when deadheading those spent blooms, focus on early morning sessions when stems are firm and dew has evaporated.
- Visual Cues for Leggy Stems: When you reach Step 2 and need to identify leggy stems, look for those pale, elongated growths with sparse foliage.
Frequently asked questions
Got questions about keeping your asters blooming beautifully? Here are some of the most common ones—and their answers—to help you master the pruning game!
When is the best time to prune asters for continuous blooms?
Prune asters after they finish blooming in early summer (around July) to encourage a second flush of flowers in fall. Lightly trim spent blooms weekly throughout the season to redirect energy to new growth. Avoid heavy pruning in late summer—focus on deadheading instead!
How much should I cut back asters when pruning?
For deadheading, snip just above the first set of healthy leaves (about ¼ inch above) to promote regrowth. If resizing, cut back 1/3 of the plant’s height in early summer, but never remove more than half at once. Over-pruning can stress the plant and reduce fall blooms.
What if my asters stop blooming after pruning?
If blooms taper off, check for overcrowding (thin plants if needed) or poor soil (add compost). Also, ensure you’re pruning early enough—asters need time to recover. A light fertilizer (low nitrogen) after pruning can boost flower production.
Can I prune asters in fall to prepare for next year?
Yes! Cut back dead or diseased stems to ground level in late fall or early winter. Leave healthy foliage until spring to protect the crown. Avoid heavy pruning in fall—it can expose tender roots to cold. Mulch lightly to insulate the plant.
Are there any asters that don’t need pruning?
Most asters benefit from pruning, but wild-type or native varieties (like Symphyotrichum species) may tolerate minimal trimming. If you skip pruning, expect fewer but larger blooms. Deadheading still helps extend the season—just prune lightly to avoid stressing the plant.
Wrapping up and next steps
Pruning asters doesn’t have to be intimidating—it’s your secret weapon for longer, more vibrant blooms from summer right through fall! 🌸 By mastering the art of deadheading and strategic trimming, you’re not just tidying up; you’re encouraging your plants to thrive with energy and enthusiasm.
With the right tools, timing, and techniques, you’ll enjoy a garden that stays lush and colorful well into the cooler months.
Ready to put your new skills to work? Grab those pruners, step outside, and give your asters the care they deserve. Watch them reward you with a dazzling display! 🌺