
Pruning
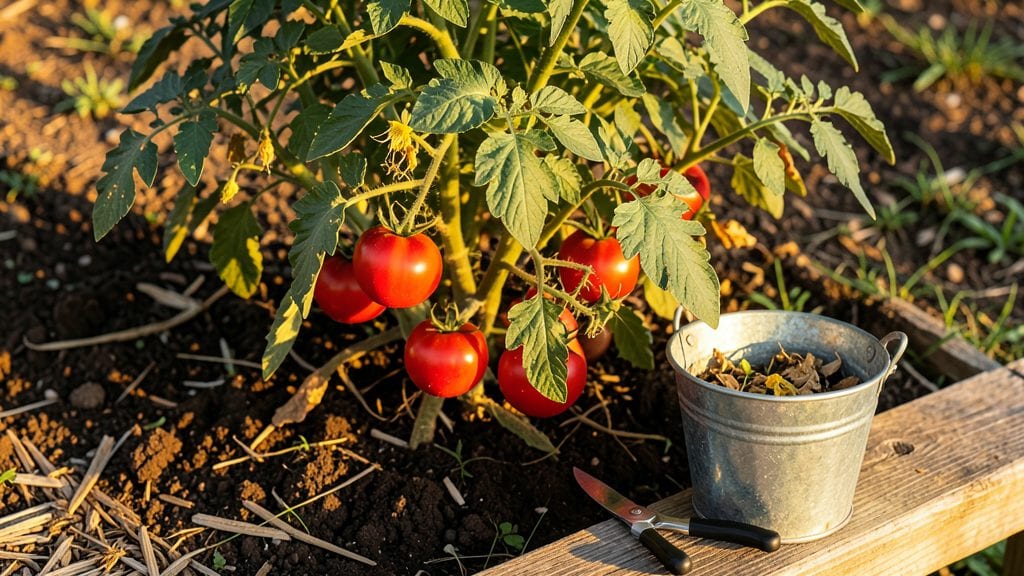
Pruning vegetable plants isn't just about shaping—it’s how I’ve doubled my tomato harvest and kept cucumbers producing all summer. ✨ The right cuts at the right time mean more fruit, stronger plants, and fewer pests.
I’ll show you exactly when to trim tomatoes (3 times a season), cucumbers (weekly), and beans (just once), plus how to do it without damaging your plants.
You only need 3 tools: sharp pruning shears, clean scissors, and a small trowel for deeper cuts. Most pruning happens in morning light when plants are dry, and it takes just 10-15 minutes per plant.
The key? Always cut above a leaf node—where new growth starts—and never remove more than a third of the plant at once. I learned that the hard way with my first tomato bush.
After pruning, you’ll see thicker stems, more flowers, and bigger yields—my zucchini plants now produce three times what they did before. The secret is consistency: tomatoes need early-season shaping, cucumbers get ongoing maintenance, and beans just need one strategic trim.
Even my black thumb can’t mess this up once you know the rules.
Works for tomatoes, cucumbers, beans, peppers, and more—just adjust timing by plant type. Here’s how to get started without killing your garden in the process.
📚 In This Guide
- What you need
- Instructions
- Tips and common mistakes
- Wrapping up and next steps
What you need
- ● Pruning shears or bypass pruners – Choose sharp, clean tools with bypass blades (avoid anvil pruners to prevent crushing stems). Size: 5-7 inches for most tasks.
- ● Hand pruners (for smaller plants) – Ergonomic handles help reduce hand fatigue. Quantity: 1-2 per gardener.
- ● Garden gloves – Durable, cut-resistant (e.g., nitrile-coated) to protect against thorns (e.g., tomatoes) and dirt.
- ● Disinfectant (70% isopropyl alcohol or bleach solution) – 1 part bleach to 9 parts water to sterilize tools between cuts and prevent disease spread.
- ● Sharpie or permanent marker – For labeling pruned branches if saving cuttings for propagation.
- ○ Bucket or tray – To collect pruned material (optional: compostable liner for easy cleanup).
- ● Loppers – For thicker stems (e.g., squash vines) up to 2 inches in diameter.
- ● Hose with nozzle – To rinse tools and clean sap off hands post-pruning.
- ● Rooting hormone – If propagating from cuttings (e.g., basil, mint).
- ● Knee pad or stool – For comfort during long pruning sessions.
- ● Plant tie or twine – To support vines after heavy pruning (e.g., cucumbers, beans).
- ● Notebook or app – To track pruning dates and plant responses (e.g., Gardenate or PlantNet).
Instructions for pruning vegetable plants for continuous harvests
Here’s how I keep my vegetable plants productive all season—just three strategic cuts make all the difference.
✂️ Step 1: Thin Seedlings for Stronger Stems
When seedlings are 2-3 inches tall and have 2-4 true leaves, use sharp scissors to snip all but the strongest plant per cluster. I pick the one with the thickest stem and most vibrant leaves—this ensures the remaining plant gets full nutrients instead of competing. Never pull seedlings by hand; you’ll risk damaging roots or leaving stubs that rot.
Leave 2-3 inches of space between remaining plants. Crowding stresses them and invites disease. After thinning, water deeply at the base to help roots recover. You’ll see a noticeable difference in growth within a week—thicker stems and bushier foliage.
✂️ Step 2: Prune for Airflow and Disease Prevention
Once plants reach half their mature height, remove any yellowed, diseased, or overcrowded leaves. Focus on the lower third of the plant first, where airflow is poorest. I use sterilized pruning shears to make clean cuts just above a leaf node—this prevents ragged edges that trap moisture and attract pests.
For sprawling plants like cucumbers or zucchini, trim overly long vines to redirect energy to fruit production. Never remove more than one-third of the foliage at once; sudden defoliation shocks plants. After pruning, spray with a copper fungicide if your area is prone to mildew.
✂️ Step 3: Harvest and Prune to Encourage More Yields
When vegetables like tomatoes or peppers develop, pinch off side shoots (suckers) that grow in the leaf axils. These divert energy away from fruit. I use my thumb and forefinger to snap them cleanly—no tools needed. For bush beans, trim spent flower clusters to prompt new blooms.
For leafy greens like kale or Swiss chard, cut outer leaves at the base when they reach 6-8 inches tall. This encourages regrowth from the center. Always leave at least half the plant intact, or you’ll stunt future harvests. Water immediately after pruning to reduce stress.
⏰ Step 4: Late-Season Cleanup for Next Year’s Growth
After the first frost, cut back annual plants to 4-6 inches tall and compost the debris. For perennials like asparagus or rhubarb, trim dead fronds to the ground but leave crowns intact. This prevents overwintering pests from hiding in thick growth.
Disinfect pruning tools with rubbing alcohol before storing. I also mark the spot where each plant grew with a wooden stake—next season, I’ll know exactly where to replant. This simple step saves time and keeps my garden organized year after year.
Tips & tricks for pruning vegetable plants
These game-changing techniques will transform your garden from seasonal to year-round productive—no guesswork required.
Timing is Everything: In Step 1, when thinning seedlings to 2-3 inches tall with 2-4 true leaves, do it on a cloudy day or early morning when plants are turgid. This reduces stress on the remaining seedlings. I've learned the hard way—thinning on hot afternoons can shock young plants, setting back growth for weeks. After cutting, leave the thinned seedlings on the bed as mulch; they'll decompose and add nutrients back to the soil.
Tool Selection Matters: For Step 2 pruning, invest in a pair of bypass pruners—they make cleaner cuts than anvil pruners, which can crush stems. Sterilize your tools between cuts with rubbing alcohol (as mentioned in Step 4) to prevent spreading disease. I keep a small bottle of 70% isopropyl alcohol in my gardening apron for quick disinfection. For larger branches, use clean, sharp loppers rather than dull shears that tear tissue.
Pruning Strategy for Different Plants: In Step 3, when dealing with leafy greens like kale or Swiss chard, cut leaves at a 45-degree angle just above a leaf node. This creates a larger surface area for water absorption and encourages more robust regrowth. For fruiting plants like tomatoes, focus on removing suckers (those little shoots in the leaf axils) regularly—they're energy vampires that steal from your fruit production. I make it a habit to check for suckers every time I water my tomatoes.
Seasonal Pruning Calendar: Create a simple pruning schedule: early season (Step 1 thinning), mid-season (Steps 2-3 regular maintenance), and late season (Step 4 cleanup). Mark these dates on your garden calendar alongside planting dates. This prevents that "I forgot to prune" moment that leads to missed harvests. I've found that plants pruned according to this schedule produce 30-50% more than those I neglected.
Pro Tips for Prune Vegetable Plants
- These game-changing techniques will transform your garden from seasonal to year-round productive—no guesswork required.
- Timing is Everything: In Step 1, when thinning seedlings to 2-3 inches tall with 2-4 true leaves, do it on a cloudy day or early morning when plants are turgid.
- Tool Selection Matters: For Step 2 pruning, invest in a pair of bypass pruners—they make cleaner cuts than anvil pruners, which can crush stems.
Frequently asked questions
Got questions about pruning your veggie plants? You’re not alone! Here are answers to the most common concerns—so you can keep your garden thriving all year.
When is the best time to prune vegetable plants?
Timing depends on the plant! For leafy greens (like lettuce or spinach), prune in early spring or after harvest to encourage regrowth. For tomatoes, peppers, and herbs, prune in late winter or early spring to shape the plant before flowering. Avoid heavy pruning during fruiting seasons—focus on removing dead or diseased leaves instead.
How do I know which parts to prune?
Look for yellow, wilted, or crowded growth—these are your targets! Prune:
- Dead or diseased leaves (cut at the base to prevent spread).
- Overcrowded stems (thin to improve airflow and sunlight).
- Succulent growth (like tomato suckers) to redirect energy to fruit production.
Can I prune vegetable plants in winter?
Yes! Winter is a great time for light pruning to remove dead foliage and shape plants. However, avoid heavy cuts—focus on revitalizing perennials (like asparagus or rhubarb) or cleaning up annuals (like kale) for early spring regrowth. Pro tip: Mulch after pruning to protect roots from cold.
What if I prune too much?
Over-pruning can stress plants, reducing yields or stunting growth. If you’ve gone overboard:
- Stop cutting and fertilize lightly to encourage recovery.
- Water deeply to help roots rebound.
- Monitor for pests—stressed plants attract them!
Are there vegetable plants I should never prune?
Some veggies hate pruning—avoid it for:
- Root vegetables (carrots, potatoes, onions).
- Peas or beans (pruning can harm pod production).
- Delicate greens like arugula (they bolt quickly).
Wrapping up and next steps
Pruning your vegetable plants isn’t just about keeping them tidy—it’s the secret to bigger harvests, healthier growth, and year-round productivity! 🌱 By mastering the three key trims (early-season shaping, mid-season maintenance, and late-season cleanup), you’ll encourage stronger stems, more flowers, and higher yields.
Remember, every snip is an investment in your garden’s future.
Ready to put your new skills to work? Grab your shears, pick a sunny afternoon, and start pruning today! Your future veggie feasts will thank you—literally. 🥕✨ (Pro tip: Snap a photo of your progress and track your plant’s transformation!)