
Propagation
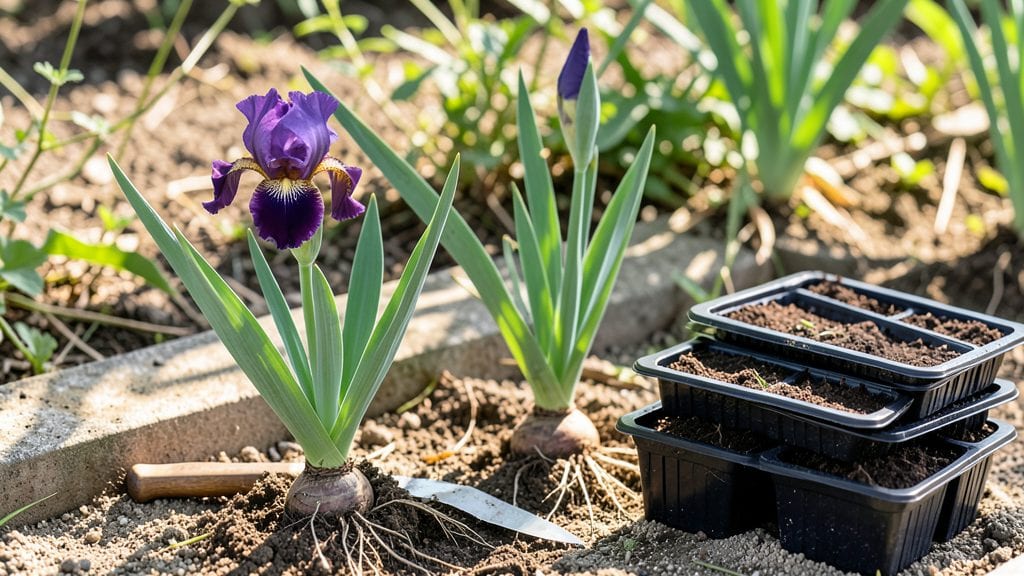
Propagating iris plants in late summer is easier than you think—and it rewards you with free clumps and showstopping blooms the following spring. 🌿 I’ve turned one into a dozen over five years, and the secret isn’t complicated—just timing, sharp tools, and knowing where to cut.
The first time I tried, I nearly sliced through the roots, but now I’ve got a foolproof system that works even for beginners.
You’ll need a clean knife or spade, a sunny spot with well-draining soil, and about 30 minutes of focused work. The key is waiting until after the foliage yellows but before the first frost—usually late August to early September in most climates.
Dig up the clump, gently separate the rhizomes (those thick, fleshy stems), and discard any that look mushy or diseased.
After replanting, water them in and watch for new growth by spring. The first blooms might be smaller, but by year two, you’ll have bold, striped flowers covering your garden. The best part? You can share these divisions with friends—everyone wins with irises.
This method works for bearded, Siberian, and even Japanese irises, though timing varies slightly by type. Just avoid transplanting in extreme heat or cold, and you’ll be golden. Let’s get those rhizomes multiplying!
📚 In This Guide
- What you need
- Instructions
- Tips and common mistakes
- Wrapping up and next steps
What you need
- ● Mature iris rhizomes: Healthy, established clumps (at least 3–5 years old) with multiple fans (leaf clusters). Aim for at least 3 fans per division for best results.
- ● Sharp garden knife or pruning shears: Sterilized to prevent disease (rubbing alcohol works great!). A clean, serrated knife is ideal for clean cuts.
- ● Gloves: Heavy-duty gardening gloves to protect hands from rhizome edges (they can be sharp!).
- ● Compost or well-draining potting mix: 1 part compost to 2 parts perlite or sand for optimal drainage. Avoid heavy clay soil.
- ● Garden fork or trowel: For lifting rhizomes gently from the ground without damaging them.
- ● Hose or watering can: With a gentle spray nozzle to rinse rhizomes post-division.
- ○ Fungicide (optional but recommended): Copper-based or neem oil solution to prevent rot during healing.
- ● Rooting hormone: A gel or powder to boost root growth on divided sections (especially useful for smaller pieces).
- ● Shade cloth: Lightweight fabric (30–50% shade) to protect newly planted divisions from intense sun for the first 2 weeks.
- ● Mulch: Straw or wood chips to retain moisture and regulate soil temperature.
- ● Labels: Waterproof plant tags to track varieties if propagating multiple types.
Step-by-Step instructions for propagating iris plants
Here's how to double your iris collection with healthy, thriving rhizomes ready for replanting.
🌱 Step 1: Choose the Right Time and Healthy Rhizomes
Timing matters most—wait until late summer or early fall after the foliage has yellowed but before the first frost. This gives new roots time to establish before winter. Select mature rhizomes with 3-4 fan-shaped leaves and at least one thick, firm growth point—these are your best candidates for propagation.
Gently dig around the plant with a spade, being careful not to damage the rhizomes. Lift them out and brush off excess soil to reveal the brown, scaly rhizome and its attached leaves. Discard any that look soft, mushy, or show signs of rot. Healthy rhizomes feel firm and slightly woody to the touch.
✂️ Step 2: Divide the Rhizomes Properly
Use a clean, sharp knife to separate the rhizome into sections, ensuring each piece has at least one fan of leaves and one growth point. The division should be made just below the growth point—this is where new roots and shoots will emerge. Avoid cutting through the center of the rhizome, as this can weaken or kill the section.
Here's the thing—never remove the leaves during division. They feed the rhizome during its first critical weeks of rooting. After dividing, let the sections dry in a shaded spot for 1-2 hours. This helps prevent rot and allows any cut surfaces to callus over slightly.
🪴 Step 3: Prepare and Plant the New Sections
Choose a well-draining planting site with full sun (at least 6 hours daily). Iris rhizomes rot easily in soggy soil, so amend heavy clay with sand or grit if needed. Dig a trench about 2 inches deep—just enough to cover the top of the rhizome without burying it completely.
Space the divided rhizomes 12-18 inches apart in rows, with the growth point facing upward. The top of the rhizome should be just barely covered with soil—this prevents rot while allowing the leaves to photosynthesize. Water lightly after planting to settle the soil, but avoid soaking the rhizomes.
☀️ Step 4: Provide Care for Establishment
Keep the newly planted rhizomes consistently moist but not soggy for the first 4-6 weeks. You'll know moisture is right when the soil feels damp 1 inch below the surface. After this period, reduce watering to once every 1-2 weeks, allowing the soil to dry slightly between waterings.
Fertilize lightly with a balanced, slow-release fertilizer in early spring, but avoid heavy feeding during the first year. You'll see new growth emerge in 4-6 weeks, and by next season, your divided iris will be established and ready to bloom. Mulch lightly with 2 inches of organic matter to retain moisture and regulate soil temperature.
⏰ Step 5: Monitor and Maintain Through the First Year
Watch for new fan leaves in spring—a sign the rhizome is rooting successfully. If leaves yellow excessively, it may indicate overwatering or poor drainage. Adjust your care by letting the soil dry more between waterings. By late summer, you should see strong, healthy foliage and possibly even a few blooms on well-established sections.
Real talk: Some divided rhizomes take a year to fully recover and bloom. Don't rush—patience pays off. If a section struggles, dig it up in late summer to check for rot or pests. Healthy rhizomes should feel firm and have white, fibrous roots developing at the base.
Tips & tricks for perfect iris propagation
These little details make all the difference between struggling iris plants and thriving new blooms.
Timing Secret: The late summer to early fall window is non-negotiable for successful iris propagation. I've learned this the hard way after trying to divide in spring—those rhizomes simply don't have enough time to establish roots before winter. Look for that perfect moment when foliage yellows but before your first frost hits. This gives your new sections the full 4-6 weeks of root development they need before dormancy.
Division Technique Tip: When dividing in Step 2, make your cuts just below the growth point—this is where all the magic happens. I used to worry about damaging the rhizome, but the key is using a clean, sharp knife and making one smooth cut rather than multiple choppy ones. Remember, each section needs at least one fan of leaves and that all-important growth point facing upward. The leaves aren't just decoration—they're feeding the rhizome during its critical rooting phase.
Planting Depth Strategy: That 2-inch deep trench in Step 3 might seem shallow, but it's perfect for iris rhizomes. Burying them too deeply suffocates them, while leaving them exposed invites rot. Think of it like planting potatoes—just enough soil to cover the top while keeping the growth point upward and the leaves exposed. After planting, give them a light watering to settle the soil, but resist the urge to soak them. Iris rhizomes hate soggy conditions.
Watering Wisdom: The 4-6 week moisture window is where most gardeners go wrong. I've seen beautiful divisions fail because of either too much or too little water. Check soil moisture by feeling 1 inch below the surface—it should be damp, not wet. After those initial weeks, let the soil dry slightly between waterings. This tough-love approach helps prevent rot while encouraging strong root development. And that 2-inch mulch layer? It's not just for looks—it helps regulate soil temperature and retain just the right amount of moisture.
Pro Tips for Propagating Iris Plants
- These little details make all the difference between struggling iris plants and thriving new blooms.
- Timing Secret: The late summer to early fall window is non-negotiable for successful iris propagation.
- Division Technique Tip: When dividing in Step 2, make your cuts just below the growth point—this is where all the magic happens.
Frequently asked questions
Got questions about propagating iris plants? You’re not alone! Here are some of the most common concerns—and their solutions—to help you grow a thriving patch of these stunning perennials.
When is the best time to divide iris plants?
The ideal time to divide iris is in early spring (just as new shoots emerge) or late summer/early fall (after blooming but before frost). Avoid dividing in winter or mid-summer heat—these extremes stress the plants and can reduce survival rates. For rhizomes (the thick, fleshy stems), aim for a 60°F–70°F (15°C–21°C) temperature range for optimal root regrowth.
How do I know if my iris rhizomes are healthy enough to divide?
Healthy iris rhizomes should be firm, plump, and free of soft spots or mold. Look for rhizomes that are at least 2–3 inches long with fan-shaped leaves (the "fans") still attached. Discard any that are shriveled, mushy, or infested with iris borers—these won’t propagate well and may spread disease. A quick sniff test helps too: rotten or foul-smelling rhizomes are a no-go!
Can I propagate iris from seed instead of division?
Yes, but it takes 3–5 years for seed-grown iris to bloom—far longer than division! If you’re patient, collect seeds from spent blooms (they’re the small, papery pods) and sow them in a well-draining mix at 60°F (15°C). Keep them moist but not soggy, and expect hybrid vigor to diminish over generations. For faster results, stick with division or tissue culture for rare varieties.
What’s the best way to care for iris divisions after planting?
After dividing, water lightly for the first 2 weeks to encourage root growth, then taper off to moderate watering (1 inch/2.5 cm per week). Avoid overwatering—iris rhizomes rot easily! Mulch lightly with gravel or coarse sand (not organic mulch) to improve drainage. In the first year, skip fertilizing; let the plant focus on root establishment. By year two, you’ll see bold new fans and blooms!
Why aren’t my iris divisions blooming after a year?
Don’t worry—it’s normal for divisions to skip blooming for 1–2 years while they rebuild energy. Focus on healthy foliage growth (3–4 strong fans per rhizome). If divisions aren’t growing at all, check for:
- Poor drainage (soggy soil = root rot)
- Too much shade (iris needs 6+ hours of sun)
- Nutrient deficiency (add a balanced fertilizer in early spring)
- Pests (iris borers or slugs)
Wrapping up and next steps
Propagating iris plants is a rewarding way to expand your garden’s beauty with minimal effort—and now you’ve got all the tools to succeed! 🌱 Whether you’re dividing rhizomes, replanting offsets, or troubleshooting common challenges, each step brings you closer to a vibrant display of bold, striped blooms. Start small, stay patient, and soon you’ll be sharing your thriving irises with neighbors (or admiring your own lush patches!).
Ready to dive in? Pick a sunny spot, grab your gloves, and begin your iris propagation journey today!