
Propagation
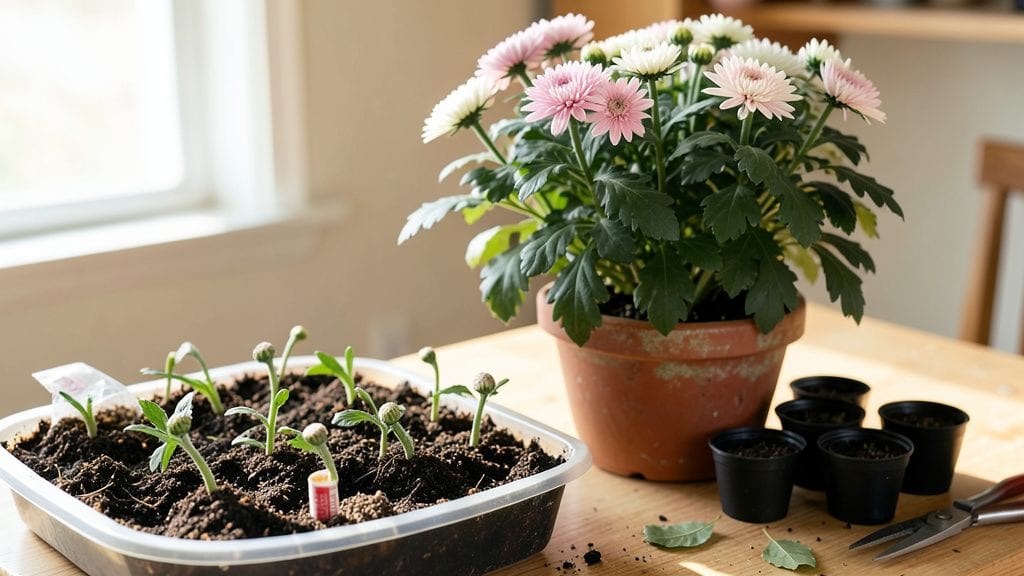
Propagating chrysanthemums through layering turns a single plant into three thriving bushes in just four weeks—no greenhouse required. 🌿 I’ve used this method for years to multiply my fall-blooming favorites, and the secret lies in encouraging roots to form while the stem is still attached.
The best time to start is in early summer when temperatures are warm but not scorching, giving new roots plenty of time to establish before winter.
You’ll need sharp pruning shears, rooting hormone (optional but helpful), and a container of moist potting mix. Choose a healthy stem with at least three leaves, making a small cut just above a leaf node.
Bend the stem down into the soil, securing it with a small rock or stake if needed. Keep the soil consistently moist—this is where most beginners fail, as too much water can rot the stem while too little stunts root growth.
Within three weeks, you’ll spot tiny roots forming at the cut site. Once they’re about an inch long, gently sever the layered stem from the mother plant and transplant it into its own pot.
These new plants will bloom just like their parent, often producing even more abundant flowers if given the right care. The key is patience—rushing the process leads to weak, leggy stems that struggle to establish.
This method works for both garden chrysanthemums and container varieties, making it perfect for expanding your collection without breaking the bank. Layering also reduces transplant shock, so you’ll see faster growth and stronger plants compared to traditional cuttings.
For best results, repeat the process in late summer for a second batch of rooted stems before the first frost.
📚 In This Guide
- What you need
- Instructions
- Tips and common mistakes
- Wrapping up and next steps
What you need
- ● Healthy chrysanthemum plant(s) – Choose mature stems with at least 3-4 leaves and no signs of disease.
- ● Sharp pruning shears or clean scissors – Sterilize with rubbing alcohol to prevent infection.
- ○ Rooting hormone (optional but recommended) – A gel or powder to boost root growth (e.g., Clonex or Rootone).
- ● Plastic or metal plant ties/clips – To secure the stem to the soil (e.g., zip ties or bent wire).
- ● Well-draining potting mix – A blend of peat moss, perlite, and sand (or store-bought cactus/succulent mix).
- ● Small pots or trays (3-4 inches deep) – One per stem you’re layering (or reuse containers).
- ● Misting bottle or spray nozzle – To keep the soil and stem moist without overwatering.
- ○ Clear plastic bag or humidity dome (optional) – Creates a mini greenhouse to retain moisture.
- ● Warm, indirect sunlight – Ideal temp range: 65–75°F (18–24°C).
- ● Humidity control – Aim for 50–70% humidity (use a humidity tray if needed).
- ● Patience! – Roots typically form in 4–6 weeks with consistent care.
Step-by-Step instructions for propagating chrysanthemums using layering
This method guarantees strong, established plants in just 4 weeks—no fancy tools needed!
🌿 Step 1: Select and Prepare a Healthy Stem
Choose a non-flowering stem that’s 4-6 inches long with at least 3-4 leaves and 2-3 nodes (those little bumps where leaves meet the stem). Use sharp scissors to make a clean diagonal cut just below a leaf node—this prevents tearing and encourages faster rooting.
Here’s the thing—thick, woody stems root slower. If yours feels stiff, grab a younger, more flexible one. Bend it gently to test. You’ll know it’s right when it bends slightly without snapping. This flexibility means it’s ready to form roots.
💧 Step 2: Create the Layer and Encourage Root Growth
Make a small slit (about ½ inch long) in the stem just above a leaf node using a sterilized knife. This tiny wound triggers root formation. Next, gently bend the stem downward until the slit touches the soil—no deeper than 1 inch. Secure it with a U-shaped bent wire or a small rock to keep it in place.
Keep the soil moist but not soggy—chrysanthemums hate wet feet. Mist the area lightly every 2-3 days until you see tiny white roots peeking through the slit (usually 2-3 weeks). Real talk: if the soil dries out, the stem will shrivel before roots form.
☀️ Step 3: Maintain Ideal Conditions for Root Development
Place your layered chrysanthemum in bright, indirect light—think east-facing window or 4-6 inches under a grow light. Too much direct sun will dry out the stem before roots establish. You’ll know it’s happy when the existing leaves stay vibrant green and firm to touch. Yellowing or wilting means it’s stressed.
Water at the base only, avoiding the stem. Use a spray bottle for the top inch of soil to keep humidity high without drowning the roots. In 4 weeks, gently tug on the stem—if it resists, roots have formed! If it pulls free, wait another week and check again.
✂️ Step 4: Sever and Plant the New Chrysanthemum
Once roots are 1-2 inches long, use sterilized pruners to cut the stem just below the new roots. This ensures your new plant has enough energy to thrive on its own. Remove any lower leaves that might touch the soil—they’ll rot before roots can establish.
Plant the rooted cutting in well-draining soil and water deeply. Keep it in partial shade for a week to reduce transplant shock. You’ll see new growth within 2 weeks—that’s your sign it’s thriving! Here’s the best part: these layered plants bloom faster than those grown from cuttings or seeds.
Tips & tricks for perfect chrysanthemum layering
Ready to turn your chrysanthemum propagation into a foolproof success? These game-changing tips will help you avoid common pitfalls and get those roots growing like crazy!
Stem Selection is Everything: In Step 1, don't just grab any stem—look for ones that are flexible but not brittle. Bend it gently: if it snaps easily, it's too old. If it barely bends, it's too young. The perfect stem should bend slightly without breaking. This flexibility indicates active growth, which means faster root development. Confession: I skipped this check for years and wondered why my roots took so long!
The Slit Technique Matters: When making that ½-inch slit in Step 2, don't cut too deep or too shallow. Too shallow and you won't trigger root formation. Too deep and you'll damage the stem's ability to transport water. Hold the knife at a 45-degree angle and cut just through the outer layer. Think of it like making a tiny window for roots to peek through—this is what creates the perfect environment for root growth.
Lighting is Non-Negotiable: Step 3 mentions bright, indirect light, but here's what nobody tells you—chrysanthemums actually prefer morning sun and afternoon shade. If you only have one window choice, east-facing is ideal. Too much direct sun will scorch the leaves before roots even form. I learned this the hard way after my first batch turned crispy before developing roots!
Root Check Hack: When testing for roots in Step 3, don't just tug once. Gently twist the stem slightly while pulling—this gives you a better feel for root resistance. If it feels like pulling a carrot from the ground (with some give), roots are forming. If it comes out clean, give it another week. This method has saved me from prematurely severing stems that just needed more time.
Pro Tips for Propagating Chrysanthemum Plants
- Ready to turn your chrysanthemum propagation into a foolproof success?
- Stem Selection is Everything: In Step 1, don't just grab any stem—look for ones that are flexible but not brittle.
- The Slit Technique Matters: When making that ½-inch slit in Step 2, don't cut too deep or too shallow.
Frequently asked questions
Got questions about propagating chrysanthemums? You’re not alone! Here are answers to the most common concerns—from timing to troubleshooting—to help you grow thriving new plants with ease.
When is the best time to propagate chrysanthemums?
The ideal time is late spring to early summer (May–June in most climates). This gives young plants enough time to establish roots before winter. Avoid propagating in extreme heat or cold—aim for 60–75°F (15–24°C) for best success.
How long does it take for chrysanthemum cuttings to root?
With the layering method, you’ll see roots forming in 3–4 weeks under optimal conditions. Patience is key—keep the soil moist and the cutting shaded until you spot new growth. Pro tip: Gently tug the stem after 3 weeks to check for resistance (a sign roots are forming!).
What if my chrysanthemum cuttings rot or wilt?
Wilting or rot usually means overwatering or poor drainage. Let the soil dry slightly between waterings and ensure the cutting site stays moist but not soggy. If you spot black, mushy stems, trim the affected part and replant in fresh, dry soil. Airflow helps too—avoid overcrowding cuttings.
Can I propagate chrysanthemums from store-bought flowers?
Yes! Many grocery-store mums are sterile hybrids, but you can still try. Snip a healthy stem with leaves, strip the lower foliage, and follow the layering steps. Success isn’t guaranteed—these plants are bred for blooms, not propagation—but it’s worth a shot for free plants!
How do I keep my new chrysanthemum plants alive after rooting?
Once rooted, transplant your cuttings to individual pots with well-draining soil and keep them in bright, indirect light for 2–3 weeks. Water when the top inch of soil feels dry, and fertilize lightly with a balanced 10-10-10 mix after 4 weeks. Pro tip: Pinch back the tips to encourage bushier growth!
Wrapping up and next steps
Propagating chrysanthemums using the layering method is a rewarding way to expand your garden with minimal effort! 🌱 By following these steps, you’ll encourage strong root growth in just four weeks, giving you healthy, self-sufficient plants ready for transplanting.
Whether you’re a beginner or a seasoned gardener, this technique is a game-changer—so grab your tools, get your hands dirty, and watch your chrysanthemums thrive!
Ready to take the next step? Pick a sunny spot in your garden and start layering today—your blooming future begins now! 🌸