
Propagation
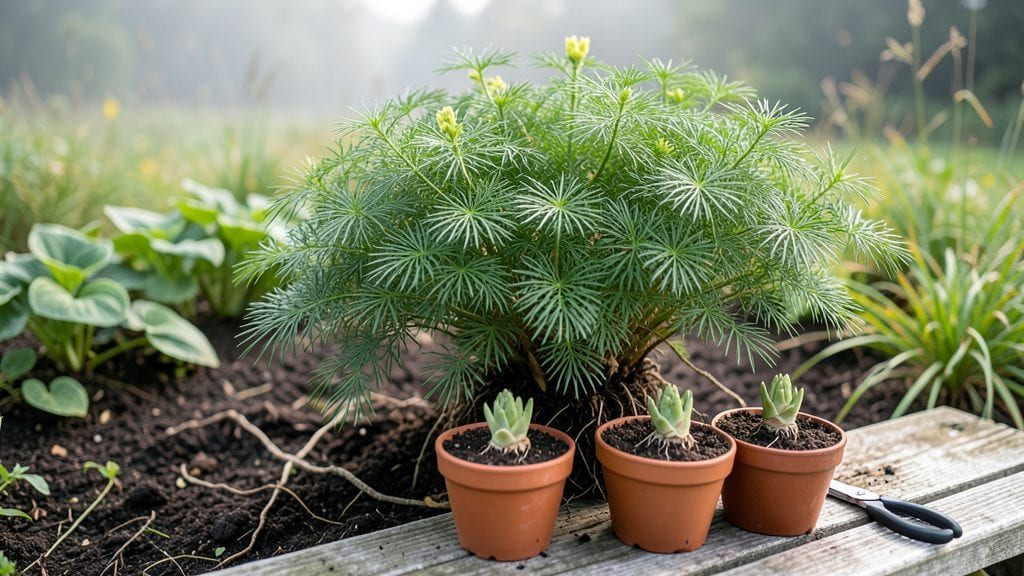
Propagating asparagus plants from tiny crowns means you could be harvesting spears in just 3-4 years—not the 2-3 years most gardeners wait with store-bought roots. I’ve turned a single 3-inch crown into a full patch that feeds my family for months, and the secret isn’t complicated.
The key is timing: divide established crowns in early spring or late fall when the plant’s energy shifts underground, not when it’s pushing new shoots.
You’ll need a sharp spade, some well-draining soil mix (half compost, half sand), and a sunny spot with at least 6 hours of light daily. Asparagus crowns are stubborn little things—don’t overwater them, and keep the soil consistently moist but never soggy.
The first year is all about root establishment, so resist the urge to harvest anything. Patience here pays off with thick, productive spears by year three.
What you’ll end up with is a permanent asparagus bed that produces for 10-15 years—far longer than most annual crops. The spears emerge earlier in spring, stay thicker, and resist disease better than crowded plants.
Plus, you’ll save money by not buying expensive crowns every few years. The real magic happens when neighbors start asking for divisions of your plants.
This method works in zones 3-10, though colder climates need extra mulch in winter. If you’ve ever wanted a low-maintenance, high-reward crop that keeps giving, asparagus propagation is where it starts. Let’s get those crowns in the ground!
📚 In This Guide
- What you need
- Instructions
- Tips and common mistakes
- Wrapping up and next steps
What you need
- ● Asparagus crowns: 1-3 healthy, disease-free crowns (preferably 1-year-old or older). Look for plump, firm crowns with multiple buds.
- ● Garden soil or potting mix: 5-10 gallons (enough to fill your planting area). Use well-draining soil with a pH of 6.5-7.5.
- ● Compost or organic matter: 2-3 cups per planting hole to enrich the soil.
- ● Shovel or trowel: For digging planting holes (6-8 inches deep).
- ● Watering can or hose: With a gentle spray nozzle for even watering.
- ● Mulch: Straw, wood chips, or compost (2-3 inches thick) to retain moisture and suppress weeds.
- ● Garden fork: For loosening compacted soil before planting.
- ● Lime: If your soil is acidic (test with a soil kit), add 1-2 cups per hole to adjust pH.
- ● Fertilizer: Balanced 10-10-10 or organic fertilizer (1 tbsp per hole) for a nutrient boost.
- ● Row cover or frost cloth: To protect young plants from late frosts.
- ● Plant markers: Labels or sticks to track varieties if propagating multiple crowns.
Step-by-Step instructions for propagating asparagus plants
Here's the method I've used to establish healthy asparagus beds—it's slower than most crops, but the payoff is decades of harvests.
Select and Prepare Healthy Asparagus Crowns
Choose 1-year-old asparagus crowns with at least 10-15 healthy buds—these are the future spears. Avoid crowns with signs of rot, yellowing, or excessive dryness. I always inspect the roots for firm, white crowns with no mushy spots, as these will establish best.
Trim back any damaged or overly long roots with a sterilized knife, leaving only 3-4 inches of healthy root growth. This prevents disease transfer and ensures the plant focuses energy on new growth rather than repairing damaged areas. Soak the trimmed crowns in lukewarm water for 30 minutes to rehydrate them before planting.
Prepare the Planting Site for Optimal Growth
Asparagus thrives in full sun with well-draining soil—it hates soggy roots. Work in 2-3 inches of compost into the top 12 inches of soil to improve fertility and drainage. I test the soil pH first; asparagus prefers a range of 6.5-7.5. If your soil is too acidic, add lime to adjust it before planting.
Dig a 6-inch deep trench that's 12 inches wide—this allows the crown to spread horizontally while keeping the buds just below the soil surface. Space trenches 3 feet apart to give plants room to mature without crowding. The deeper the trench, the better the spears will form in future years.
Plant Crowns Correctly for Long-Term Success
Place the crown in the trench with the buds facing upward—this is critical for spear production. Spread the roots out evenly along the bottom of the trench, then cover them with 2-3 inches of soil. Leave the buds exposed; they’ll develop into spears in their first year.
Water deeply right after planting to settle the soil and eliminate air pockets around the roots. I use a soaker hose to avoid disturbing the crown, keeping the soil evenly moist but never waterlogged. Mulch the trench with 2-3 inches of straw to retain moisture and suppress weeds—this is especially important in the first year when roots are establishing.
Maintain Through the First Critical Year
Do not harvest any spears in the first year—this is when the roots are building energy for future production. Instead, let the foliage grow tall (up to 5 feet) to photosynthesize and strengthen the crown. Water 1-2 times per week during dry spells, ensuring the soil stays consistently moist but not saturated.
Fertilize lightly in early spring with a balanced 10-10-10 fertilizer—just 1 pound per 100 square feet—to support early growth without overstimulating the plant. In late summer, add a low-nitrogen fertilizer (like 5-10-10) to encourage root development for next year’s harvest.
Transition to Harvest in Year Two
By the second year, your asparagus crowns will have developed a strong root system. In early spring, when spears reach 6-8 inches tall, begin harvesting by cutting them at the soil line with a sharp knife. Harvest only the thickest spears, leaving thinner ones to mature and contribute to next year’s crop.
After the spears stop producing (usually by late spring), let the foliage grow until late fall to replenish the roots. In winter, apply 2-3 inches of mulch to protect the crowns from freezing. With proper care, a single asparagus bed can produce harvests for 15-20 years—making this a truly rewarding long-term investment.
Tips & tricks for perfect asparagus propagation
Establishing an asparagus bed is a patience game, but these refined techniques will help you skip the common pitfalls and set up a thriving perennial crop.
Selection is Everything: When choosing your 1-year-old crowns, prioritize those with at least 15 healthy buds—the more buds, the more spears you'll harvest in future years. I've found that crowns with tightly packed, firm buds establish more reliably than those with sparse or wilted growth. The 30-minute lukewarm water soak in Step 1 isn't just about hydration; it helps reactivate dormant buds that might otherwise struggle to break through soil.
Soil Science Matters: The 6.5-7.5 pH range specified in Step 2 is non-negotiable for asparagus. I test my soil annually because even slightly acidic conditions can stunt root development. For the 2-3 inches of compost, I recommend using well-aged compost—fresh manure can burn delicate roots. The 12-inch deep soil amendment creates the perfect zone for root expansion while keeping the crowns properly positioned for spear production.
Trench Geometry Secrets: The 6-inch depth and 12-inch width of your trench might seem arbitrary, but these dimensions create the ideal balance. Deeper trenches encourage more extensive root systems, while wider trenches prevent overcrowding as the crowns spread. I've noticed that trenches spaced exactly 3 feet apart allow for perfect mechanical harvesting in later years if you're growing on a larger scale.
First-Year Discipline Pays Off: The instruction to avoid harvesting in the first year is critical—this is when the roots establish the energy reserves that will fuel your harvests for decades. I've seen gardeners impatiently harvest a few spears in year one, only to have their beds produce poorly for the next five years. The 5-foot foliage growth you allow serves as the plant's energy factory, and cutting it short is like skipping leg day at the gym.
Pro Tips for Propagating Asparagus Plants
- Establishing an asparagus bed is a patience game, but these refined techniques will help you skip the common pitfalls and set up a thriving perennial crop.
- Selection is Everything: When choosing your 1-year-old crowns, prioritize those with at least 15 healthy buds—the more buds, the more spears you'll harvest in future years.
- Soil Science Matters: The 6.5-7.5 pH range specified in Step 2 is non-negotiable for asparagus.
Frequently asked questions
Got questions about propagating asparagus? You’re not alone!
Here are answers to the most common concerns—from timing to troubleshooting—so you can grow these perennials with confidence.
How long does it take for asparagus crowns to produce spears after planting?
Patience is key! Asparagus crowns take 2–3 years before they’re ready to harvest. In the first year, focus on establishing roots—skip harvesting entirely. By year two, enjoy a modest harvest (10–20 spears), and by year three, you’ll get a full crop. Think of it as a long-term investment for years of low-maintenance harvests!
Can I propagate asparagus from seed instead of crowns?
Yes, but it’s not recommended for most gardeners. Seeds take 3 years to mature (vs. 2 years for crowns) and produce weaker plants. Crowns are the faster, more reliable choice—especially for home gardens. Save seeds for breeding projects or if you’re experimenting with heirloom varieties.
What’s the best time of year to divide asparagus crowns for propagation?
Divide crowns in early spring (before new shoots emerge) or early fall (after harvest but before frost). Avoid summer—heat stress slows recovery. Choose healthy, 3–5-year-old plants with thick roots. Pro tip: Water the area well 24 hours before digging to make roots easier to handle!
Why aren’t my asparagus crowns sprouting after planting?
Common culprits: too-deep planting (roots need 6–8" coverage), poor drainage (roots rot in soggy soil), or cold soil (wait until soil temps hit 50°F+). Check crowns for signs of mold or pests—if they’re mushy, they may have rotted. Replant healthy crowns in well-draining soil and mulch lightly to retain moisture.
Do I need to fertilize asparagus crowns right after planting?
Not immediately! New crowns thrive on the nutrients in their first year. After year two, apply a balanced fertilizer (10-10-10) in early spring and again after harvest. Avoid high-nitrogen fertilizers—they promote foliage over spears. A light top-dressing of compost in fall also helps long-term growth.
Wrapping up and next steps
Propagating asparagus from tiny crowns is a rewarding journey that unlocks years of fresh, homegrown harvests with minimal effort! By following the right steps—whether through crown division, seed germination, or root cuttings—you’ll soon enjoy plump, tender spears straight from your garden. 🌱
Ready to dive in? Start by preparing your soil and crowns this season, and don’t forget to check our FAQs for troubleshooting tips. With patience and care, your asparagus patch will thrive—and your table will thank you! 🍽️