
Propagation
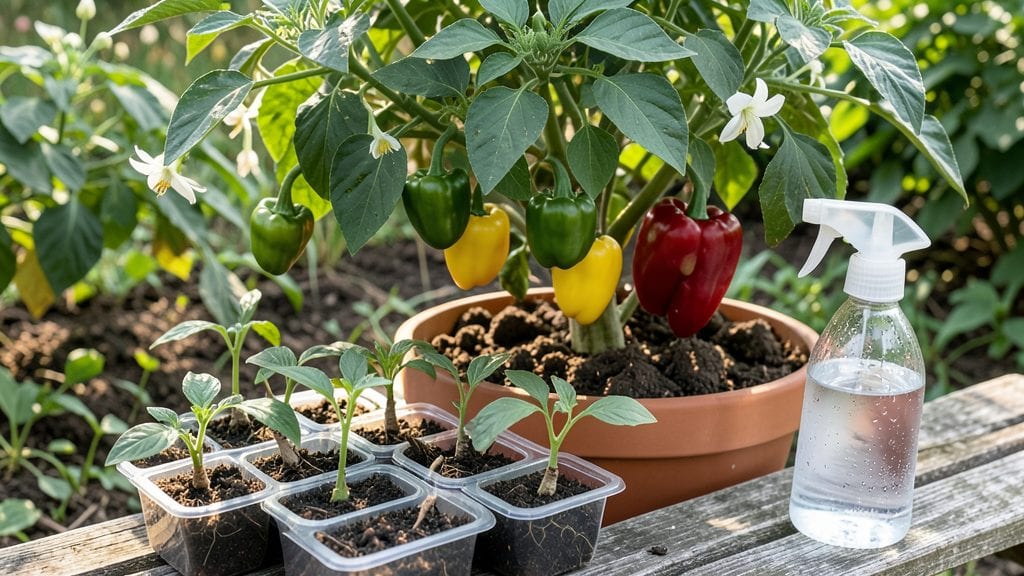
Propagating pepper plants from cuttings can shave three weeks off rooting time—here’s the humidity-dome trick that works every time. 🌱 I tried the usual water-in-a-glass method and lost half my cuttings to rot before realizing humidity control was the missing piece.
The right setup mimics a jungle environment where peppers thrive naturally.
You’ll need just five supplies: clean pruners, clear plastic domes (or even plastic bags), a well-draining mix of perlite and peat, rooting hormone (optional but helpful), and a warm spot with bright, indirect light.
The dome creates a greenhouse effect that keeps humidity high—exactly what pepper cuttings crave to develop roots quickly. Most gardeners overlook this step, which is why so many struggle with slow or failed propagation.
Within 10-14 days, you’ll see tiny white roots forming at the cut ends—proof the trick works. These rooted cuttings transplant like pros, giving you stronger plants that fruit earlier than store-bought seedlings.
The best part? You can reuse the domes for future cuttings, making this a low-cost, high-reward technique that pays off season after season.
Works for all pepper varieties—jalapeños, bell peppers, even heirlooms—and adapts to containers or backyard beds. Once you master this, you’ll never buy pepper plants again. Ready to turn stems into thriving plants faster than ever?
📚 In This Guide
- What you need
- Instructions
- Tips and common mistakes
- Wrapping up and next steps
What you need
- ● Pepper plant cuttings: Healthy, 4–6-inch stems with at least 2–3 leaves (take from non-flowering parts of the plant). Quantity: 1–10, depending on your goal!
- ● Rooting hormone: A gel or powder (like Clonex or Dip ‘N Grow) to boost root development. Quantity: Small jar or packet.
- ● Clear plastic dome or container: A humidity tent (e.g., a 1-gallon plastic container with the lid, a clear plastic bag, or a propagator dome). Size: Large enough to fit your cuttings with room to spare.
- ● Well-draining potting mix: A sterile, seed-starting mix (avoid garden soil—it’s too dense!). Quantity: Enough to fill your container 2–3 inches deep.
- ● Small pots or trays: 2–4 inch pots or a seed tray with drainage holes. Quantity: One per cutting (or share a tray if using a humidity dome).
- ● Spray bottle: With water (preferably room-temperature, distilled, or rainwater) to mist cuttings. Size: 8–16 oz.
- ● Scissors or pruners: Sharp and sterilized (rubbing alcohol wipe) to avoid disease. Type: Bypass pruners or clean scissors.
- ○ Heat mat (optional but helpful): Set to 70–75°F to speed up rooting. Size: Fits under your humidity dome.
- ○ Fogging system (optional): A small aquarium pump + spray nozzle for consistent humidity (90%+ ideal!).
- ● Plastic wrap or zip-top bags (alternative): If no dome is available, use a clear bag with holes for DIY humidity.
- ● Label markers & tags: To track pepper varieties (especially useful if propagating multiple types!).
- ○ Grow lights (optional): If natural light is LED grow bulb 6–12 inches above cuttings.
Step-by-Step instructions for propagating pepper plants with a humidity dome
Here’s how to coax strong roots from pepper cuttings in just 2-3 weeks—no fancy tools required.
🌱 Step 1: Select Healthy Cuttings and Prep Them Properly
Choose non-flowering stems from your mature pepper plants, cutting just below a leaf node with sharp scissors. The stem should be about 4-6 inches long—long enough to root but short enough to handle easily. Remove the lower leaves (about 1 inch from the base) to prevent rot while leaving the top leaves intact for photosynthesis.
Dip the cut end in rooting hormone (optional but speeds things up). I like to tap the cutting gently to remove excess moisture—too much hormone can gunk up the mix. This is also your chance to inspect the stem: if it’s woody or dried out, grab a fresh cutting.
💧 Step 2: Set Up the Humidity Dome for Faster Root Growth
Fill a small container (like a 4-inch pot) with moistened perlite or vermiculite—these materials drain well while holding enough moisture for root development. Stick your prepared cutting about 1-2 inches deep into the mix, firming the medium gently around it. The goal is snug but not compacted; roots need air too.
Place the container inside a clear plastic bag or under a glass cloche to create a humidity dome. This traps moisture at 70-80% humidity, which pepper cuttings crave. Poke a few small holes in the bag if using one—you want airflow to prevent mold, but enough trapped moisture to keep the cutting happy. Mist the inside lightly with water to raise humidity further.
☀️ Step 3: Position for Indirect Light and Monitor Closely
Set your humidity dome in a spot with bright, indirect light—think east-facing window or under grow lights 6-12 inches away. Direct sun will bake the cutting, while too little light slows root growth. You’ll know it’s getting enough light when the leaves stay vibrant green and don’t yellow.
Check the cuttings every 3-4 days. Mist the inside of the dome if the leaves look limp or the medium dries out. Roots typically form in 2-3 weeks, but if you see condensation dripping inside the dome, it’s too humid—remove the cutting, let it dry for a day, and restart with fresh perlite.
✂️ Step 4: Test for Roots and Transition to Soil
Gently tug on the cutting after 2 weeks. If you feel slight resistance (but not a firm grip), roots are forming. For a definitive check, slide the cutting out and inspect the base—you’ll see tiny white roots if successful. If not, give it another week before testing again.
Once rooted, gradually acclimate the cutting to open air by removing the dome for 1-2 hours daily, increasing time over 5-7 days. After a week outside the dome, transplant into 4-inch pots with regular potting mix. Water lightly at first—overwatering now can drown those delicate new roots.
Tips & tricks for propagating pepper plants with a humidity dome
These game-changing insights will help you turn those 2-3 week propagation windows into foolproof success stories.
Cutting Selection Secret: Look for stems that are about pencil-thick with a slight bend—these are young enough to root but mature enough to handle the process. Avoid stems with flowers or buds, as they'll drain energy from root development. In Step 1, when removing the lower leaves, leave at least one set of leaves above the soil line to maintain photosynthesis while preventing rot. I've found that morning-harvested cuttings often root faster since they've had overnight hydration.
Medium Matters: While perlite or vermiculite work perfectly, you can also create your own rooting mix using equal parts coconut coir and perlite for better moisture retention. In Step 2, when planting your cuttings, press the medium firmly around the stem to eliminate air pockets—this creates better contact between roots and medium. A pro trick: lightly water the medium before inserting cuttings to prevent shock from sudden moisture changes.
Lighting Strategy: The bright, indirect light requirement in Step 3 is crucial—pepper cuttings need light for photosynthesis but can't handle direct sun that would scorch them. If you're using artificial lights, LED grow lights are ideal as they produce less heat. I place my setups under lights for 14-16 hours daily, mimicking natural daylight. Watch for leaf yellowing as a sign of insufficient light or overwatering.
Humidity Management: The 70-80% humidity target in Step 2 is your sweet spot—too high leads to mold, too low causes wilting. I've found that placing a small tray of water near the dome helps maintain humidity without over-saturating the air. If you notice condensation dripping inside the dome (a sign of excess humidity), remove the cutting, let it dry for 24 hours, and restart with fresh medium. This happens most often in humid climates or when using sealed containers.
Pro Tips for Propagate Pepper Plants
- These game-changing insights will help you turn those 2-3 week propagation windows into foolproof success stories.
- Cutting Selection Secret: Look for stems that are about pencil-thick with a slight bend—these are young enough to root but mature enough to handle the process.
- Medium Matters: While perlite or vermiculite work perfectly, you can also create your own rooting mix using equal parts coconut coir and perlite for better moisture retention.
Frequently asked questions
Got questions about propagating pepper plants? You’re not alone—growing peppers from cuttings can feel tricky at first! Here are answers to the most common queries to help you succeed with your humidity-dome setup.
How long does it take for pepper cuttings to root in a humidity dome?
With a humidity dome, pepper cuttings typically root in 2–4 weeks, depending on the variety, temperature (ideal: 75–85°F), and moisture levels. Check for roots by gently tugging the cutting—resistance means success! Avoid lifting too soon, or you’ll risk damaging tender growth.
Can I reuse the humidity dome for multiple batches of pepper cuttings?
Yes! Clean and disinfect the dome with a 10% bleach solution between uses to prevent mold or bacterial infections. Let it dry completely before reuse. For extra safety, swap out the water in the dome’s base to avoid stale buildup that can hinder rooting.
What’s the best temperature for rooting pepper cuttings in a humidity dome?
Peppers thrive in warmth: aim for 75–85°F during the day and no lower than 65°F at night. Use a seedling heat mat if your space dips below these temps. Avoid drafts—consistent warmth speeds up rooting and prevents shock.
My pepper cuttings are turning yellow or mushy—what’s wrong?
Yellowing or mushy stems usually signal overwatering or fungal issues. Reduce humidity slightly, ensure the dome isn’t foggy, and improve airflow by lifting the lid for 10–15 minutes daily. If mold appears, discard affected cuttings and disinfect the dome with hydrogen peroxide (3%).
Can I propagate peppers from store-bought plants instead of seeds?
Snip healthy stems (4–6 inches long) from store-bought peppers, ensuring each has 2–3 leaves and a node (where roots sprout). Remove flowers/fruit to redirect energy to root growth. Just avoid hybrid F1 varieties—they may not produce true-to-type peppers.
Pro Tip:
For stubborn varieties like jalapeños or habaneros, add a rooting hormone (like Clonex) to cuttings before planting. It boosts success rates by 30–50%! Pair this with your humidity dome for even faster results.
Wrapping up and next steps
Propagating pepper plants with a humidity dome is a game-changer—it speeds up root growth, boosts survival rates, and gives your seedlings a head start! 🌱 With the right setup and patience, you’ll soon be harvesting vibrant peppers straight from your own plants.
Now that you’re armed with the humidity-dome trick, it’s time to put your green thumb to work.
Ready to level up your garden? Start by gathering your supplies, follow the steps with confidence, and soon you’ll be watching those roots flourish like never before. Happy growing! 🌿