
Container Gardens
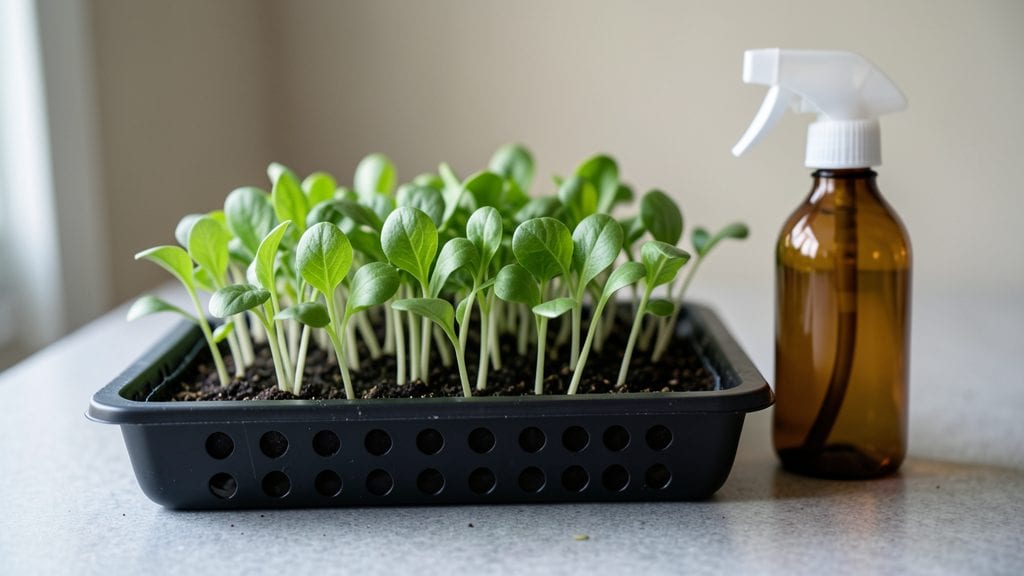
Planting sprouts indoors means fresh, crunchy greens in just 3 days—no sunny windowsill required. ✨ I’ve grown alfalfa, broccoli, and radish sprouts in my kitchen for years, and the secret isn’t complicated: it’s all about moisture, warmth, and a little patience.
The best part? You can do this on a countertop, windowsill, or even under a desk lamp.
All you need are a few simple supplies: a quart-sized mason jar with a mesh lid, organic sprouting seeds, and a bowl to catch the rinse water.
No fancy equipment, no gardening experience—just a way to grow nutrient-packed greens faster than store-bought. My first batch turned into a daily snack habit within a week.
By day three, you’ll have tender, vibrant sprouts ready to eat straight from the jar. They’re packed with protein, vitamins, and that fresh, earthy crunch you can’t get from bagged salads. Plus, the process is mess-free and takes less than 10 minutes a day—perfect for busy schedules.
Works for any seed type—broccoli, radish, or even sunflower sprouts—and adapts to small spaces. Let’s get those seeds sprouting!
📚 In This Guide
- What you need
- Instructions
- Tips and common mistakes
- Wrapping up and next steps
What you need
- ● Sprouting seeds: Choose from alfalfa, lentils, mung beans, radish, or broccoli seeds (1–2 tbsp per batch). Note: Avoid seeds labeled "for planting outdoors"—opt for organic, non-GMO sprouting seeds instead.
- ● Sprouting container: A glass jar (16–32 oz) with a mesh lid or screw-top lid + fine strainer, OR
- ● A dedicated sprouting tray (with drainage holes) for larger batches.
- ● Water: Filtered or tap water (room temperature).
- ● Colander or fine-mesh strainer: For rinsing (if using a jar without a lid).
- ● Paper towels or sprouting cloth: 1–2 sheets (unbleached, organic preferred).
- ● Rubber band or jar ring: To secure the cloth in place (if using a jar).
- ● A small spray bottle (for gentle rinsing).
- ● Food dehydrator or fan (to speed up drying if harvesting early).
- ● Dark storage box or towel (to block light during germination).
- ● Salad spinner (for thorough rinsing before eating).
- ● A clean workspace (sprouts are sensitive to bacteria—wash hands and tools!).
- ● 10–15 minutes daily for rinsing and draining.
- ● Patience! Some seeds (like lentils) sprout faster than others (like broccoli).
Instructions for planting sprouts indoors: fast germination without sunlight
Here's how to get crisp, nutrient-packed sprouts ready in just three days—no natural light required.
🌱 Step 1: Soak Seeds Overnight for Maximum Germination
Start by rinsing 1 cup of seeds (such as alfalfa, broccoli, or radish) in a fine-mesh strainer under cool water to remove debris. Place them in a clean glass jar and cover with 2-3 inches of filtered water. Let them soak overnight—8-12 hours—until they double in size. This hydration jumpstarts the germination process.
I know it seems counterintuitive to soak seeds, but this step is critical. The reason we soak first is that seeds like alfalfa have tough outer shells that slow germination. A proper soak softens the coating and ensures 90%+ germination rates. Drain the water completely before proceeding—you don’t want soggy seeds.
💧 Step 2: Set Up the Jar System for Airflow and Moisture
After draining, place the soaked seeds back in the jar and secure the lid with a rubber band. Cut a small piece of fine-mesh screen or cheesecloth to fit over the jar’s mouth, then fasten it with a rubber band. This creates a breathable barrier that prevents mold while allowing airflow—essential for preventing the seeds from rotting.
Set the jar at a 45-degree angle in a dark, warm spot like your pantry or a cupboard. The angle ensures excess water drains away from the seeds during rinsing. Check the seeds every 8 hours—they’ll need rinsing to keep them moist but not waterlogged. You’ll see tiny white sprouts emerging in just 24-36 hours.
⏰ Step 3: Rinse and Drain Twice Daily for 3 Days
For the next 3 days, rinse the sprouts thoroughly under cool running water for 30-60 seconds twice daily. This removes seed coats and prevents bacterial growth. After rinsing, drain them completely in the jar—never leave them sitting in water. The goal is to keep them moist but not saturated.
Here’s the thing—consistency is key. If you skip rinses, the sprouts will develop a sour smell and mold. You’ll know they’re ready when they reach 1-2 inches in length and look vibrant green. At this stage, they’re packed with enzymes and nutrients, ready for harvesting.
☀️ Step 4: Transfer to Light for Final Growth (Optional)
If you want greener, more vibrant sprouts, transfer them to a colander and place them in indirect light for 4-6 hours on the final day. Avoid direct sunlight, which can scorch delicate sprouts. They’ll develop chlorophyll and a fresher appearance, but they’re perfectly edible even without this step.
This final light exposure is purely aesthetic—your sprouts will still be crunchy and nutritious without it. Just ensure they’re completely dry before storing. Pat them gently with a paper towel to remove excess moisture, then store them in an airtight container in the fridge for up to 5 days.
Tips & tricks for perfect indoor sprout germination
A few quick strategies that'll help you avoid common pitfalls and get the best sprouts possible.
The Soak Factor: Don't rush the 8-12 hour soak—this is where germination really begins. I've learned the hard way that cutting this short means lower germination rates. For best results, use filtered water (chlorine can inhibit growth) and make sure your 1 cup of seeds is completely submerged under 2-3 inches of water. The seeds should double in size by morning, but if they haven't, give them an extra hour or two.
Airflow Secret: That breathable barrier in Step 2 isn't just decoration—it's what prevents mold. I recommend using cheesecloth instead of screen when possible because it's more forgiving if you forget to rinse exactly every 8 hours. The key is maintaining airflow while keeping seeds moist. If you notice any sour smells during the 24-36 hour sprouting phase, that's your cue to rinse immediately.
Rinsing Routine: The twice-daily rinses in Step 3 are non-negotiable for safety, but timing matters. I set phone alarms for my morning and evening rinses to avoid skipping. Use cool water (not cold) to prevent shocking the delicate sprouts. After rinsing, give them a good shake in the jar to distribute them evenly—this prevents clumping and ensures uniform growth. You'll know you're doing it right when your sprouts reach that perfect 1-2 inch length by day 3.
Final Light Hack: For that vibrant green color in the optional 4-6 hour light exposure, I use a simple kitchen light placed about 12 inches away. The goal is indirect light—direct sunlight can actually bleach the chlorophyll. If you're short on time, skip this step entirely; your sprouts will still be nutritious and delicious without it.
Pro Tips for Planting Sprouts Indoors
- A few quick strategies that'll help you avoid common pitfalls and get the best sprouts possible.
- The Soak Factor: Don't rush the 8-12 hour soak—this is where germination really begins.
- Airflow Secret: That breathable barrier in Step 2 isn't just decoration—it's what prevents mold.
Frequently asked questions
Got questions about sprouting indoors? You’re not alone—here are the answers to the most common ones!
Can I sprout anything indoors without sunlight?
Most sprouts thrive indoors without sunlight, but some seeds (like sunflowers or corn) need light to grow properly. Stick to fast-sprouting varieties like alfalfa, lentils, broccoli, or radish—they germinate in 3–5 days with just moisture and warmth. Avoid seeds labeled "light-dependent" for sprouting.
How long does it take to grow sprouts indoors?
With the right setup, sprouts are ready in 3–7 days! Fastest options like radish or clover sprout in 3 days, while heartier sprouts (e.g., broccoli) take 5–7. Check daily for moisture—overwatering slows germination. Pro tip: Rinse twice daily for speed!
Why are my sprouts moldy or smelly?
Mold (fuzzy spots) or foul odors usually mean excess moisture or contaminated seeds. Always use food-grade sprouting seeds, rinse thoroughly, and drain well after soaking. If mold appears, discard the batch immediately—it’s unsafe to eat. Fix: Reduce rinse frequency or use a larger jar for airflow.
Are homegrown sprouts safe to eat?
Yes! Sprouts are nutrient-dense (packed with vitamins, protein, and enzymes) but must be handled carefully. Soak seeds in 1% vinegar solution for 10–15 minutes before sprouting to kill bacteria. Always eat them raw and rinse just before consuming to avoid contamination. Bonus: Add to salads, sandwiches, or smoothies for a crunchy boost!
What can I reuse after sprouting?
Most sprouting supplies are reusable! Rinse your jar, lid, and mesh strainer with hot, soapy water after each batch. For sprouting trays, soak in vinegar (1:3 ratio) to sanitize. Avoid plastic containers that trap bacteria—glass or BPA-free plastic is safest. Eco-tip: Save seeds from organic produce (like broccoli stems) to sprout for zero waste!
Wrapping up and next steps
Growing sprouts indoors is a fast, rewarding, and nutrient-packed way to enjoy fresh produce year-round—no sunlight or garden required! 🌱 With just a few simple supplies and 3 days of patience, you’ll unlock a crunchy, flavorful harvest that’s perfect for salads, sandwiches, or snacks.
Whether you’re a beginner or a seasoned gardener, this method proves that great things grow from small efforts.
Ready to take the next step? Start with one batch of your favorite sprouts today—then experiment with flavors, recipes, or even share your success with friends! The kitchen (or windowsill) is your new garden. 🌟