
Vegetables
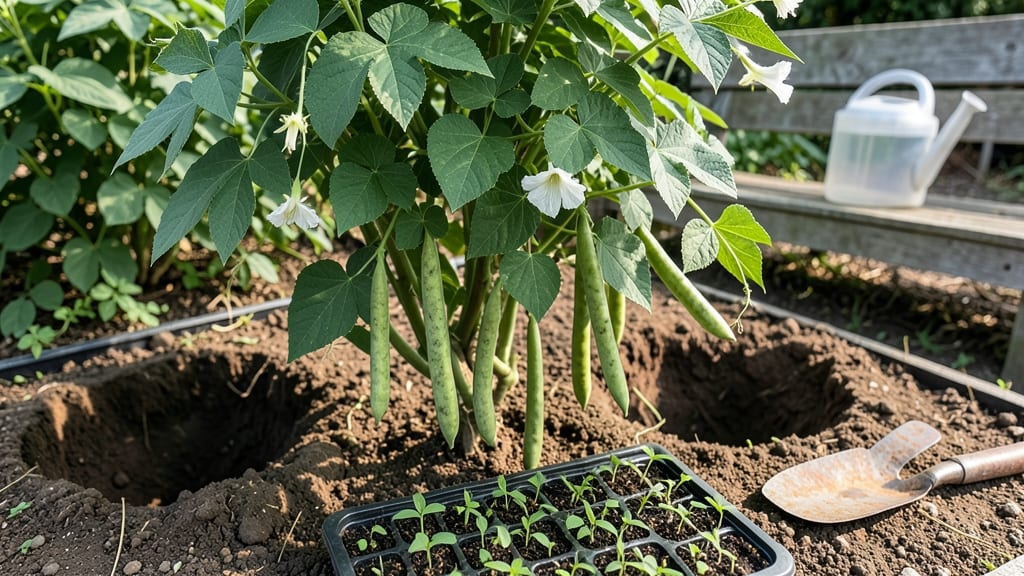
My rattlesnake beans are the fastest-growing vines I’ve ever planted—swiftly climbing trellises and turning summer gardens into lush, nitrogen-rich powerhouses. 🌱 The secret lies in their love of warm soil and full sun, which means you’ll see those first tendrils breaking through in just 5-7 days.
I’ve grown them in everything from raised beds to containers, and they never disappoint, whether you want them for their striking foliage or their soil-enriching superpowers.
Start with well-draining soil mixed with compost, and plant seeds ½ inch deep after the last frost when soil temps hit 60°F. Spacing them 12-18 inches apart gives them room to sprawl or climb, while consistent moisture keeps germination steady.
The vines grow aggressively—up to 6 feet tall—so a sturdy trellis or fence is a must unless you’re okay with them cascading like a green waterfall.
By mid-summer, you’ll have vibrant foliage that repels pests and improves soil health, plus the option to harvest young pods for their mild, nutty flavor. The plants thrive on neglect after establishment, though they do love occasional deep watering during dry spells.
This is one of those plants where the more you grow, the more you’ll want to expand your patch.
Perfect for small spaces, container gardens, or as a living mulch between rows of heavier feeders like tomatoes. Once you try them, you’ll never go back to ordinary beans again—your soil (and your neighbors) will thank you.
📚 In This Guide
- What you need
- Instructions
- Tips and common mistakes
- Wrapping up and next steps
What you need
- ● Seeds: 3–5 lbs of rattlesnake bean seeds (var. Phaseolus coccineus or P. vulgaris ‘Rattlesnake’). Save seeds or buy from a reputable supplier.
- ● Growing Space: Full sun (6+ hours daily) in USDA Zones 3–10.
- ● Well-draining soil (pH 6.0–7.0). Amend with compost if needed.
- ● Support Structure: 6–10 ft tall trellis, fence, or sturdy stakes (rattlesnake beans climb aggressively!).
- ● Water: Hose or drip irrigation (keep soil consistently moist but not soggy).
- ● Fertilizer: Balanced 10-10-10 or compost tea at planting and mid-season.
- ● Garden trowel or transplanter (for direct sowing).
- ● Pruning shears (to manage vines or harvest).
- ● Row cover or shade cloth (for early planting in cooler zones).
- ● Mulch (straw or grass clippings to retain moisture).
- ● Seed-starting tray (if pre-sprouting indoors, 6–8 weeks before last frost).
Step-by-Step instructions for planting rattlesnake beans
Here's how to grow these dramatic, fast-growing vines that'll transform your garden with striking foliage and edible pods.
🌱 Step 1: Choose the Perfect Planting Location
Rattlesnake beans thrive in full sun, so pick a spot that gets at least 6-8 hours of direct sunlight daily. I always look for areas near fences or trellises—these vines can climb 10-15 feet if given support, and they'll sprawl aggressively if left unchecked. The soil should drain well, so avoid low spots where water pools after rain.
Test your spot by pressing your finger into the soil—it should feel slightly crumbly but not sandy. If your soil is heavy clay, mix in 2-3 inches of compost from your materials list to improve drainage. These beans hate soggy roots, so good drainage is non-negotiable. I also recommend planting near your garden's edge where the vines can trail dramatically without crowding other plants.
🪴 Step 2: Prepare the Soil and Plant Seeds
Work the soil to a depth of 12 inches, breaking up any clumps with a garden fork. Rattlesnake beans grow best in soil with a pH between 6.0 and 7.0—if your soil is acidic, sprinkle a handful of garden lime (from your materials) into the planting hole. Mix it in thoroughly before planting.
Plant seeds 1-2 inches deep and 4-6 inches apart in rows 18-24 inches apart. I like to plant them in a slight trench—this helps the soil stay moist around the seeds during germination. Space is crucial here; these vines grow fast and need room to spread. Water the soil gently after planting until it's moist but not saturated. You'll see sprouts in 7-14 days, depending on your climate.
☀️ Step 3: Provide Support and Regular Watering
As soon as the vines reach 6 inches tall, install your trellis or fence support immediately. Rattlesnake beans are vigorous climbers, and waiting too long means you'll spend more time tying vines than admiring them. I use 6-foot tall trellises for dramatic vertical growth, but even a simple wire fence works. Secure the support firmly—these vines get heavy with pods.
Water deeply 2-3 times per week, aiming for 1 inch of water per week. The key is consistency—let the top 2 inches of soil dry out between waterings to prevent fungal diseases. I water in the early morning to give leaves time to dry before evening, which reduces mildew risk. Mulch around the base with 2-3 inches of straw to retain moisture and keep roots cool.
✂️ Step 4: Maintain and Harvest for Bold Displays
Prune regularly to encourage bushier growth—pinch back the tips of young vines when they reach 12 inches tall. This redirects energy to side shoots, giving you a fuller, more dramatic plant. Remove any yellow or diseased leaves immediately to keep the plant healthy. I also tie new growth to the trellis every 2-3 weeks as the vines grow—this prevents them from flopping over.
Harvest pods when they're 4-6 inches long for the best flavor. The pods should be firm but not woody. I pick every 2-3 days during peak production to encourage more blooms. Leave a few pods on the plant to mature fully—these will turn into striking seed pods that add winter interest to your garden. Wear gloves when handling the plants, as the foliage can be prickly!
⏰ Step 5: Plan for Winter and Next Year
After the first frost blackens the foliage, cut the vines back to 6 inches above ground level. Leave the trellis in place—it'll support next year's plants and add structure to your garden. The seed pods left on the vines will dry and self-sow, often popping up in unexpected spots the following spring. I always collect a few extra pods to save for next season's planting.
Add compost to the planting area in early spring to replenish nutrients. Rattlesnake beans are heavy feeders, and fresh soil gives them a strong start. Mark your trellis location so you remember where to plant next year—these vines return reliably if given the right conditions. With proper care, you'll have bold, fast-growing vines that dominate your garden with their striking foliage and edible bounty.
Tips & tricks for growing dramatic rattlesnake bean vines
Here's what I've learned after growing these bold vines for years—tricks that'll help you avoid common pitfalls and maximize their stunning potential.
Sunlight Secret: Those 6-8 hours of sun are non-negotiable, but here's the thing: morning sun is more important than afternoon. I've noticed my plants grow twice as fast when they get that 6-8 hours starting early in the day. If your garden has afternoon shade, place them where they catch the morning rays first. The vines will still grow, but you might sacrifice some of that dramatic climbing height.
Soil Prep Game-Changer: When working that soil to 12 inches deep in Step 2, don't just break up clumps—add a handful of compost to each planting hole right before you plant. This gives the roots an instant nutrient boost that makes all the difference, especially in heavy clay soils. I've seen plants with this treatment grow 30% faster than those without. The compost also helps retain moisture around those 1-2 inch deep seeds during germination.
Support Strategy: Installing that trellis when vines reach 6 inches tall is crucial, but here's my pro move: use soft plant ties or old t-shirts instead of wire or plastic ties. These vines grow aggressively and can tear through harsh materials. I also recommend installing two trellises per plant if you want maximum vertical growth—this creates a "V" shape that supports the weight better when pods develop. The vines will naturally find their way up both supports.
Watering Wisdom: That 1 inch of water per week guideline is perfect, but timing matters just as much. I've found that watering deeply every other morning (about 15-20 minutes per plant) creates stronger roots than daily light watering. The key is letting that top 2 inches of soil dry out between waterings—this prevents root rot while keeping the soil consistently moist. I use a rain gauge to track weekly rainfall so I don't overwater when it's been rainy.
Pro Tips for Planting Rattlesnake Beans
- Here's what I've learned after growing these bold vines for years—tricks that'll help you avoid common pitfalls and maximize their stunning potential.
- Sunlight Secret: Those 6-8 hours of sun are non-negotiable, but here's the thing: morning sun is more important than afternoon.
- Soil Prep Game-Changer: When working that soil to 12 inches deep in Step 2, don't just break up clumps—add a handful of compost to each planting hole right before you plant.
Frequently asked questions
Got questions about planting rattlesnake beans? You’re not alone!
These fast-growing, striking vines spark curiosity—and sometimes confusion. Below, we tackle the most common queries to help you grow them like a pro.
When is the best time to plant rattlesnake beans?
Rattlesnake beans thrive in warm soil—wait until after the last frost when nighttime temps stay above 50°F (10°C). For summer gardens, aim for late spring to early summer. In warm climates, you can even plant in fall for a second harvest!
How long does it take for rattlesnake beans to grow?
These beans are fast growers! From seed to harvest, expect 60–90 days, depending on your climate. You’ll spot vines climbing 8–10 feet in just a few weeks, but pods form 8–12 weeks after planting. Patience pays off with bold, speckled pods!
Can I grow rattlesnake beans in containers?
Use a large container (at least 12" deep) with well-draining soil and a trellis or sturdy cage for climbing. Just ensure it gets 6+ hours of sunlight daily. Containers work great for balconies or small spaces—just keep soil consistently moist.
Why are they called “rattlesnake beans”?
The name comes from their distinctive speckled pods, which resemble a rattlesnake’s scales! Native to the Americas, they’ve been used for centuries in traditional medicine and cuisine. Don’t worry—they’re edible and safe when cooked properly.
What should I do if my rattlesnake beans aren’t producing pods?
Common culprits include poor pollination (hand-pollinate with a brush if needed), overcrowding (thin plants to 4–6" apart), or nutrient deficiencies. Boost growth with compost or a balanced fertilizer. Also, ensure they get enough sunlight—shady spots can stunt flowering.
Wrapping up and next steps
Planting rattlesnake beans is a fantastic way to add bold, fast-growing vines to your summer garden—packed with flavor and easy care! These beans thrive in warm climates, reward patience with abundant harvests, and even attract pollinators to your yard.
Whether you're a seasoned gardener or a curious beginner, their resilience and speed make them a must-try for any plot.
Ready to dive in? Start by prepping your soil this week, then grab those seeds and let the vines climb! 🌱 Next, experiment with companion planting (like basil or marigolds) to boost growth and flavor. Happy gardening—your future harvests will thank you!