
Planting
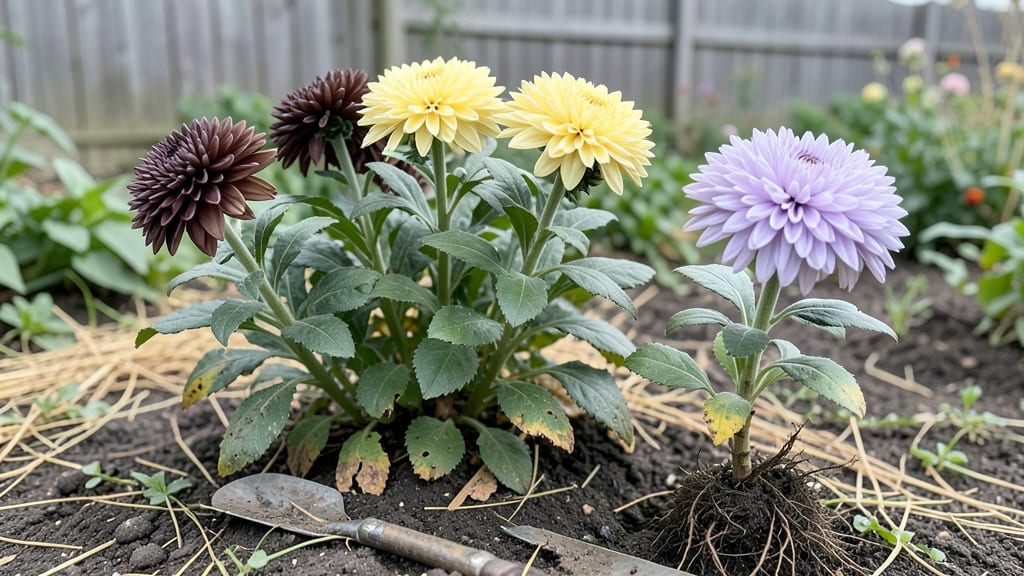
Planting mums outdoors in early fall gives them time to establish roots before winter's chill—my garden's most reliable blooms start right here. 🌻 The secret lies in timing: too early and they bolt; too late and frost catches them off guard.
I've learned to plant mine 4-6 weeks before first frost, when soil stays warm enough for roots to grow but nights cool down enough to trigger dormancy.
You'll need well-draining soil, a sunny spot (at least 6 hours of sunlight daily), and mums that say "hardy" on the tag. Amend heavy clay with compost, and space plants 12-18 inches apart—crowded mums fight for nutrients and flop by summer.
The right variety matters too: look for "fall-blooming" tags if you want color before winter sets in.
After planting, water deeply once a week unless rain does the work—mums hate soggy roots but won't survive drought either. A 2-inch layer of mulch keeps moisture in and weeds out. By next spring, you'll see sturdy stems and buds forming, ready to burst into color when summer arrives.
The best part? These perennials come back year after year with almost no effort.
For colder zones (5-7), plant even earlier—late summer works. In warmer areas (8-10), wait until October to avoid winter heat stress. Either way, the payoff is worth it: a garden that stays vibrant when everything else fades away. Let's get those roots growing!
📚 In This Guide
- What you need
- Instructions
- Tips and common mistakes
- Wrapping up and next steps
What you need
- ● Chrysanthemum plants (mums): 3–5 healthy, potted mums (check for vibrant foliage and buds). Opt for hardy varieties like 'Bonanza,' 'Dynasity,' or 'Medallion' for cold tolerance.
- ● Well-draining potting soil or garden soil: 1–2 bags (1 cubic foot each) for amending heavy or clay soil. Aim for a pH of 6.0–7.0.
- ● Compost or organic matter: 1–2 gallons (for enriching soil with nutrients). Avoid fresh manure—it can burn roots!
- ● Slow-release fertilizer (10-10-10 or 5-10-5): 1–2 cups per 10 sq. ft. of planting area.
- ● Mulch (straw, shredded leaves, or pine needles): 2–3 inches to insulate roots and retain moisture.
- ● Watering can or hose with a gentle spray nozzle: For hydrating plants without damaging stems.
- ● Garden trowel or hand shovel: For digging small holes (6–8 inches deep and wide).
- ○ Gloves (optional but recommended): To protect hands from thorns or soil.
- ● Pruning shears: For trimming leggy stems to encourage bushier growth.
- ● Measuring tape or ruler: To ensure proper spacing (12–18 inches apart for full sun, 18–24 inches for partial shade).
- ● Sunlight: Choose a spot with 6+ hours of direct sun daily (mums need light to bloom!). Partial shade works for hot climates.
- ● Timing: Plant mums 4–6 weeks before your first frost (typically late summer to early fall).
- ● Weather watch: Avoid planting during extreme heat or rain—wait for a cool, overcast day.
Step-by-Step instructions for planting mums outdoors
Here’s the simple, foolproof way to plant mums that’ll burst with color all fall.
🌱 Step 1: Pick the Perfect Spot and Time
Choose a location with at least 4-6 hours of sunlight daily—mums thrive where they get morning sun and afternoon shade if your summers run hot. I like to plant mine where they’ll catch that golden light but avoid the harsh midday heat. Late summer to early fall is ideal—6-8 weeks before your first frost date gives them time to establish roots before winter.
Dig a hole twice as wide as the mum’s root ball but only as deep as the container it came in. Loosen the soil around the edges with your fingers or a trowel—this helps roots spread outward instead of circling. If your soil drains poorly, mix in a handful of sand or perlite to improve drainage.
🪴 Step 2: Prepare the Plant and Plant It Right
Gently remove the mum from its container and loosen the roots if they’re tightly bound. You’ll see a thick, woody base—this is the crown. Plant so the top of the root ball sits just below soil level—burying it too deep can rot the crown, while leaving it too high risks drying out. I always check by comparing the crown to the surrounding soil line in the hole.
Fill the hole halfway with soil, then water deeply to settle it. This removes air pockets that could strangle new roots. Once the water drains, add more soil until the plant sits firmly. Press gently around the base to eliminate gaps, but don’t compact the soil—mums hate heavy, packed dirt.
💧 Step 3: Water and Mulch for Long-Term Success
Water deeply right after planting—aim for 1-2 gallons per plant to encourage roots to grow downward. You’ll know you’ve done it right when water runs out the bottom of the hole. After that, keep the soil evenly moist but not soggy for the first 2-3 weeks. Let the top inch dry out between waterings to prevent root rot.
Spread 2-3 inches of mulch around the base, keeping it 2 inches away from the stem. I use shredded bark or straw because it breaks down slowly and insulates roots through winter. Mulch helps retain moisture and keeps soil temps stable—critical for mums that hate temperature swings.
☀️ Step 4: Feed and Care for Fall Color
Apply a balanced, slow-release fertilizer (like 10-10-10) 2 weeks after planting to give your mums a nutrient boost. I sprinkle it around the drip line—not right against the stem—and water it in. Avoid high-nitrogen fertilizers after mid-summer; they’ll produce lush foliage but fewer blooms. Instead, opt for phosphorus-heavy feeds to encourage flowers.
Deadhead spent blooms by snipping stems back to the first set of leaves. This redirects energy to new flowers and keeps your mums looking tidy. Watch for aphids or spider mites—they love mums too. A strong spray of water usually knocks them off, but if they persist, use an insecticidal soap (follow package directions).
⏰ Step 5: Prep for Winter and Next Year
When frost threatens, cut back stems to 4-6 inches tall and cover the base with 4-6 inches of mulch. This protects the crown from freezing and thawing cycles that can crack roots. I use straw or leaves because they’re cheap and insulating. In spring, remove the mulch and trim back any dead growth—new shoots will emerge from the crown.
Mums are perennials, so they’ll come back bigger and brighter each year. Just divide clumps every 3-4 years in early spring to keep them vigorous. Dig up the plant, separate the sections with a clean knife, and replant the healthiest pieces. You’ll end up with more plants for free—and who doesn’t love that?
Tips & tricks for perfectly planted mums
A few simple tricks will help your mums thrive and bloom beautifully all fall.
The Light Factor: That 4-6 hours of sunlight is non-negotiable, but here's the thing: morning sun and afternoon shade is ideal if you live in a hot climate. I've seen mums wilt when planted in full afternoon sun—it's like leaving a car parked in the sun with the windows up. If your garden gets intense afternoon heat, plant where they'll catch that cooler morning light instead.
Root Ball Secrets: When loosening those roots in Step 2, don't go overboard—just gently tease apart any tight circles. I always check the root ball's depth by comparing it to the surrounding soil line. That crown (the thick woody base) should sit just below soil level—any deeper and you risk rot, any higher and you'll dry out the plant. Think of it like Goldilocks: not too deep, not too high, just right.
Watering Wisdom: That deep watering after planting (1-2 gallons) is crucial for establishing roots. Here's my trick: I use a garden hose with a gentle spray attachment to water slowly until it runs out the bottom of the hole. This ensures water penetrates deeply without running off. After that, keep soil evenly moist for those first 2-3 weeks—stick your finger an inch down and if it's dry, it's time to water.
Mulch Magic: That 2-3 inches of mulch isn't just decoration—it's insulation. I like to use straw because it breaks down slowly and provides consistent protection. The key is keeping it 2 inches away from the stem to prevent moisture buildup that can cause rot. In winter, that extra 4-6 inches of mulch becomes your mum's cozy blanket against freezing temperatures.
Pro Tips for Planting Mums Outdoors
- A few simple tricks will help your mums thrive and bloom beautifully all fall.
- The Light Factor: That 4-6 hours of sunlight is non-negotiable, but here's the thing: morning sun and afternoon shade is ideal if you live in a hot climate.
- Root Ball Secrets: When loosening those roots in Step 2, don't go overboard—just gently tease apart any tight circles.
Frequently asked questions
Got questions about planting mums outdoors? You’re not alone! Here are answers to the most common queries to help you nail that fall color without the fuss.
When is the best time to plant mums outdoors?
Plant mums 4–6 weeks before your first fall frost (typically late summer to early fall). This timing ensures roots establish before cold weather hits. In warmer zones, you can plant as late as October!
Can I plant mums too late in the season?
Yes, but with caution. If planted too late (e.g., November), mums may struggle to root before frost. Pro tip: Choose cold-hardy varieties (like ‘Autumn Joy’) and mulch heavily to protect roots. Better late than never!
What if my mums don’t bloom next year?
Mums often skip blooming if they’re overcrowded, underfed, or planted too late. Fix it: Divide clumps in early spring, fertilize lightly in spring/fall, and ensure full sun (6+ hours daily). Patience pays off!
Are there low-maintenance mum alternatives?
Yes! Try sedum (drought-tolerant), black-eyed Susans (long bloom time), or heuchera (colorful foliage). These thrive with minimal care and add late-season interest too.
Why are my mum leaves turning yellow or brown?
Yellow leaves often mean overwatering or poor drainage. Brown edges? Likely underwatering or heat stress. Check soil moisture (top 1–2 inches should dry between waterings) and ensure well-draining soil. Mulch helps retain moisture!
Wrapping up and next steps
Planting mums outdoors is a simple, rewarding way to bring vibrant color to your garden—with minimal effort! 🌸 By choosing the right variety, timing, and location, you’ll enjoy months of cheerful blooms while keeping pests and diseases at bay.
Whether you’re a seasoned gardener or just starting, these hardy flowers make fall gardening a breeze.
Ready to transform your outdoor space? Grab your mums, follow the steps, and watch your garden glow! For extra tips, check out our guide on long-term mum care to keep them thriving year after year.