
Transplanting
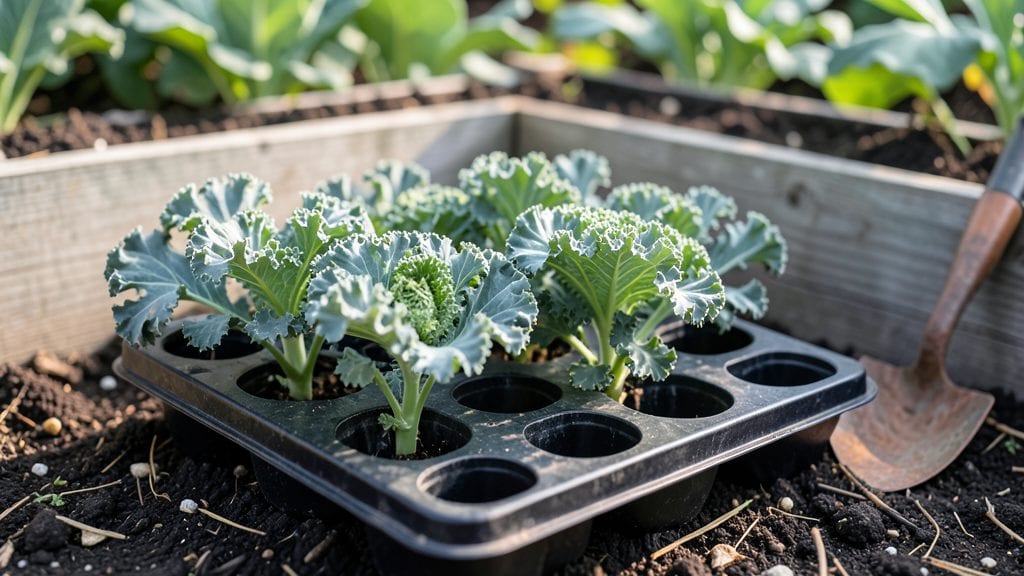
Planting kale seedlings in the right way means the difference between a thriving winter crop and a sad, bolted mess. 🌱 I’ve learned that patience—letting those little plants toughen up first—is everything. When you skip hardening off, seedlings flop like overcooked pasta in the first real breeze.
The key is timing and prep: cool but not freezing soil, loose dirt that won’t suffocate roots, and spacing that lets leaves breathe. Most people crowd them too tight, and before you know it, you’re fighting mildew instead of harvesting.
I’ll show you the exact spacing and watering tricks that keep my kale standing tall.
By the time you’re done, you’ll have seedlings that look like they’ve been there all season—dark green, sturdy stems, and leaves ready to grow. The first real harvest comes in just 4-6 weeks, and if you time it right, you’ll keep pulling leaves straight through winter.
Works for both spring and fall plantings, even in cooler zones. The secret isn’t fancy—it’s just getting the basics right the first time. Let’s get those seedlings in the ground for good.
📚 In This Guide
- What you need
- Instructions
- Tips and common mistakes
- Wrapping up and next steps
What you need
- ● Kale seedlings: 6–12 hardened-off starts (check for sturdy stems and vibrant leaves).
- ● Garden plot or large containers: At least 12" deep, with well-draining soil (raised beds or pots work too!).
- ● High-quality potting mix or garden soil: Amend with compost (2–3 inches mixed in) for nutrients.
- ● Fertilizer: Balanced organic fertilizer (10-10-10) or compost tea for a nutrient boost.
- ● Watering can or hose with a gentle spray nozzle: Avoid blasting seedlings.
- ○ Gloves (optional but handy): Protect your hands from thorns or soil.
- ● Mulch (straw or shredded leaves): Retains moisture and suppresses weeds.
- ● Plant markers: Label your seedlings if growing multiple varieties.
- ● Shade cloth (30–50% coverage): Protects seedlings from harsh afternoon sun.
- ● Epsom salt (1 tbsp per gallon of water): Boosts magnesium for lush growth.
- ● Row cover or cloches: Shields young plants from pests or frost.
Step-by-step instructions for planting kale seedlings
Ready to put those hardened-off kale seedlings to work? Here’s how to get them thriving in your garden.
🌱 Step 1: Choose the Right Time and Spot
Kale loves cool weather, so plant your seedlings 2-3 weeks before your last frost date in spring or 6-8 weeks before your first frost in fall. Pick a location with full sun to partial shade—at least 4-6 hours of sunlight daily. Kale tolerates light shade better than many greens, so a spot with morning sun and afternoon shade works well.
Test the soil by pinching a small clump—it should crumble easily when dry but hold moisture when damp. If your soil feels compacted, loosen it with a garden fork to help roots spread. Kale prefers slightly acidic to neutral soil, so a pH of 6.0-7.0 is ideal. If unsure, grab a soil test kit from your local garden center.
🪴 Step 2: Prepare the Planting Area
Dig small holes just slightly larger than the root balls of your seedlings—about 1 inch wider and deeper than the containers they came in. Space holes 12-18 inches apart for bush varieties or 24 inches apart for larger, upright types like 'Lacinato.' Kale thrives in cool weather but struggles in heat, so give it room to breathe and avoid overcrowding.
Gently remove each seedling from its container, holding the leaves rather than the stem to avoid damage. If roots are circling tightly, tease them apart with your fingers. Place the seedling in the hole so the top of the root ball sits even with the soil surface. Kale doesn’t like being buried too deep—this ensures strong growth from the base.
💧 Step 3: Plant and Water Thoroughly
Fill the hole with soil, pressing lightly around the base to eliminate air pockets. Water immediately after planting to settle the soil and remove any air gaps. Use a watering can with a gentle spray nozzle to avoid disturbing the seedlings. Aim for 1 inch of water per week, splitting it into two waterings—once in the morning and once in the evening—to keep roots consistently moist.
Mulch around the base with 1-2 inches of organic mulch (like straw or shredded leaves) to retain moisture and suppress weeds. Keep the mulch 2 inches away from the stems to prevent rot. Kale is a heavy feeder, so side-dress with compost or a balanced fertilizer every 3-4 weeks to keep it growing strong.
☀️ Step 4: Monitor and Protect Young Plants
Watch for signs of stress like yellowing leaves or wilting—these often mean the soil is too dry or too wet. Kale handles cool, damp conditions well but wilts in heat. If temperatures climb above 80°F, provide afternoon shade with a lightweight row cover or shade cloth to prevent bolting (when the plant flowers prematurely and becomes bitter).
Check for pests like cabbage worms or aphids weekly. If you spot chewed leaves or sticky residue, blast the plants with water to dislodge pests or apply an organic insecticidal soap. Kale is resilient but benefits from consistent care. Harvest outer leaves as they reach 6-8 inches tall to encourage continuous growth—this keeps the plant productive for weeks.
Tips & tricks for planting kale seedlings
A few simple tricks will help your kale seedlings thrive from day one—here's what I've learned after planting dozens of batches.
Soil Prep Secret: Before planting, mix a handful of compost directly into each hole—this gives your seedlings an instant nutrient boost right where their roots will spread. I like to use worm castings for extra microbial activity that helps roots establish faster. The key is to work it in gently so you don't disturb the root ball when you place the seedling.
Timing Tip for Temperature: Kale seedlings are most vulnerable when temperatures climb above 80°F, which is why the 6-8 week fall planting window matters so much. If you're planting in late spring and hit a heatwave, create temporary shade with a lightweight row cover during the hottest afternoon hours. This simple step prevents bolting (when plants flower prematurely) and keeps leaves tender and sweet.
Watering Wisdom: The 1 inch of water per week guideline works for established plants, but seedlings need more frequent moisture. Water gently every morning for the first week, keeping the soil consistently damp but not soggy. I use a spray nozzle to avoid blasting the delicate stems—think of it like giving them a gentle shower rather than a downpour. This helps prevent transplant shock.
Spacing Strategy: Those 12-18 inch spacing guidelines might feel generous, but trust me on this—crowding stresses kale plants and makes them more susceptible to pests. For bush varieties, you can get away with the closer spacing, but give larger types like 'Lacinato' that full 24 inches. The extra space means better airflow, which reduces disease risk and helps leaves mature more evenly.
Pro Tips for Planting Kale Seedlings
- A few simple tricks will help your kale seedlings thrive from day one—here's what I've learned after planting dozens of batches.
- Soil Prep Secret: Before planting, mix a handful of compost directly into each hole—this gives your seedlings an instant nutrient boost right where their roots will spread.
- Timing Tip for Temperature: Kale seedlings are most vulnerable when temperatures climb above 80°F, which is why the 6-8 week fall planting window matters so much.
Frequently asked questions
Got questions about planting kale seedlings? You’re not alone—this nutrient-packed crop has its quirks! Here are answers to the most common concerns to help you grow like a pro.
When is the best time to plant kale seedlings outdoors?
Plant hardened-off kale seedlings after the last frost when soil temps are at least 40°F (4°C). For cool climates, aim for early spring or late summer—kale thrives in 50–70°F (10–21°C) and even tolerates light frost! Avoid planting in scorching heat (above 80°F/27°C), as it can bolt prematurely.
How long does it take for kale seedlings to mature after transplanting?
With proper care, kale seedlings typically reach harvest size in 60–70 days from transplanting. Baby leaves (for salads) can be picked in 3–4 weeks, while full-sized heads take longer. Pro tip: Harvest outer leaves first to encourage continuous growth!
Can I plant kale seedlings in containers or just the ground?
Kale grows well in 5–7 gallon containers with drainage holes, using a well-draining potting mix. Just ensure pots get 6+ hours of sunlight daily. For ground planting, space seedlings 12–18 inches apart in loose, fertile soil with a pH of 6.0–7.0.
Why are my kale seedlings wilting or turning yellow after transplanting?
Wilting or yellowing often signals transplant shock (common in kale!). Check for overwatering (root rot) or underwatering (dry soil). Harden seedlings properly and mulch to retain moisture. Pests like cabbage worms can also cause damage—inspect leaves and use row covers if needed.
Does kale need special care in hot or cold weather?
Kale handles cold well but struggles in extreme heat. In hot climates, provide afternoon shade and keep soil moist. For winter, use row covers or cold frames to protect seedlings. Avoid planting in soggy soil—kale hates waterlogged roots!
Wrapping up and next steps
Planting kale seedlings is a rewarding way to grow a nutritious, hardy crop in your garden! By hardening off your starts and choosing the right timing, you’ll set the stage for a thriving harvest. Whether you’re a beginner or a seasoned gardener, these steps make the process simple and stress-free.
Ready to dig in? Start by marking your planting spots—then grab those seedlings and get growing! With a little patience and care, you’ll soon be enjoying fresh, homegrown kale straight from your garden. 🌱