Picking
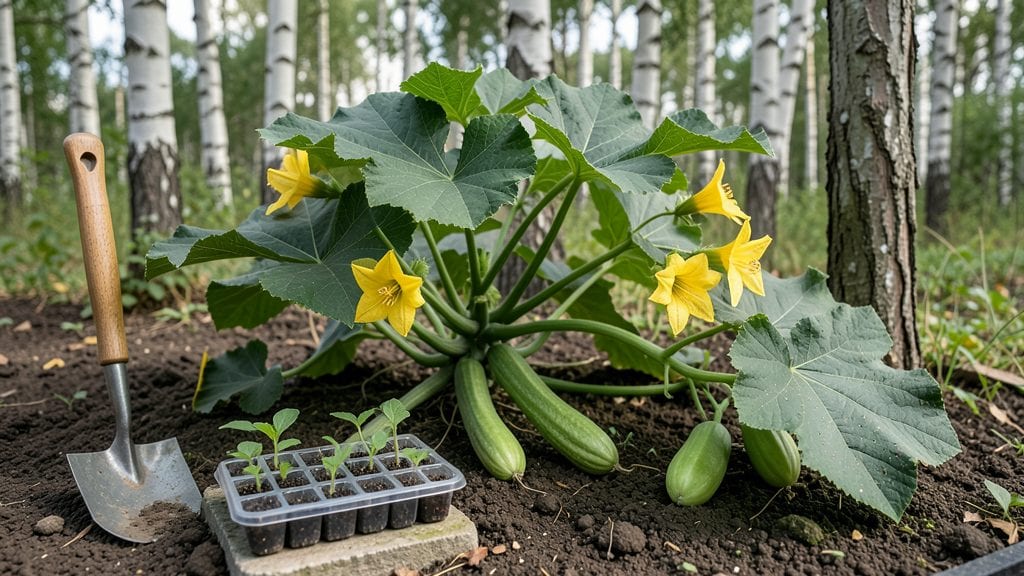
Planting hubbard squash in a spacious patch with rich, moisture-retentive soil is key—my early mistakes of crowding the vines left me with a tangled mess and underwhelming harvests. them like the space-hogging giants they are, giving them at least 100 square feet per plant.
The reward? Squash that can weigh 20+ pounds each, with that signature ribbed texture and nutty sweetness that makes fall harvests feel like a victory.
Start with seeds, not transplants—Hubbard squash doesn’t like being uprooted, and nursery plants often struggle to recover. Plant seeds 1 inch deep and 3 feet apart in well-draining soil rich with compost, then water deeply to settle the soil.
Warmth triggers germination, so wait until the soil hits 60°F before planting—usually 2-3 weeks after your last frost. The vines spread fast, so mark planting spots with stakes or flags to avoid stepping on emerging seedlings.
Once established, these plants drink water like they’re in a drought, so keep the soil consistently moist but never soggy. A 3-inch layer of straw mulch saves you watering time and protects the fruit from rot.
Companion plants like beans or corn help shade the soil, while nasturtiums deter pests. By midsummer, you’ll see those massive leaves—and if you’re lucky, the first football-sized squash peeking through the foliage.
Here’s the secret most gardeners miss: Hubbard squash needs space above too. The vines grow 6-10 feet wide, but the fruit itself can stretch 3 feet long, so avoid planting near fences or structures.
If space is tight, opt for bush varieties or train vines along a trellis (though they’ll still sprawl). With the right setup, you’ll harvest 5-10 squash per plant—enough to share with neighbors or freeze for winter soups.
📚 In This Guide
- What you need
- Instructions
- Tips and common mistakes
- Wrapping up and next steps
What you need
- ● Hubbard squash seeds: 3–5 seeds per plant (or 1–2 per hill if planting multiple seeds). Choose heirloom or hybrid varieties for best results.
- ● Well-draining soil: Rich in organic matter (compost or aged manure). Aim for a pH of 6.0–7.0.
- ● Space: Each plant needs 5–6 feet of diameter (they spread widely!).
- ● Water: Consistent moisture (1–2 inches per week). Use a drip irrigation system or water early in the day.
- ● Fertilizer: Balanced organic fertilizer (10-10-10) or compost tea at planting and mid-season.
- ● Garden trowel or transplanter (for seedling transfer).
- ● Mulch (straw or black plastic) to retain moisture and suppress weeds.
- ○ Row covers or netting (optional, to protect from pests like squash bugs).
- ● Pruning shears (for trimming vines if needed).
- ● Harvesting knife or pruners (for clean cuts when squash is ready).
Instructions for planting Hubbard squash with confidence
Here’s how to grow these massive, flavorful squash with minimal fuss—no advanced techniques required.
Choose the Perfect Warm, Sun-Drenched Spot
Hubbard squash needs a south-facing location with full sun exposure—at least 8 hours of direct sunlight daily. These vines spread 10-15 feet wide, so pick a spot with plenty of open ground or a sturdy trellis if space is tight. I always test soil warmth by pressing my hand into the ground; if it feels 70°F or warmer at 4 inches deep, it’s ready. Cold soil delays germination and weakens seedlings.
If your garden soil is heavy clay, amend it with 2-3 inches of compost mixed into the top 12 inches of soil. Hubbard squash roots run deep, so rich, loose soil prevents rot and encourages heavy fruit production. Avoid low-lying areas where water pools—these plants hate soggy feet. A slight slope helps excess water drain away naturally.
Plant Seeds Directly After Last Frost
Hubbard squash does not transplant well, so sow seeds 1-2 inches deep when soil temperatures reach 60°F. Plant 4-5 seeds per mound, spacing mounds 6-8 feet apart—this gives vines room to sprawl without crowding. I like to create small hills of soil for better drainage, then press seeds in gently with my thumb. Overplanting leads to weak, underdeveloped squash, so thin to 2-3 strongest plants per mound once they’re 4 inches tall.
Seeds germinate in 7-14 days, depending on warmth. Keep the soil evenly moist but not soggy during this time—use a spray bottle to mist rather than a heavy watering can. If the surface dries out, seeds may fail to sprout. Once seedlings emerge, thin to the strongest ones, snipping at soil level with clean scissors to avoid disturbing roots.
Support Vines and Water Deeply for Heavy Fruits
As vines mature, they’ll need strong support. If trellising, use heavy-duty netting or wooden frames—Hubbard squash fruits can weigh 20+ pounds, so flimsy supports snap. I’ve found that spreading vines across a raised bed works best for most home gardens. Water deeply 2-3 times per week, soaking the soil to 12 inches down. Drip irrigation is ideal—it delivers water slowly at the roots without wetting leaves, which reduces disease risk.
Watch for yellowing leaves, a sign of inconsistent moisture. Hubbard squash is drought-tolerant once established, but uneven watering causes bitter fruit. Mulch with straw or shredded leaves to retain moisture and keep roots cool. When vines reach 3-4 feet long, they’re ready to start producing—expect first fruits in 80-100 days from planting.
Harvest at Peak Ripeness for Maximum Flavor
Hubbard squash is ready when the skin turns deep green to gray, the rind hardens, and the stem dries slightly. I tap the fruit—if it sounds hollow, it’s ripe. Harvest with a sharp knife, leaving 1-2 inches of stem attached to prevent rot. Handle fruits carefully; even a small bruise speeds up spoilage. Store in a cool, dark place (50-55°F) for 2-3 months. If frost threatens before harvest, pick squash early—they’ll keep for several weeks indoors if cured properly.
Don’t let overripe squash linger on the vine. Once the stem shrivels completely, the flesh turns grainy and bland. Cut open a test squash when unsure—if the seeds are hard and dark, it’s past its prime. With proper care, one healthy Hubbard vine can yield 5-10 squash, making it a rewarding crop for patient gardeners.
Tips & tricks for planting Hubbard squash with confidence
Growing Hubbard squash successfully comes down to a few key details that make all the difference between a modest harvest and a bountiful one.
Soil Temperature Matters: The instructions emphasize waiting until soil reaches 60°F before planting, but I can’t stress enough how critical this is. Cold soil delays germination and weakens seedlings—even if air temperatures feel warm, check soil warmth at 4 inches deep with a soil thermometer. If it’s below 60°F, wait a few more days. I’ve seen seeds planted too early simply rot in cold soil, wasting weeks of effort.
Thinning Strategy: When thinning seedlings to 2-3 strongest plants per mound, do it carefully with clean scissors to avoid disturbing roots. I’ve found that pulling seedlings by hand can uproot nearby plants. Wait until seedlings are 4 inches tall—this gives them enough stability to handle thinning without shock. The remaining plants will reward you with stronger vines and heavier fruits.
Watering Wisdom: The 2-3 times per week watering schedule works best when you soak the soil to 12 inches deep. Use a moisture meter to check—if the soil feels dry at that depth, it’s time to water again. Drip irrigation is ideal, but if you’re watering by hand, focus on the base of plants rather than the leaves. Wet foliage invites disease, especially in humid climates.
Harvesting Cues: The instructions mention tapping squash to check ripeness, but I’ve added another trick: look for the stem to start drying slightly while still attached. When the stem shrivels completely, the squash is past its prime. Also, check the skin—it should be hard enough that you can’t puncture it with your thumbnail. If you’re unsure, harvest a test squash and cut it open: the seeds should be soft and light-colored at peak ripeness.
Pro Tips for Planting Hubbard Squash
- Growing Hubbard squash successfully comes down to a few key details that make all the difference between a modest harvest and a bountiful one.
- Soil Temperature Matters: The instructions emphasize waiting until soil reaches 60°F before planting, but I can’t stress enough how critical this is.
- Thinning Strategy: When thinning seedlings to 2-3 strongest plants per mound, do it carefully with clean scissors to avoid disturbing roots.
Frequently asked questions
Got questions about growing hubbard squash? You’re not alone! Here are answers to the most common queries to help you cultivate these giant gourds like a pro.
When is the best time to plant hubbard squash?
Hubbard squash thrives in warm soil—wait until after the last frost when nighttime temps stay above 50°F (10°C). For most climates, this means late spring to early summer (April–June). Start seeds indoors 4–6 weeks before transplanting if your growing season is short.
How long does it take for hubbard squash to mature?
Expect a 90–120 day harvest from planting! Hubbard squash grows slowly but steadily—don’t rush it. Ripe squash will have hard, dry rinds and a dull sound when tapped. Patience pays off with hefty, flavorful fruits weighing 10+ pounds!
Can I grow hubbard squash in containers or small spaces?
Hubbard squash needs space to sprawl—aim for at least 50–100 sq ft per plant. While possible in large containers (15+ gallon pots), vines will be restricted, leading to smaller yields. If space is tight, opt for bush varieties or trellis the vines (though they’re heavy—use sturdy support!).
What are the most common pests/diseases, and how do I prevent them?
Watch for squash bugs, cucumber beetles, and powdery mildew. Prevention tips:
- Use row covers early in the season.
- Rotate crops yearly to avoid soil-borne diseases.
- Handpick pests (check undersides of leaves!).
- Improve airflow with spaced planting to deter mildew.
How do I store hubbard squash for the longest time?
Store whole, unwashed squash in a cool (50–55°F), dark, and dry place (like a basement or pantry). They’ll keep for 2–3 months. Avoid refrigeration—cold damages their texture. For longer storage, cure them first: Place in sunlight for 10 days to harden the rind.
Wrapping up and next steps
Growing Hubbard squash is a rewarding journey that brings big flavors and even bigger harvests to your garden! With the right space, soil, and care, these sprawling vines will thrive and gift you with heirloom-quality squash that’s perfect for soups, pies, or roasting.
Now that you’re armed with tips—from choosing seeds to troubleshooting pests—it’s time to roll up your sleeves and plant with confidence! 🌱
Ready to take the next step? Mark your calendar for planting season, prep your garden beds, and watch your Hubbard squash vines transform into a bountiful harvest. Happy growing—your future meals will thank you! 🍽️