Shrubs
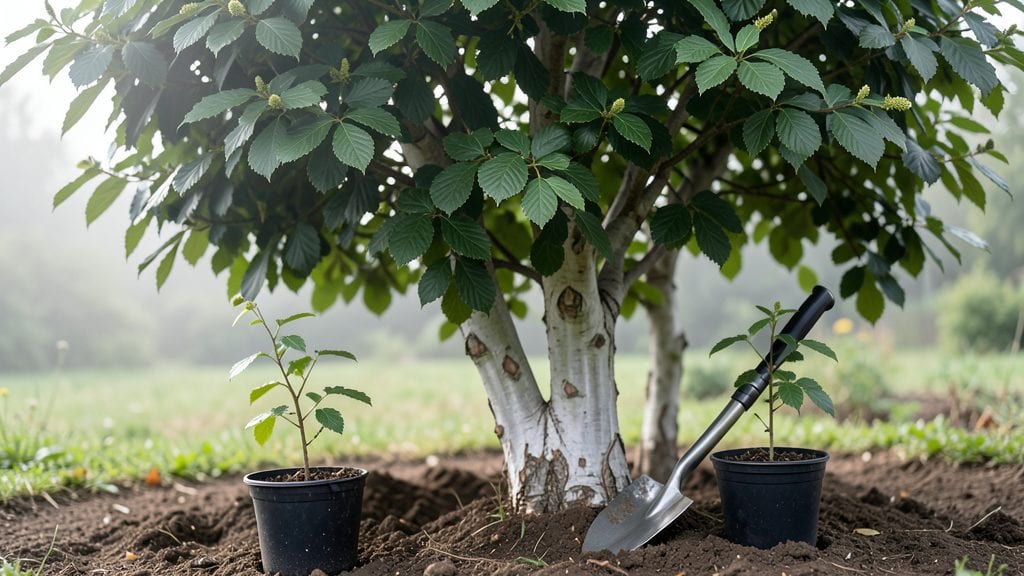
A hornbeam hedge delivers that structured elegance year-round, with glossy leaves that turn copper in fall and clean lines that never go out of style. 🌿 I planted mine last spring, and the key was getting the spacing and soil right from day one—something I wish I'd known before digging in.
The payoff? A hedge that stays dense, resists pests, and looks polished whether you're pruning or not.
Start with healthy 1- to 2-year-old saplings spaced 3–4 feet apart for a formal hedge or 4–5 feet for a more natural look. Amend heavy clay soil with compost to improve drainage, and avoid planting in low spots where water pools.
The first year is all about establishing roots, so mulch lightly and water deeply once a week unless rain does the work for you.
By late winter, you'll see why hornbeams earn their reputation: smooth bark and vibrant foliage that hold up in winter. Prune in late spring or early summer to shape, but avoid heavy cuts—this isn’t a hedge that responds well to drastic trimming.
The goal is clean lines, not bushy regrowth, and with the right approach, your hedge will stay neat, lush, and low-maintenance for decades.
Perfect for formal gardens, privacy screens, or dividing property lines where structure meets durability. The secret? Patience—hornbeams grow 12–18 inches per year, so plan ahead if you want quick results.
But once established, they’re one of the most reliable hedges for color, texture, and year-round interest without the fuss of constant pruning.
📚 In This Guide
- What you need
- Instructions
- Tips and common mistakes
- Wrapping up and next steps
What you need
- ● Hornbeam plants: 10–15 per linear foot (depending on desired spacing—18–24 inches apart for a dense hedge). Choose 1–2 year-old bare-root or container-grown plants for best establishment.
- ● Shovel or spade: A round-point shovel (18–24 inches wide) for digging trenches or a matlock for precision.
- ● Garden fork: For loosening compacted soil before planting.
- ● Measuring tape: To mark and maintain consistent spacing.
- ● Garden line & stakes: For creating a straight planting line (use wooden or metal stakes every 10 feet).
- ● Compost or well-rotted manure: 5–10 gallons mixed into the planting hole to enrich soil.
- ● Mulch: 2–3 inches of wood chips or bark to retain moisture and suppress weeds (avoid piling mulch against stems).
- ● Pruning shears or hedge trimmer: Bypass pruners (for small hedges) or electric/manual hedge trimmers (for larger projects) for shaping.
- ● Watering can or hose with nozzle: A soaker hose is ideal for deep watering.
- ● Garden gloves: Heavy-duty nitrile or leather gloves to protect your hands.
- ● Soil test kit: To check pH (hornbeams prefer slightly acidic to neutral soil, pH 6.0–7.0).
- ● Root stimulator: A mycorrhizal inoculant or seaweed extract to boost early growth.
- ● Erosion control fabric: For sloped areas to prevent soil runoff.
- ● Plant support stakes: 1–2 ft bamboo or metal stakes for young hedges in windy areas.
- ● Hedge wire or trellis: If training the hedge vertically.
Step-by-Step instructions for planting a hornbeam hedge
Here's how to establish a dense, evergreen hedge with minimal maintenance—once planted right.
🌱 Step 1: Prepare the Planting Site and Soil
Hornbeams thrive in well-drained soil with a pH between 5.0 and 7.5. Before planting, clear the area of weeds and loosen the soil to a depth of 12 inches using a garden fork. Amend heavy clay with 2-3 inches of compost to improve drainage, but avoid overly rich soil—hornbeams prefer lean conditions that encourage dense growth rather than leggy shoots.
For your 4 plants, dig holes twice as wide as the root ball but no deeper. Space the holes 3-4 feet apart for a formal hedge or 4-5 feet for a more natural look. Water each hole thoroughly before planting to settle the soil and prevent air pockets around roots.
🪴 Step 2: Plant Hornbeam Saplings at the Right Depth
Remove each sapling from its container and gently tease the roots outward if they're circling. Place the plant in the hole so the top of the root ball sits level with the surrounding soil—never bury the trunk too deep, or it'll suffocate. Backfill with native soil, tamping lightly every 2 inches to eliminate air gaps.
Create a 2-inch-wide watering basin around each plant and fill it completely. This ensures roots make immediate contact with moisture. Mulch with 2-3 inches of wood chips, keeping it 3 inches away from the trunk to prevent rot. Water deeply again after mulching to settle everything.
✂️ Step 3: Shape and Prune for Structure Immediately
Hornbeams respond best to formative pruning right after planting. Use sharp bypass pruners to trim the top 1/3 of the leader shoot (the central stem) to encourage branching. Cut just above an outward-facing bud to promote bushier growth. Remove any damaged or crossing branches at the base.
For a formal hedge, use a hand saw or hedge shears to create a clean, straight top edge. Keep the sides slightly tapered to allow light penetration to the center. Avoid heavy pruning—hornbeams recover slowly from aggressive cuts. Water immediately after pruning to reduce stress.
☀️ Step 4: Water and Maintain Through the First Season
Water your new hedge deeply 2-3 times per week for the first 8-10 weeks, ensuring the soil stays evenly moist but not soggy. Check moisture by pushing a finger 2 inches into the soil—if it feels dry, water again. Reduce frequency once roots establish, aiming for 1 inch of water per week during dry spells.
Monitor for aphids or spider mites, which thrive on tender new growth. Spray affected areas with neem oil at the first sign of infestation. Avoid fertilizing in the first year—hornbeams establish better with minimal nutrients. By late fall, your hedge should show compact, uniform growth with no gaps.
Tips & tricks for planting a hornbeam hedge
Establishing a thriving hornbeam hedge requires attention to detail—here are the key strategies that'll help you avoid common pitfalls and create a dense, long-lasting screen.
Soil Preparation is Everything: When loosening soil to 12 inches, focus on breaking up compacted layers rather than just turning the top layer. For heavy clay soils, mix in that 2-3 inches of compost thoroughly—don't just create pockets. I've seen too many hedges fail because roots couldn't penetrate compacted subsoil. Use a garden fork to create vertical channels that encourage root growth downward. The goal is to mimic natural soil structure while improving drainage.
Root Ball Placement Precision: The most critical mistake I see in Step 2 is planting too deep—never bury that root ball below soil level. Use a level or reference stick to ensure the top sits flush with surrounding soil. For your 4 plants, create a small stake marker at each hole's depth before planting to avoid guesswork. Remember, hornbeams hate having their trunks buried—they'll develop stem rot and struggle to establish.
Pruning Technique That Works: When doing that formative pruning in Step 3, cut at a 45-degree angle just above an outward-facing bud. This creates a natural water runoff and exposes the bud to light. For your formal hedge, I recommend using a string line to ensure perfectly straight edges—even a slight curve will become more pronounced as the hedge matures. And here's what nobody tells you: water immediately after pruning to reduce stress on the plants.
Watering Strategy for First Season: Those 2-3 weekly waterings in the first 8-10 weeks are non-negotiable. Use a rain gauge or tuna can to measure exactly 1 inch of water per week—eyeballing leads to inconsistent moisture. I've found that morning watering (before 10am) minimizes evaporation and fungal risks. During dry spells, consider using drip irrigation to deliver water directly to the root zone without wetting the foliage—this prevents those pesky spider mites from getting established.
Pro Tips for Planting Hornbeam Hedge
- Establishing a thriving hornbeam hedge requires attention to detail—here are the key strategies that'll help you avoi...
- Soil Preparation is Everything: When loosening soil to 12 inches, focus on breaking up compacted layers rather than j...
- Root Ball Placement Precision: The most critical mistake I see in Step 2 is planting too deep—never bury that root ba...
Frequently asked questions
Got questions about planting a hornbeam hedge? You’re not alone! Here are some of the most common concerns—and straightforward answers—to help you get started with confidence.
When is the best time to plant a hornbeam hedge?
The ideal window for planting is late fall to early spring (October–March), when the soil is workable but the ground isn’t frozen. This gives roots time to establish before summer heat. Spring planting (March–April) is a close second—just be sure to water deeply during dry spells to support root growth.
How long does it take for a hornbeam hedge to fill out?
With proper care, a hornbeam hedge typically reaches full density in 3–5 years. Young plants grow slowly at first but gain height and width steadily. Pruning in the first two years encourages bushier growth, while mature hedges (5+ years) can be shaped more aggressively. Patience pays off—these hedges last decades with minimal upkeep!
Can I plant hornbeam hedges in full shade?
Hornbeams are tolerant of partial shade but thrive best in full sun to partial shade (4–6 hours of sunlight daily). In deep shade, growth may slow, and the hedge could become sparse. If your site is shady, choose a sun-loving alternative like boxwood or privet—or supplement with a light-reflective surface (e.g., a nearby wall or fence) to boost light exposure.
How often should I water a newly planted hornbeam hedge?
Water deeply 2–3 times per week for the first year, ensuring the soil stays consistently moist but not soggy. After establishment, water 1–2 times weekly during droughts. Mulch around the base (2–3 inches of organic material) to retain moisture and suppress weeds. Avoid overhead watering to prevent fungal issues.
What’s the best way to prune a hornbeam hedge for a neat look?
Prune twice a year: lightly in late spring (after new growth appears) and heavily in late summer/early fall (before new growth hardens). Use sharp, clean shears and cut just outside the branch collar. For a formal shape, step back and trim in layers—this prevents jagged edges. Never prune into old wood (brown stems), as hornbeams struggle to regrow from there.
Are hornbeam hedges prone to pests or diseases?
Hornbeams are naturally resistant to most pests, but watch for aphids, spider mites, or scale insects in dry conditions. Treat infestations with neem oil or insecticidal soap. Diseases like powdery mildew can occur in humid climates—improve airflow with proper spacing and avoid overhead watering. Healthy soil and balanced pruning keep issues at bay!
Wrapping up and next steps
Planting a hornbeam hedge is a rewarding project that delivers year-round structure, privacy, and elegance to your landscape—with just a little pruning precision! 🌿 Whether you’re a seasoned gardener or a beginner, this versatile shrub adapts beautifully to different climates and soil types, making it a smart choice for both functional and aesthetic goals.
Now that you’re armed with the right tools, techniques, and tips, it’s time to roll up your sleeves and get planting! Start small if needed, but don’t hesitate—your future hedge will thank you with lush, resilient growth. Happy digging! 🌱