Propagation
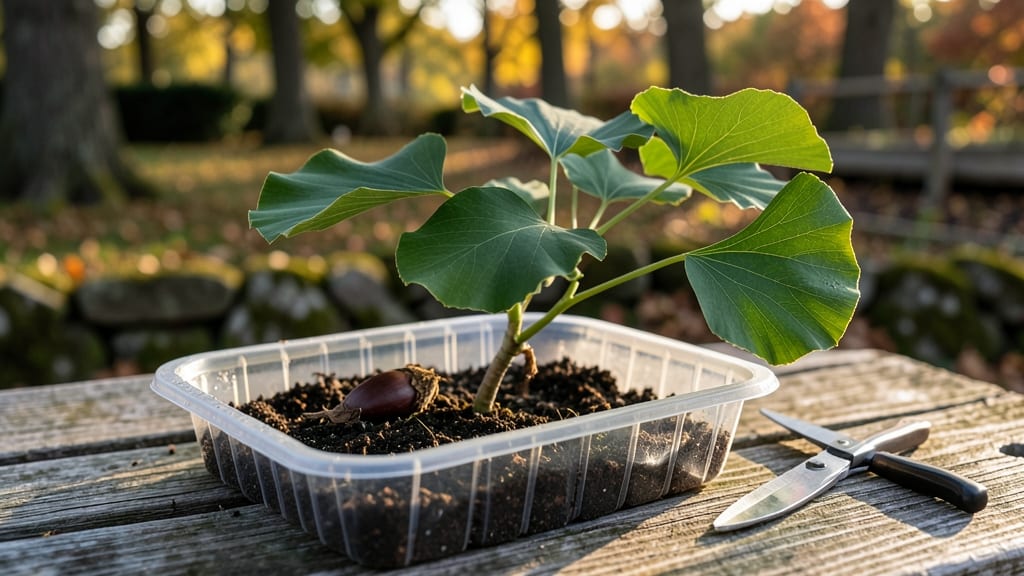
Planting ginkgo seeds is like unlocking a slow-motion masterpiece—those ancient, fan-shaped leaves won’t appear for years, but the wait is worth it. 🌱 I’ve started dozens, and the ones that made it through stratification now stand as proud, wind-resistant giants in my backyard.
The key isn’t rushing it; it’s letting nature handle the heavy lifting while you prepare the perfect conditions.
You’ll need fresh seeds (store-bought ones often lose viability), a mix of sand and peat moss for stratification, and a patient heart. The process takes about 90 days of cold treatment before planting, but trust me—skipping this step means waiting years, if ever, for germination.
Even then, expect sprouts to poke through in 3-6 months, not weeks. Think of it as a decade-long investment disguised as a weekend project.
Once those first green shoots break through the soil, you’ll feel like a botanical archaeologist who just uncovered a living fossil. The seedlings grow less than an inch per year at first, but with consistent watering and full sun, they’ll eventually tower over your house.
The real magic happens when those iconic, smelly (yes, smelly) ginkgo fruits appear—proof you’ve nurtured something truly rare.
This method works best in USDA Zones 4-8, but the principles apply anywhere with cold winters. Whether you’re planting in containers or straight into the ground, the secret is patience—ginkgos don’t just grow trees, they grow legacies. Ready to start yours?
📚 In This Guide
- What you need
- Instructions
- Tips and common mistakes
- Wrapping up and next steps
What you need
- ● Fresh ginkgo seeds – 3–5 seeds (ensure they’re plump and free of cracks or soft spots).
- ● Well-draining potting mix – A blend of peat moss, perlite, and sand (or a cactus/succulent mix). Quantity: Enough to fill a small container (4–6 inches deep).
- ● Small pots or seed trays – Size: 3–4 inches in diameter (one pot per seed or a shared tray with drainage holes).
- ● Plastic bags or clear lids – For creating a humidity dome (e.g., a ziplock bag with small holes or a plastic wrap lid).
- ● Refrigerator or cold stratification setup – A consistent 35–45°F (2–7°C) environment for 60–90 days (use a fridge’s crisper drawer or a cool basement).
- ● Spray bottle – For gentle watering (avoid soaking the mix).
- ● Label and marker – To track planting dates and seed varieties.
- ● Seed scarification tool – A sandpaper (100–120 grit) or knife to lightly nick the seed coat (speeds up germination).
- ● Grow lights or sunny windowsill – Ginkgo seeds need bright, indirect light (12+ hours/day) after stratification.
- ● Humidity tray – A shallow tray with pebbles and water to maintain moisture levels.
- ○ Heat mat (optional) – If your home stays below 60°F (15°C), a seedling heat mat can encourage faster sprouting.
- ● Fertilizer (after sprouting) – A balanced, water-soluble fertilizer (e.g., 10-10-10) diluted to half-strength.
Step-by-step instructions for planting ginkgo seeds
Cold-stratification transforms ginkgo seeds from stubborn to sprouting—here's how to do it right.
🌱 Step 1: Harvest and Prepare the Seeds
Gather fresh ginkgo seeds as soon as they fall in autumn—they won't last long. Remove the fleshy outer layer by rubbing the seeds between your palms under running water until only the hard, tan seed remains. This outer coating contains butyric acid, which inhibits germination, so removing it is critical.
Inspect each seed for cracks or soft spots—discard any damaged ones. Healthy seeds feel firm and weigh noticeably more than their size suggests. Place the cleaned seeds in a paper towel and label them with the harvest date. This ensures you track stratification time accurately.
💧 Step 2: Moisten and Cold-Stratify the Seeds
Wrap the seeds individually in a damp paper towel, then fold them into a small square packet. Place all packets in a sealed plastic bag and label it with the date. The goal is to keep the towels consistently moist—neither soggy nor dry. I like to use a spray bottle to mist the towels weekly, checking for dampness by squeezing gently.
Store the bag in your refrigerator's crisper drawer, where temperatures hover around 35-40°F. This mimics winter conditions and breaks seed dormancy. Cold-stratification typically requires 90-120 days, but ginkgo seeds can take up to 6 months—patience is key here. Don't peek inside the bag during stratification; opening it disrupts moisture levels.
☀️ Step 3: Sow Stratified Seeds in Containers
After cold-stratification, plant each seed in its own 4-inch diameter pot filled with a well-draining mix of 50% peat moss and 50% perlite. Ginkgo seeds need excellent drainage—they rot quickly in soggy soil. Press each seed 1 inch deep into the mix, then water gently until the soil feels uniformly moist but not waterlogged.
Place the pots in a warm, bright location with indirect light—65-70°F is ideal. Avoid direct sunlight at this stage, as young seedlings are sensitive to heat stress. You'll see the first signs of germination in 4-8 weeks, though some seeds may take longer. Germination isn't guaranteed, so plant all your seeds to maximize success.
🌿 Step 4: Provide Consistent Moisture and Light
Once sprouts emerge, move the pots to a spot with bright, indirect light for the first two weeks. Direct sunlight can scorch tender seedlings, so a north-facing window or grow light works best. Water the soil when the top ½ inch feels dry—ginkgo seedlings are drought-sensitive but hate soggy roots.
When the first true leaves appear (not the initial seed leaves), increase light exposure gradually. You'll notice the seedlings develop a deep green color and sturdy stems. At this stage, fertilize lightly with a balanced 10-10-10 solution diluted to half-strength. Over-fertilizing can burn young roots, so less is more.
⏰ Step 5: Transplant Seedlings to Larger Pots
After 6-8 months, when seedlings reach 6-8 inches tall, transplant them into 1-gallon containers with a mix of 60% potting soil and 40% perlite. Ginkgo trees grow slowly, so they don't need frequent repotting. Handle the seedlings carefully—their roots are delicate and break easily.
Place the transplanted seedlings in a location with full sun for at least 6 hours daily. They'll tolerate partial shade but grow more slowly. Water deeply once a week, allowing the top 1-2 inches of soil to dry between waterings. This encourages strong root development and prevents fungal issues.
✂️ Step 6: Prune and Prepare for Outdoor Planting
By the second year, your ginkgo seedlings will need pruning to encourage a strong structure. Remove any dead, diseased, or crossing branches using clean, sharp pruners. Prune just above a leaf node to promote new growth. Ginkgo trees are resilient, so don't worry about making mistakes—just focus on maintaining an open canopy.
When seedlings are 3-4 feet tall and the last frost has passed, acclimate them to outdoor conditions over 2 weeks. Start by placing them outside in a sheltered spot for 2 hours daily, gradually increasing exposure. Once hardened off, plant them in their permanent location with well-draining soil and full sun. Mulch around the base to retain moisture and suppress weeds.
Tips & tricks for planting ginkgo seeds
These simple yet critical steps will help you navigate the delicate process of growing ginkgo seeds from scratch.
Cold-Stratification Precision: The 90-120 day cold-stratification period at 35-40°F is non-negotiable for breaking dormancy. I place my seeds in a sealed bag with a moisture meter to ensure consistent dampness—never soggy. If your fridge runs warmer (like 45°F), extend the stratification to 150 days. This mimics nature's winter cycle that triggers germination.
Seed Selection Matters: In Step 1, discard any seeds with cracks or soft spots—they won't germinate. I also weigh them: healthy ginkgo seeds feel surprisingly heavy for their size. For maximum success, use seeds harvested within 2 weeks of falling—they lose viability quickly. Label each seed packet with the harvest date to track your 90-120 day count accurately.
Transplanting Technique: When moving seedlings to 1-gallon containers in Step 5, handle them by the soil ball—not the stems. Ginkgo roots are brittle, and damage here can set back growth by months. Water thoroughly after transplanting to settle the soil around delicate roots, then reduce watering to once weekly as specified. The 6-8 month timeline assumes consistent care—rushing this step often leads to root rot.
Pro Tips for Planting Ginkgo Seeds
- These simple yet critical steps will help you navigate the delicate process of growing ginkgo seeds from scratch.
- Cold-Stratification Precision: The 90-120 day cold-stratification period at 35-40°F is non-negotiable for breaking do...
- Seed Selection Matters: In Step 1, discard any seeds with cracks or soft spots—they won't germinate. I also weigh the...
Frequently asked questions
Got questions about growing ginkgo trees from seeds? You’re not alone—this ancient plant has quirks! Here are answers to the most common concerns to help you succeed.
How long does it take for ginkgo seeds to germinate?
Patience is key! With cold stratification (4–6 weeks in the fridge), germination typically takes 2–6 months. Some seeds may sprout faster if pre-soaked, but inconsistent moisture or warmth can delay results. Keep the soil consistently damp (not soggy) and avoid moving the pot—ginkgos are sensitive to disturbance.
Can I skip cold stratification? Will ginkgo seeds grow without it?
Nope! Ginkgo seeds require stratification to break dormancy. Without it, germination rates plummet to near zero. If you’re short on time, try sandpaper-scratching the seed coat (lightly!) to mimic natural wear, but stratification remains the gold standard. Think of it as winter prep for your seed’s “hibernation.”
What’s the best soil mix for ginkgo seed germination?
Light, well-draining soil is critical. Mix 50% peat moss or coconut coir with 50% perlite or coarse sand to prevent rot. Avoid heavy garden soil—ginkgo roots need air! A sterilized mix reduces mold risk. Pro tip: Add a thin layer of vermiculite on top to retain moisture without suffocating the seed.
Why did my ginkgo seed turn moldy or rot?
Overwatering is the #1 culprit! Ginkgo seeds rot in waterlogged soil. If you spot fuzzy mold or a foul smell, act fast: remove the seed, trim any mushy parts, and replant in fresh, dry mix. To prevent this, use a spray bottle for hydration and ensure pots have drainage holes. Less is more—keep soil moist, not wet.
How do I know if my ginkgo seedling is healthy?
Healthy seedlings have bright green, glossy leaves and firm stems (no wilting or yellowing). Check for new growth monthly—slow but steady is normal. Weak or leggy sprouts may need more light (but avoid direct sun). If leaves curl or brown, it could signal overwatering or pests (like spider mites). A happy ginkgo seedling grows steadily, not sporadically.
Bonus Tip: What if my seeds won’t sprout at all?
Not all ginkgo seeds germinate—it’s 20–50% success rate even with stratification. If you’ve tried everything and struck out, try buying fresh seeds from a nursery or check for empty seed coats (tap the seed—if it sounds hollow, it’s likely infertile). Persistence pays off, though! Some gardeners report second-year germination if seeds are stored dry and cool.
Wrapping up and next steps
Planting ginkgo seeds is a rewarding journey that blends patience with the joy of nurturing life. With the right tools—like cold stratification—and a little care, you’ll soon watch those tiny seeds sprout into resilient, ancient-looking trees. 🌱
Ready to take the next step? Start by gathering your seeds this fall, then follow the simple steps above. Before you know it, you’ll be tending to your own ginkgo saplings, ready to thrive for decades. Happy growing! 🌿