Orchid Care
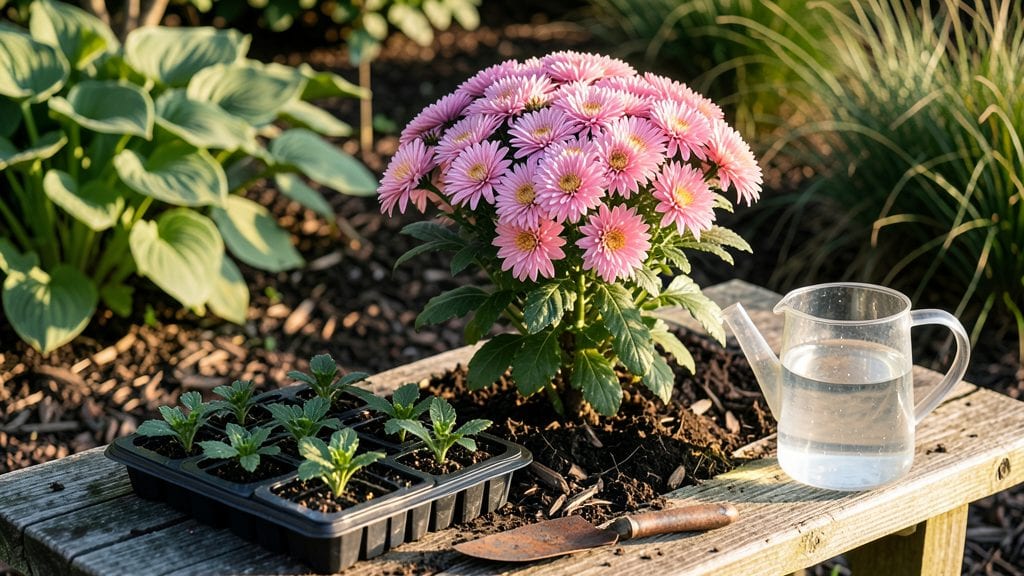
Planting chrysanthemums outdoors transforms your garden into a nonstop color show from early summer through frost—with almost no fuss. I’ve grown them for years, and the secret isn’t fancy techniques but timing, soil prep, and a little patience.
Most people rush planting, then wonder why their blooms fizzle out by September.
The best time to plant is 4-6 weeks before your first frost, when soil stays warm but nights cool down. Chrysanthemums thrive in full sun to partial shade, and well-draining soil prevents those dreaded mushy stems.
For containers, use pots with drainage holes—5-gallon sizes work great for one plant—and mix in compost for extra nutrients. In-ground? Amend clay soil with sand or peat moss to keep roots happy.
After planting, water deeply once a week (more in extreme heat), and watch those buds form. The real magic happens when you pinch back the tips in early summer—this trick forces bushier growth and longer-lasting blooms.
By late fall, you’ll have a garden that stays vibrant while neighbors’ plants fade.
Works for borders, containers, or even hanging baskets—just adjust spacing (12-18 inches apart for in-ground, closer for pots). Here’s how to get started without the guesswork.
📚 In This Guide
- What you need
- Instructions
- Tips and common mistakes
- Wrapping up and next steps
What you need
- ● Chrysanthemum plants: 6–12 healthy nursery-grown plants (or seeds if starting from scratch)
- ● Pro tip: Choose varieties suited to your USDA hardiness zone (e.g., ‘Bonanza’ for zones 5–9).
- ● Soil: Well-draining, fertile garden soil (amend with compost if needed)
- ○ Optional: 2–3 inches of organic mulch (straw or shredded bark)
- ● Tools: Trowel or hand shovel
- ● Garden fork (for loosening soil)
- ● Watering can or hose with a gentle spray nozzle
- ● Pruning shears (for shaping and deadheading)
- ● Fertilizer: Balanced, slow-release fertilizer (10-10-10 or 5-10-5 ratio)
- ○ Optional: Liquid bloom booster (like fish emulsion or compost tea)
- ● Support (if needed):strong> Stakes or tomato cages (for tall varieties like ‘Mammoth’)
- ● Sunlight: Full sun (6+ hours/day) for optimal blooms.
- ● Timing: Plant in early spring (after last frost) or early fall (6–8 weeks before first frost).
- ● Pro tip: Avoid planting in extreme heat—chrysanthemums thrive in cool weather!
- ● Space: 12–24 inches apart (check variety spacing requirements).
Step-by-Step instructions for planting chrysanthemums outdoors
Here’s how to establish hardy, long-blooming chrysanthemums that thrive with minimal fuss—just follow these precise steps.
Select the Perfect Planting Location
Chrysanthemums demand full sun—at least 6 hours of direct light daily—to produce their signature abundant blooms. I always scout the site in late afternoon when shadows are longest, marking spots where sunlight lingers until 5 PM or later. Avoid low-lying areas where cold air pools, as these plants tolerate frost but not prolonged dampness.
Test the soil’s drainage by digging a 6-inch-deep hole and filling it with water. If it drains completely within 30 minutes, the spot is ideal. Poor drainage leads to root rot, and chrysanthemums are particularly susceptible. Amend heavy clay soil with 2-3 inches of compost mixed into the top 12 inches of earth to improve aeration.
Prepare the Soil and Planting Holes
Loosen the soil in a 12-inch-wide circle around each planting spot to a depth of 12 inches, breaking up any compacted layers with a garden fork. Chrysanthemums thrive in well-draining, slightly acidic soil with a pH between 6.0 and 6.5. If your soil is alkaline, work in 1-2 pounds of peat moss per planting hole to lower the pH gradually.
Dig holes twice as wide as the root ball but only as deep as the container’s drainage holes. This ensures the crown sits just ½ inch below soil level—any deeper, and stems risk rotting; too high, and roots dry out. Gently tease apart any circling roots before placing the plant in the hole to encourage outward growth.
Plant and Water for Immediate Establishment
Lower the chrysanthemum into the hole, backfilling with soil while pressing lightly to eliminate air pockets. Water deeply immediately after planting to settle the roots—1 gallon per plant should soak the soil to a depth of 6 inches. Avoid letting water pool around the crown, which can suffocate the plant.
Mulch the base with 2-3 inches of shredded bark or straw, keeping it 3 inches away from the stem to prevent moisture buildup. This conserves soil moisture, regulates temperature, and suppresses weeds. For the first 2 weeks, water every 2-3 days until new growth appears—this critical period determines whether the plant establishes strong roots.
Prune Strategically for Bushier Growth
Once the plant reaches 6-8 inches tall, pinch back the top 2-3 inches of each stem just above a set of leaves. This forces the plant to branch out, creating a fuller, more compact shape. Repeat this process 2-3 times during the growing season—each time you see 4-5 sets of true leaves appear on new growth, pinch again.
Deadhead spent blooms by cutting stems back to the nearest leaf node within 24 hours of wilting. This redirects the plant’s energy into producing fresh flowers instead of setting seed. In fall, allow 3-4 weeks of blooming before cutting back stems to 6 inches tall—this encourages next year’s robust growth.
Overwinter for Year-Round Performance
In USDA Zones 5-7, mound 4-6 inches of mulch around the base of the plant in late fall, covering the crown completely. Chrysanthemums are hardy to Zone 5, but extra insulation prevents heaving and frost damage. In Zones 8-10, reduce watering in winter but avoid letting the soil dry out entirely.
In early spring, remove the mulch and trim back any dead or damaged stems to 4 inches tall. Fertilize lightly with a balanced 10-10-10 formula at ½ the recommended rate to stimulate new growth without burning tender roots. You’ll see fresh shoots emerge within 2-3 weeks, signaling it’s time to resume regular care.
Tips & tricks for perfectly established chrysanthemums
These essential strategies will help you avoid common pitfalls and ensure your chrysanthemums thrive from planting to winter dormancy.
Sunlight Strategy: The 6 hours of direct sunlight requirement is non-negotiable for vibrant blooms. I recommend planting on the south or west side of your garden where afternoon sun is most intense. If your location receives less than 6 hours, consider using reflective surfaces like white gravel or light-colored fencing to bounce extra light onto the plants. In urban settings, containers placed on patios or balconies can receive concentrated sunlight that mimics garden conditions.
Soil Preparation Insight: When testing soil drainage in Step 1, I've found that clay-heavy soils often need more than just compost to improve aeration. For particularly dense soils, mix in 1 part perlite or coarse sand to 3 parts compost in the 12-inch-deep amended area. This creates larger air pockets while maintaining moisture retention. The 30-minute drainage test is critical—if water remains after this time, your soil needs additional amendments.
Pruning Precision: The 6-8 inch height threshold for first pinching might seem arbitrary, but it's based on the plant's natural growth pattern. At this stage, the stem has developed enough energy reserves to support new lateral shoots. When you see 4-5 sets of true leaves on new growth, it means the plant has successfully redirected its energy through the pinching process. This typically occurs about 3-4 weeks after the initial pinch, depending on your climate.
Winter Protection Technique: For Zones 5-7, the 4-6 inches of mulch should be applied after the first hard frost when soil temperatures drop below 40°F. I use straw rather than leaves because it breaks down more slowly and provides better insulation. In Zones 8-10, the reduced winter watering should continue until you see new growth in early spring—typically around February or March, depending on your last frost date.
Pro Tips for Planting Chrysanthemums Outdoors
- These essential strategies will help you avoid common pitfalls and ensure your chrysanthemums thrive from planting to winter dormancy.
- Sunlight Strategy: The 6 hours of direct sunlight requirement is non-negotiable for vibrant blooms.
- Soil Preparation Insight: When testing soil drainage in Step 1, I've found that clay-heavy soils often need more than just compost to improve aeration.
Frequently asked questions
Got questions about planting chrysanthemums outdoors? You’re not alone! Here are some of the most common concerns—plus straightforward answers to help you grow stunning, low-maintenance blooms.
When is the best time to plant chrysanthemums outdoors?
For most climates, early spring (after the last frost) or early fall (6–8 weeks before the first frost) are ideal. Chrysanthemums thrive in cooler weather, so avoid planting in scorching summer heat. If you’re in a warm zone, fall planting ensures vibrant blooms come winter!
Can I plant chrysanthemums in full sun or partial shade?
Chrysanthemums love full sun (6+ hours/day) for the best blooms, but they tolerate partial shade (4–6 hours) in hotter regions. Too much shade? You’ll get fewer flowers. Test your spot: If it’s sunny enough for tomatoes, it’s perfect for mums!
What pests or diseases should I watch for when planting outdoors?
Keep an eye out for aphids, spider mites, and slugs—they love tender new growth. For diseases, powdery mildew (white dust on leaves) is common in humid areas. Improve airflow, water at the base, and use neem oil if needed. Healthy soil = happier plants!
Can I plant chrysanthemums in containers instead of the ground?
Containers work great—just use a well-draining pot (at least 12 inches deep) and a balanced fertilizer. Place them in a sunny spot, water regularly, and overwinter them indoors if your climate freezes. Potted mums are perfect for patios or balconies!
Do I need to prune chrysanthemums after planting?
Not right away! Wait until spring to trim back dead stems by 1/3. Pinch back new growth in early summer to encourage bushier blooms. Over-pruning can delay flowering, so be gentle. Think of it like shaping a topiary—less is often more!
Wrapping up and next steps
Planting chrysanthemums outdoors is a rewarding way to bring bold color and texture to your garden with minimal fuss! 🌸 With the right soil, sunlight, and a little seasonal care, these hardy blooms will thrive year after year—even with light pruning.
Whether you’re a beginner or a seasoned gardener, now’s the perfect time to grab some plants and get growing.
Ready to dive in? Start by choosing your favorite varieties and mark your calendar for planting in early spring or fall. Your garden (and future pollinators!) will thank you.