
Picking
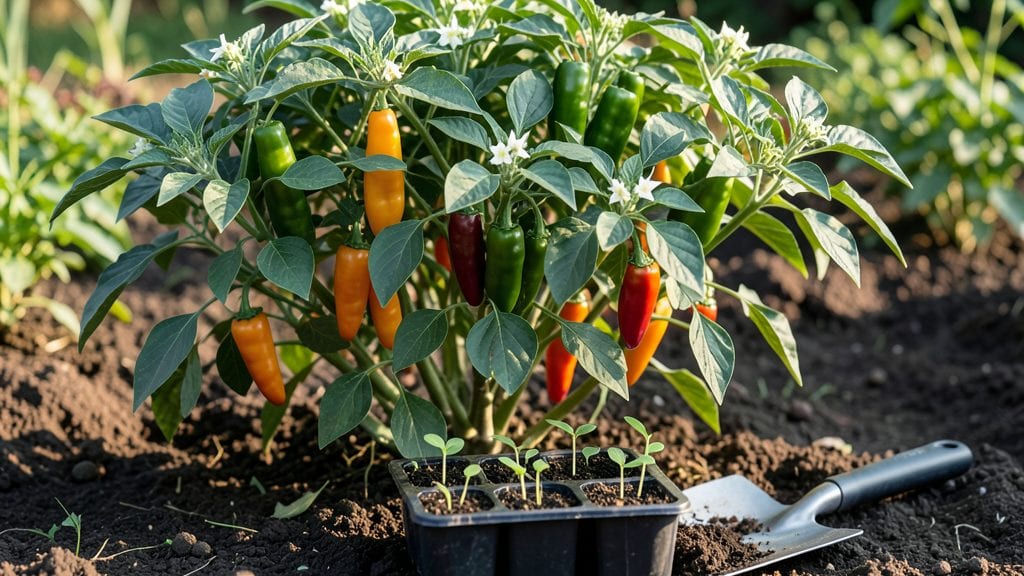
Planting Anaheim peppers from seed to harvest in just 60 days changes everything about how you think about summer meals. 🌿 I’ve grown them in everything from deep garden beds to shallow patio containers, and the key to success isn’t fancy soil—it’s patience with the early stages and sunlight that mimics their desert roots.
Most beginners rush the spacing or watering, but these peppers reward precision over effort.
The real game-changer is starting seeds indoors 4-6 weeks before your last frost, giving them a head start while still moving them outside before summer’s full heat.
You’ll need well-draining soil (mix in perlite if yours compacts), pots at least 2-3 inches deep for seedlings, and a sunny spot that gets 6-8 hours of direct light daily. Transplants? Just bury them deeper than the pot—peppers send roots from their stems, so extra depth means stronger plants.
By day 60, you’ll be harvesting 4-6 inch peppers with that signature mild heat, perfect for stuffing, salsas, or drying. The plants keep producing all season, so one seed packet feeds your family for months.
The trick is consistent watering—1 inch per week—and avoiding overhead sprinklers to prevent disease. Even my first attempt yielded enough to share with neighbors, and that’s when you know you’ve cracked the code.
Works in containers, raised beds, or in-ground—just adjust spacing (18-24 inches apart) for your setup. Here’s how to make it foolproof, no matter where you’re growing.
📚 In This Guide
- What you need
- Instructions
- Tips and common mistakes
- Wrapping up and next steps
What you need
- ● Seeds or Seedlings: 5–10 Anaheim pepper seeds (or 3–5 starter seedlings from a nursery). Pro tip: Choose heirloom or hybrid varieties like ‘Luna’ or ‘NuMex Sandia’ for consistent results! 🌡️
- ● Containers or Garden Plot: For indoors: 5–10 5–6 inch diameter pots with drainage holes (or a 10–12 inch deep container for multiple plants).
- ● For outdoors: A sunny spot with 12+ hours of light and well-draining soil (or raised beds).
- ○ Soil: 1–2 bags of well-draining potting mix (or garden soil amended with compost). Optional: Add perlite or vermiculite for extra aeration! ✨
- ● Fertilizer: Balanced 10-10-10 fertilizer (or organic options like fish emulsion or compost tea).
- ● Slow-release granules (follow package rates).
- ● Watering Can or Spray Bottle: With a gentle spray nozzle for seedlings.
- ● Grow Lights (Indoors Only):strong> LED full-spectrum grow lights (12–16 hours/day) if natural light is <10 hours.
- ● Support: Small stakes or cages for taller varieties (Anaheims can grow 2–3 feet!).
- ● Mulch: Straw or shredded leaves to retain moisture.
- ● Pruning Shears: For trimming leggy growth.
- ● pH Test Kit: To ensure soil pH is 6.0–7.0 (peppers love slightly acidic soil!).
- ● Row Covers: Lightweight fabric to protect seedlings from pests or chilly nights.
Step-by-Step instructions for planting Anaheim peppers
Ready to grow your own mild-to-medium heat peppers? Here’s how to turn seeds into a bountiful harvest in just two months.
🌱 Step 1: Start Seeds Indoors for Early Growth
Fill 2-3 inch deep biodegradable pots with the seed-starting mix and moisten it until damp but not soggy. Plant 1-2 seeds per pot at a depth of ¼ inch, pressing lightly to ensure contact with soil. Cover with a thin layer of additional mix and mist gently with water.
Place the pots in a warm spot with 75-85°F soil temperature—a seedling heat mat works wonders here. Keep the soil consistently moist but never waterlogged. You’ll see sprouts in 7-14 days, depending on your growing conditions. Once the first true leaves appear (not the initial cotyledons), thin to the strongest seedling per pot.
☀️ Step 2: Provide Bright Light and Prevent Leggy Growth
Anaheim peppers need 14-16 hours of light daily to grow strong and compact. Place seedlings under a grow light or in the sunniest window you have, ensuring they’re within 2-4 inches of the light source. If stems stretch toward the light or leaves space far apart, your light is too far away.
Rotate the pots a quarter turn daily so plants grow straight instead of leaning. After 4-6 weeks, when seedlings have 3-4 true leaves, they’re ready to transplant. Harden them off by gradually exposing them to outdoor conditions over 7-10 days to avoid shock.
🪴 Step 3: Transplant Seedlings Outdoors After Frost
Choose a location with full sun (6+ hours daily) and well-draining soil. Dig holes slightly larger than the root ball, spacing plants 18-24 inches apart in rows 2 feet apart. Gently remove seedlings from their pots, loosen the roots if they’re circling, and place them in the holes at the same depth they were growing indoors.
Fill the holes with soil, firm it lightly, and water deeply to settle the roots. Mulch around the base with 2-3 inches of straw to retain moisture and suppress weeds. Anaheims thrive in 70-85°F temperatures, so wait until nighttime temps stay above 55°F before transplanting.
💧 Step 4: Water Deeply and Fertilize for Fruit Production
Water at the base of the plant 1-2 inches deep weekly, ensuring the soil stays consistently moist but not waterlogged. Anaheims need steady moisture, especially during fruiting. Avoid wetting the leaves to prevent disease. You’ll know the soil is ready for water when the top 1-2 inches feel dry.
After 4-6 weeks of growth, feed with a balanced fertilizer (10-10-10) every 3-4 weeks to encourage strong foliage and fruit development. Stop fertilizing 4-6 weeks before harvest to allow flavors to concentrate. Prune suckers (the small shoots in the leaf axils) to direct energy toward pepper production.
✂️ Step 5: Harvest Peppers at Peak Maturity
Anaheim peppers are ready to harvest when they reach 6-8 inches long and turn from green to red, yellow, or purple, depending on the variety. Use pruning shears to cut the peppers from the plant, leaving a small stem attached. Harvesting encourages more fruit to develop and prevents overripe peppers from sapping energy from the plant.
Store fresh peppers in the refrigerator for up to 2 weeks or dry them for long-term storage. For maximum flavor, harvest in the morning when peppers are at their crispest. With proper care, you’ll have a continuous harvest from 60-90 days after transplanting.
Tips & tricks for perfect Anaheim pepper planting
These gardening secrets will help you avoid common pitfalls and maximize your Anaheim pepper harvest from seed to harvest.
Soil Temperature Matters: In Step 1, maintaining that 75-85°F soil temperature is critical for germination. I use a seedling heat mat set to 80°F for consistent results, especially in cooler homes. If your home stays below 70°F, consider using a greenhouse or sunny windowsill with a small space heater nearby. The difference between a 70% and 95% germination rate often comes down to just these few degrees!
Lighting Strategy: For Step 2's 14-16 hours of light daily, I recommend using a full-spectrum LED grow light rather than relying on window light alone. Position it just 2-3 inches above the seedlings and adjust as they grow. You'll notice the plants develop stronger stems and darker green leaves when they get proper light. If you see leggy growth (long, weak stems), your light source is too far away or not intense enough.
Transplanting Timing: When transplanting in Step 3, wait until nighttime temperatures stay above 55°F—this is non-negotiable for Anaheims. I always check the 5-day forecast before transplanting to ensure no cold snaps are coming. The plants will struggle and may even die if exposed to temperatures below 50°F. Also, avoid transplanting on windy days—the delicate seedlings can be damaged by strong winds.
Fertilizer Schedule: In Step 4, the 4-6 weeks before harvest fertilizer cutoff is crucial for flavor development. I switch to fish emulsion (a mild organic fertilizer) at this stage to give the plants a gentle nutrient boost without overstimulating new growth. This timing allows the peppers to concentrate their natural sweetness and mild heat as they mature.
Pro Tips for Planting Anaheim Peppers
- These gardening secrets will help you avoid common pitfalls and maximize your Anaheim pepper harvest from seed to harvest.
- Soil Temperature Matters: In Step 1, maintaining that 75-85°F soil temperature is critical for germination.
- Lighting Strategy: For Step 2's 14-16 hours of light daily, I recommend using a full-spectrum LED grow light rather than relying on window light alone.
Frequently asked questions
Got questions about growing Anaheim peppers? You’re not alone! Here are some of the most common queries—plus quick, actionable answers to help you grow like a pro.
When is the best time to plant Anaheim peppers?
Start seeds indoors 8–10 weeks before your last frost date (around March for most U.S. zones). Transplant seedlings outdoors after soil reaches 60°F+ and nighttime temps stay above 50°F. For warm climates, direct-sow seeds in early spring or late summer for a fall harvest. Pro tip: Use a heat mat if your home is chilly!
How long does it take for Anaheim peppers to mature?
With the right care, Anaheim peppers typically mature in 60–90 days from transplanting. Early varieties (like ‘Early Jalapeño’) can ripen in as little as 60 days, while heirlooms may take up to 120 days. Check seed packets for exact days-to-maturity—it’s your harvest timeline!
What if my Anaheim peppers aren’t producing fruit?
Lack of flowers/fruit often means heat stress, poor pollination, or over-fertilizing with nitrogen. Try these fixes:
- Move plants to partial shade if temps exceed 90°F.
- Gently shake plants or hand-pollinate with a paintbrush.
- Switch to a balanced fertilizer (10-10-10) or add phosphorus-rich compost.
Can I grow Anaheim peppers in containers?
Choose a 5-gallon pot or larger with drainage holes. Use a lightweight potting mix, and place containers in full sun (6+ hours/day). Dwarf varieties like ‘Lunchbox’ thrive in pots. Just ensure the pot stays stable—peppers get heavy!
What can I do with excess Anaheim peppers?
Preserve the harvest! Try these ideas:
- Drying: String peppers and hang in a dark, dry place for 2–4 weeks.
- Freezing: Blanch, peel, and freeze in bags for salsas or stews.
- Fermenting: Use in homemade hot sauce or pickles.
- Gifting: Share with neighbors—every gardener needs fresh peppers!
Why are my Anaheim pepper leaves turning yellow?
Yellow leaves usually signal overwatering, nutrient deficiency, or pests. Check the soil—it should be moist but not soggy. Test for chlorosis (yellowing between veins), which may mean iron deficiency. Treat pests like aphids with neem oil or insecticidal soap.
Wrapping up and next steps
Growing Anaheim peppers is a rewarding journey that brings bold flavors straight from your garden to your plate in just 60 days! With the right soil, sunlight, and care, you’ll enjoy a bountiful harvest of versatile peppers perfect for salsas, stuffing, or drying.
Whether you’re a beginner or a seasoned gardener, these spicy-green gems are a fun and delicious way to elevate your cooking.
Ready to dive in? Start by gathering your supplies—then roll up your sleeves and get planting! Soon, you’ll be savoring the fruits of your labor (and maybe even sharing them with neighbors). 🌱✨