
Vegetables
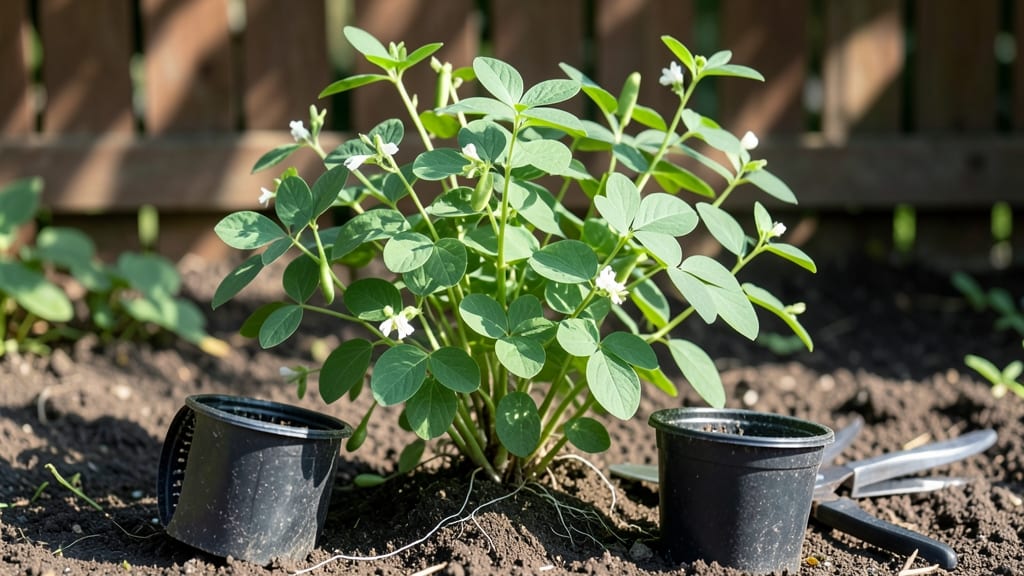
Adzuki beans sprout in just 3-5 days when planted in warm soil—no waiting months for these little powerhouses. 🌱 I’ve grown them three summers running, and the secret isn’t fancy equipment but timing the soil temperature right.
Most gardeners overlook how quickly these beans respond to warmth, which means faster harvests and fewer pests.
The real trick starts with soil prep: loosen the top 6 inches, mix in compost, and wait until the ground hits 65°F or warmer. Plant seeds 1 inch deep and 3 inches apart in rows spaced 18 inches apart.
They love full sun but tolerate partial shade if the soil stays consistently moist. Too much shade slows germination, and nobody wants to wait.
Within 10 days, you’ll see those first green leaves pushing through—so fast it feels like magic. Keep the soil damp (not soggy) until plants reach 4 inches tall, then let it dry slightly between waterings.
The beans mature in 70-80 days, giving you time for a second planting if your season stretches long enough. That first harvest of sweet, meaty pods? Worth every minute of waiting.
Bonus: Adzuki beans play well with others—try pairing them with cucumbers or corn to deter pests naturally. And if you’re in a cooler climate, opt for black adzuki varieties—they handle slight chills better than red ones.
Now go plant those seeds and watch them pop up faster than you can say “harvest.”
📚 In This Guide
- What you need
- Instructions
- Tips and common mistakes
- Wrapping up and next steps
What you need
- ● Adzuki bean seeds: 1–2 lbs (or ~500–1,000 seeds, depending on your space). Choose heirloom or organic varieties for best results.
- ● Soil: Well-draining, nutrient-rich soil with a pH of 6.0–7.0. A mix of 60% garden soil, 30% compost, and 10% perlite/sand works perfectly.
- ● Sunlight: A full-sun spot (6+ hours of direct light daily)—adzuki beans thrive in warmth!
- ● Water: Consistent moisture (but avoid soggy soil). A watering can or hose with a gentle spray nozzle helps.
- ● Garden trowel or hand shovel (for planting holes).
- ● Rake or hoe (to loosen soil before planting).
- ● Row marker or sticks (to space seeds evenly, ~2–3 inches apart).
- ○ Mulch (straw or grass clippings) (optional but helps retain moisture).
- ○ Fertilizer (optional): A balanced 10-10-10 or compost tea for a nutrient boost.
- ● Warm soil temps (60°F+)—adzuki beans love heat and germinate fastest when cozy!
- ● Last frost date passed (or use row covers for early starts).
- ● Patience! Germination takes 5–10 days in ideal conditions.
Step-by-step instructions for planting adzuki beans
Here's how to unlock their rapid germination—warm soil is the secret weapon.
🌱 Step 1: Prepare the Soil for Optimal Germination
Adzuki beans thrive in soil that stays consistently warm—at least 70°F—so work in a spot that receives full sun for most of the day. Loosen the top 6 inches of soil with a garden fork or tiller, breaking up any compacted layers. This ensures roots can spread easily without resistance.
Mix in 2-3 inches of well-aged compost to enrich the soil naturally. Adzuki beans are nitrogen-fixers, so they don’t need extra fertilizer, but the compost adds organic matter that retains warmth. Avoid fresh manure—it can overheat the soil and stunt germination. Once mixed, rake the surface smooth to create a fine seedbed.
💧 Step 2: Plant Seeds at the Right Depth and Spacing
Plant seeds 1 inch deep and 4-6 inches apart in rows that are 12-18 inches apart. Adzuki beans don’t tolerate crowding, so resist the urge to plant them closer together. Use your finger to make small holes, place 1-2 seeds per hole, and cover lightly with soil. Press gently to ensure good seed-to-soil contact—this prevents air pockets that delay germination.
Water the soil lightly but thoroughly right after planting to settle the seeds into place. You’ll see the first sprouts in 5-10 days if the soil stays warm. If your climate is cool, consider using a black plastic mulch to absorb heat and speed up germination. Avoid overwatering now—too much moisture can cause seeds to rot before they sprout.
☀️ Step 3: Maintain Consistent Moisture and Sunlight
Once seedlings emerge, keep the soil evenly moist but not soggy—adzuki beans hate waterlogged roots. Water deeply once a week, or more often in hot, dry weather, until the top 2 inches of soil feel dry. You’ll know you’ve got it right when the soil looks slightly damp but not glistening.
Ensure they receive 6-8 hours of direct sunlight daily. If your garden gets afternoon shade, supplement with a reflective surface (like white plastic sheeting) to bounce extra light onto the plants. Leggy growth is a sign they’re stretching for light—this usually means they’re not getting enough sun or nutrients.
✂️ Step 4: Support and Thin for Stronger Plants
When seedlings reach 4-6 inches tall, thin them to 1 plant per hole to give each one plenty of room to grow. Snip the weaker seedlings at the base with clean scissors—this prevents disturbing the roots of the plants you’re keeping. Leave the strongest, most upright seedling in each spot.
As plants grow, they’ll benefit from light support. Install 3-foot-tall stakes or a trellis near the rows to help vines climb. Adzuki beans are bushy but can get top-heavy with pods, so support prevents them from toppling over. Prune any yellow or diseased leaves immediately to keep the plant healthy and productive.
⏰ Step 5: Harvest at Peak Maturity for Best Flavor
Adzuki beans are ready to harvest when pods turn solid brown and feel firm to the touch. This usually happens 70-90 days after planting, depending on your climate. Pick pods regularly to encourage more production—waiting too long lets them dry out on the vine.
Harvest on a dry day to make shelling easier. Store dry beans in a cool, dark place for up to 6 months—they’ll keep their flavor and texture for cooking. If you’re growing for fresh eating, harvest when pods are still slightly tender for a sweeter taste.
Tips & tricks for perfect adzuki bean planting
Warm soil is your secret weapon for unlocking rapid germination—here's how to maximize every step for fast, healthy growth.
Soil Temperature Strategy: That 70°F minimum isn't just a suggestion—it's the magic threshold for adzuki beans. Use a soil thermometer to confirm temperatures, especially in cooler climates. If your soil runs cold, try planting in a raised bed with black plastic mulch 2 weeks before planting to pre-warm it. This preheating can shave 3-5 days off your germination timeline.
Planting Precision: In Step 2, when making those 1-inch deep holes, use a small stick or pencil to create perfectly sized pockets. This ensures consistent depth across all seeds—critical since adzuki beans are sensitive to planting depth variations. I've found that using a 1/4-inch grid pattern when marking planting spots helps maintain the 4-6 inch spacing more accurately than eyeballing.
Germination Accelerator: After planting, cover the entire bed with clear plastic sheeting (like row cover) for the first 5-7 days. This creates a mini greenhouse effect that maintains warmth and humidity at the soil surface, often bringing sprouts in just 5 days instead of the full 5-10 day window. Just remember to remove it once seedlings emerge to prevent overheating.
Post-Emergence Care: In Step 3, when maintaining even moisture, I recommend using a drip irrigation system on a timer rather than hand-watering. This delivers water directly to the roots while keeping foliage dry, which prevents fungal diseases that can stunt growth. The top 2 inches dry test works best when done in the morning—soil dries faster during the day.
Pro Tips for Planting Adzuki Beans
- Warm soil is your secret weapon for unlocking rapid germination—here's how to maximize every step for fast, healthy growth.
- Soil Temperature Strategy: That 70°F minimum isn't just a suggestion—it's the magic threshold for adzuki beans.
- Planting Precision: In Step 2, when making those 1-inch deep holes, use a small stick or pencil to create perfectly sized pockets.
Frequently asked questions
Got questions about growing adzuki beans?
You’re not alone! Here are answers to the most common queries to help you cultivate these fast-growing, nutrient-packed legumes with confidence.
When is the best time to plant adzuki beans?
Adzuki beans thrive in warm soil—aim to plant them after the last frost when temperatures consistently stay above 60°F (15°C). In cooler climates, use black plastic mulch or start seeds indoors 4–6 weeks before transplanting. They’re sensitive to cold, so patience pays off!
How long do adzuki beans take to grow?
From seed to harvest, expect 70–90 days in ideal conditions. Fast germination (5–10 days) kicks things off, but consistent warmth and moisture keep them on track. Pro tip: Harvest pods when they’re firm but still tender for the best flavor!
Can I grow adzuki beans in containers?
Adzuki beans adapt well to 5-gallon pots or deeper containers (12+ inches) with drainage. Use a lightweight potting mix and provide a trellis or sturdy support—beans love to climb. Just ensure they get 6+ hours of sunlight daily for optimal growth.
What pests should I watch for?
Keep an eye out for bean beetles, aphids, and spider mites. Early intervention is key: neem oil or insecticidal soap works wonders. Prevention tip: Interplant with basil or marigolds to deter pests naturally. Healthy soil = happier plants!
Why aren’t my adzuki beans germinating?
Cold soil (<50°F/10°C) or dry seeds are the top culprits. Soak seeds overnight before planting, and use a seedling heat mat if your climate is chilly. Ensure consistent moisture—not soggy—and test seed viability by soaking a few in water (sunk seeds = good; floating = discard).
Wrapping up and next steps
Growing adzuki beans is a rewarding journey that combines ease and delicious results! 🌱 Whether you're a beginner or a seasoned gardener, their fast germination and adaptability make them a fantastic choice for any garden.
Start small—plant a few seeds, experiment with soil warmth, and soon you’ll be harvesting sweet, nutritious beans to enjoy in soups, salads, or snacks.
Ready to take the next step? Try planting a few rows this season and share your progress—your future self (and taste buds!) will thank you. Happy gardening! 🌿