
Trees
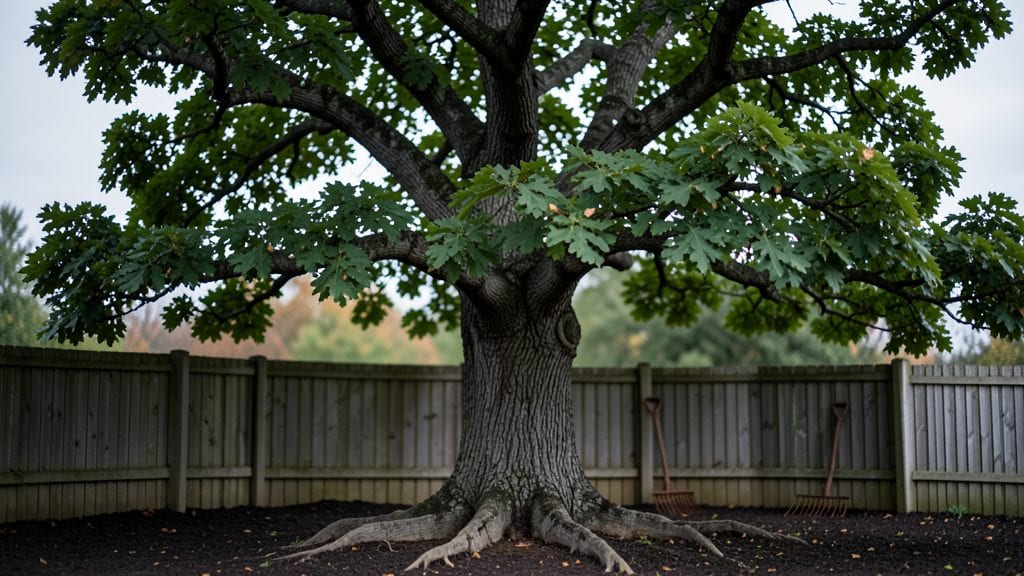
Planting outdoor trees that thrive year-round starts with the right species and a little strategic pruning—my first oak tree nearly died because I ignored its natural shape until winter.
The key isn’t just digging a hole; it’s matching the tree to your climate, amending the soil properly, and giving it room to grow without competing with your house or driveway.
You’ll need basic tools—a shovel, pruners, and mulch—but the real game-changer is understanding how each tree grows. A fast-growing willow needs more space than a slow-moving Japanese maple, and pruning techniques vary wildly between them.
I learned the hard way that cutting back too much in early spring can stress the tree, while shaping it in late winter sets up a strong growing season.
By summer’s end, you’ll see the difference: vibrant foliage, sturdy branches, and roots that spread deep instead of shallow. The mulch keeps moisture in, the pruning opens the canopy to sunlight, and the right watering schedule (deep but infrequent) builds drought resistance.
Even in harsh winters, these trees stay healthy because they’re not fighting for survival.
Works for any yard size—urban lots, rural acres, or suburban strips—just adjust spacing and species. The payoff? A shade canopy that lasts decades, wildlife that visits your yard, and a landscape feature that actually appreciates in value. Let’s get those roots in the ground the right way.
📚 In This Guide
- What you need
- Instructions
- Tips and common mistakes
- Wrapping up and next steps
What you need
- ● Pruning shears: Bypass pruners (sharp, 6–8" blades) – 1 pair (for small branches).
- ● Pruning saw: Curved-tooth saw (for thicker branches, 12–18") – 1.
- ● Gloves: Heavy-duty, cut-resistant (leather or synthetic) – 1 pair.
- ● Disinfectant: 70% isopropyl alcohol or bleach solution (1:9 ratio) – small bottle.
- ○ Tree wound dressing (optional but recommended): Pruning sealant (for cuts > ½") – small tube.
- ● Safety gear: Closed-toe shoes, long sleeves, and eye protection – as needed.
- ● Ladder: Sturdy, extendable (for tall trees) – 1.
- ● Pole pruner: Extendable shears (10–20 ft) – 1.
- ● Tree bag: For collecting large branches – 1–2.
- ● Hose or spray bottle: For cleaning tools post-pruning.
- ● Notebook/pencil: To track pruning dates and notes.
- ● Mulch: Organic mulch (wood chips, bark) – 1–2 bags (for post-pruning care).
- ● Knowledge of your tree species (deciduous vs. evergreen) and its growth habits.
- ● Clear weather (avoid pruning in wet or windy conditions).
- ● Safety check: Ensure no power lines or structures are near the tree’s canopy.
- ● Timing: Prune in late winter/early spring (dormant season) for most trees.
How to prune outdoor trees for year-round health
Smart pruning keeps your trees strong, beautiful, and resilient through every season.
Choose the Right Time for Pruning
Timing matters more than you might think. For most deciduous trees, late winter or early spring—just before buds swell—is ideal. This gives the tree time to heal before summer stress. Evergreens, however, respond best to pruning in late winter or early spring as well, but avoid heavy cuts in fall, as this can leave them vulnerable to winter damage.
Watch for the first signs of new growth—tiny green buds appearing along branches—as your cue. If you prune too early, you risk encouraging new growth that won’t harden off before winter. If you wait too long, you may remove leaves or flowers that contribute to the tree’s energy reserves.
Gather the Proper Tools and Safety Gear
You’ll need sharp, clean pruning shears for small branches, loppers for thicker limbs, and a pruning saw for anything larger than 2 inches in diameter. A sturdy ladder, gloves, and safety goggles are non-negotiable—this isn’t a job for DIY shortcuts. I always sanitize my tools with rubbing alcohol before and after use to prevent spreading disease between cuts.
Check the weather too. Prune on a dry, calm day—wet branches are slippery, and wind can make climbing or reaching difficult. If rain is forecast within 24 hours, wait. You want clean cuts that heal properly, not ones that get waterlogged or contaminated with dirt.
Remove Dead, Diseased, or Damaged Branches First
Start by identifying branches that are dead, diseased, or broken. These are easy to spot—they’ll be brown, brittle, or missing bark. Cut these out completely, making your cuts just outside the branch collar (the swollen area where the branch meets the trunk). This ensures the tree can seal the wound naturally and prevents decay from spreading.
If you’re unsure whether a branch is dead, scratch the bark with your fingernail. Live wood will be green underneath, while dead wood will reveal dry, brown tissue. Never leave dead branches on the tree—even if they look harmless, they can harbor pests or diseases that will weaken the tree over time.
Thin the Canopy for Better Airflow and Light
Next, focus on thinning the canopy to improve airflow and sunlight penetration. Look for branches that cross or rub against each other—these are prime candidates for removal. Aim to open up the center of the tree by removing about 20-30% of the smallest branches. This reduces the risk of fungal diseases and encourages stronger, more vigorous growth.
When thinning, always cut back to a lateral branch or the branch collar. Avoid leaving stubs—these can rot and invite pests. You’ll know you’ve done it right when you can see light filtering through the branches and the tree’s structure looks balanced, not top-heavy.
Shape and Maintain the Tree’s Natural Form
Finally, shape the tree to maintain its natural form while removing any branches that grow inward or upward. These are called "water sprouts" or "suckers" and compete with the main structure for nutrients. Use your pruning shears to make clean, angled cuts just above a bud or lateral branch, slanting away from the bud to prevent water from pooling.
Step back often to assess the tree’s silhouette. The goal is to enhance its natural shape without over-pruning. If you’re unsure, less is always better—you can always remove more next year, but you can’t undo a severe cut. Finish by cleaning up any debris and disposing of it properly to prevent disease spread.
Tips & tricks for pruning outdoor trees
A few key strategies will help you prune like a pro and keep your trees thriving for years to come.
Timing is Everything: The late winter or early spring window mentioned in Step 1 is crucial because it allows trees to heal before summer stress. For deciduous trees, aim to prune just as buds begin to swell—this is when the tree is preparing for new growth. If you're working with evergreens, avoid heavy pruning in fall as it can leave them vulnerable to winter damage. I've learned this the hard way after seeing trees struggle when pruned at the wrong time.
Tool Maintenance Matters: Your pruning tools should be as sharp as the day you bought them. Dull tools crush branches instead of making clean cuts, which can damage the tree and make it more susceptible to disease. After each use, wipe down your tools with rubbing alcohol to sanitize them—this prevents spreading any pathogens between cuts. I keep a small bottle of alcohol in my tool bag for quick cleanups between trees.
Visual Cues for Healthy Cuts: When making cuts in Step 3, look for the branch collar—the swollen area where the branch meets the trunk. This is your target spot for clean cuts that heal properly. For branches larger than 2 inches, make the cut just outside this collar to prevent decay. If you're unsure whether a branch is dead, scratch the bark with your fingernail—live wood will reveal green underneath, while dead wood will show brown tissue.
Canopy Thinning Strategy: The 20-30% guideline in Step 4 is a great starting point, but remember that less is often better. Focus on removing branches that cross or rub against each other first, as these create wounds and limit airflow. Step back frequently to assess the tree's silhouette—you should be able to see light filtering through the branches. This open structure reduces disease risk and encourages stronger growth throughout the tree.
Pro Tips for Outdoor Planted Trees
- A few key strategies will help you prune like a pro and keep your trees thriving for years to come.
- Timing is Everything: The late winter or early spring window mentioned in Step 1 is crucial because it allows trees to heal before summer stress.
- Tool Maintenance Matters: Your pruning tools should be as sharp as the day you bought them.
Frequently asked questions
Got questions about keeping your outdoor planted trees healthy and beautiful? Here are some of the most common ones—plus straightforward answers to help you grow with confidence!
When is the best time to plant a tree outdoors?
The ideal window is late fall or early spring—when the ground isn’t frozen and temperatures are mild. This gives roots time to establish before extreme heat or cold. Avoid planting in summer’s scorching heat or winter’s frost, which can stress young trees. Pro tip: Check your local frost dates for precision!
How often should I prune outdoor trees?
Prune once a year, ideally in late winter or early spring (before new growth starts). Light maintenance (removing dead branches) can happen anytime, but avoid heavy pruning in fall—it invites disease. Focus on shaping, removing hazards, and encouraging airflow. Need a step-by-step? We’ve got you covered!
What’s the best way to water newly planted trees?
Deep watering 2–3 times per week for the first year is key—aim for 1–1.5 inches of water per session. Use a soaker hose or drip irrigation to target roots directly. Reduce frequency in the second year as roots spread, but keep soil moist (not soggy). Bonus: Mulch around the base to retain moisture!
Can I prune trees in extreme heat or cold?
Avoid pruning when temperatures are below 40°F or above 90°F. Cold weather stresses trees, while heat increases sap flow, making them vulnerable to disease. Stick to mild, dry days for best results. If you must trim in heat, do it early in the morning or late evening to minimize stress.
What if my tree leaves turn yellow or wilt?
Yellowing leaves often signal overwatering, underwatering, or nutrient deficiency. Check soil moisture and adjust watering habits. Wilted leaves could mean root stress—test soil drainage or mulch better. Pests or disease might also be culprits; inspect branches for signs like holes or spots. Need a diagnosis? Our guide breaks it down!
Are there low-maintenance tree alternatives for small yards?
Consider dwarf varieties like the Japanese Maple or Dwarf Alberta Spruce, which thrive in tight spaces. Crape Myrtle or Serviceberry are also great picks—they’re resilient, pest-resistant, and require minimal pruning. Just ensure they get enough sunlight for their needs!
Wrapping up and next steps
Planting trees outdoors isn’t just about aesthetics—it’s a long-term investment in your property, environment, and even your well-being. 🌿 With the right pruning techniques, soil care, and seasonal attention, your trees can thrive year-round, offering shade, beauty, and ecological benefits for decades. Start small, stay consistent, and watch your green space flourish!
Ready to take the next step? Pick one tree to prune this weekend—whether it’s shaping a young sapling or maintaining a mature favorite. Need a refresher? Check out our pruning guide or consult a local arborist for personalized tips. Your future shade (and curb appeal) will thank you!